


[%PLANS_ENT%]
Table of Contents

|
|
|
|
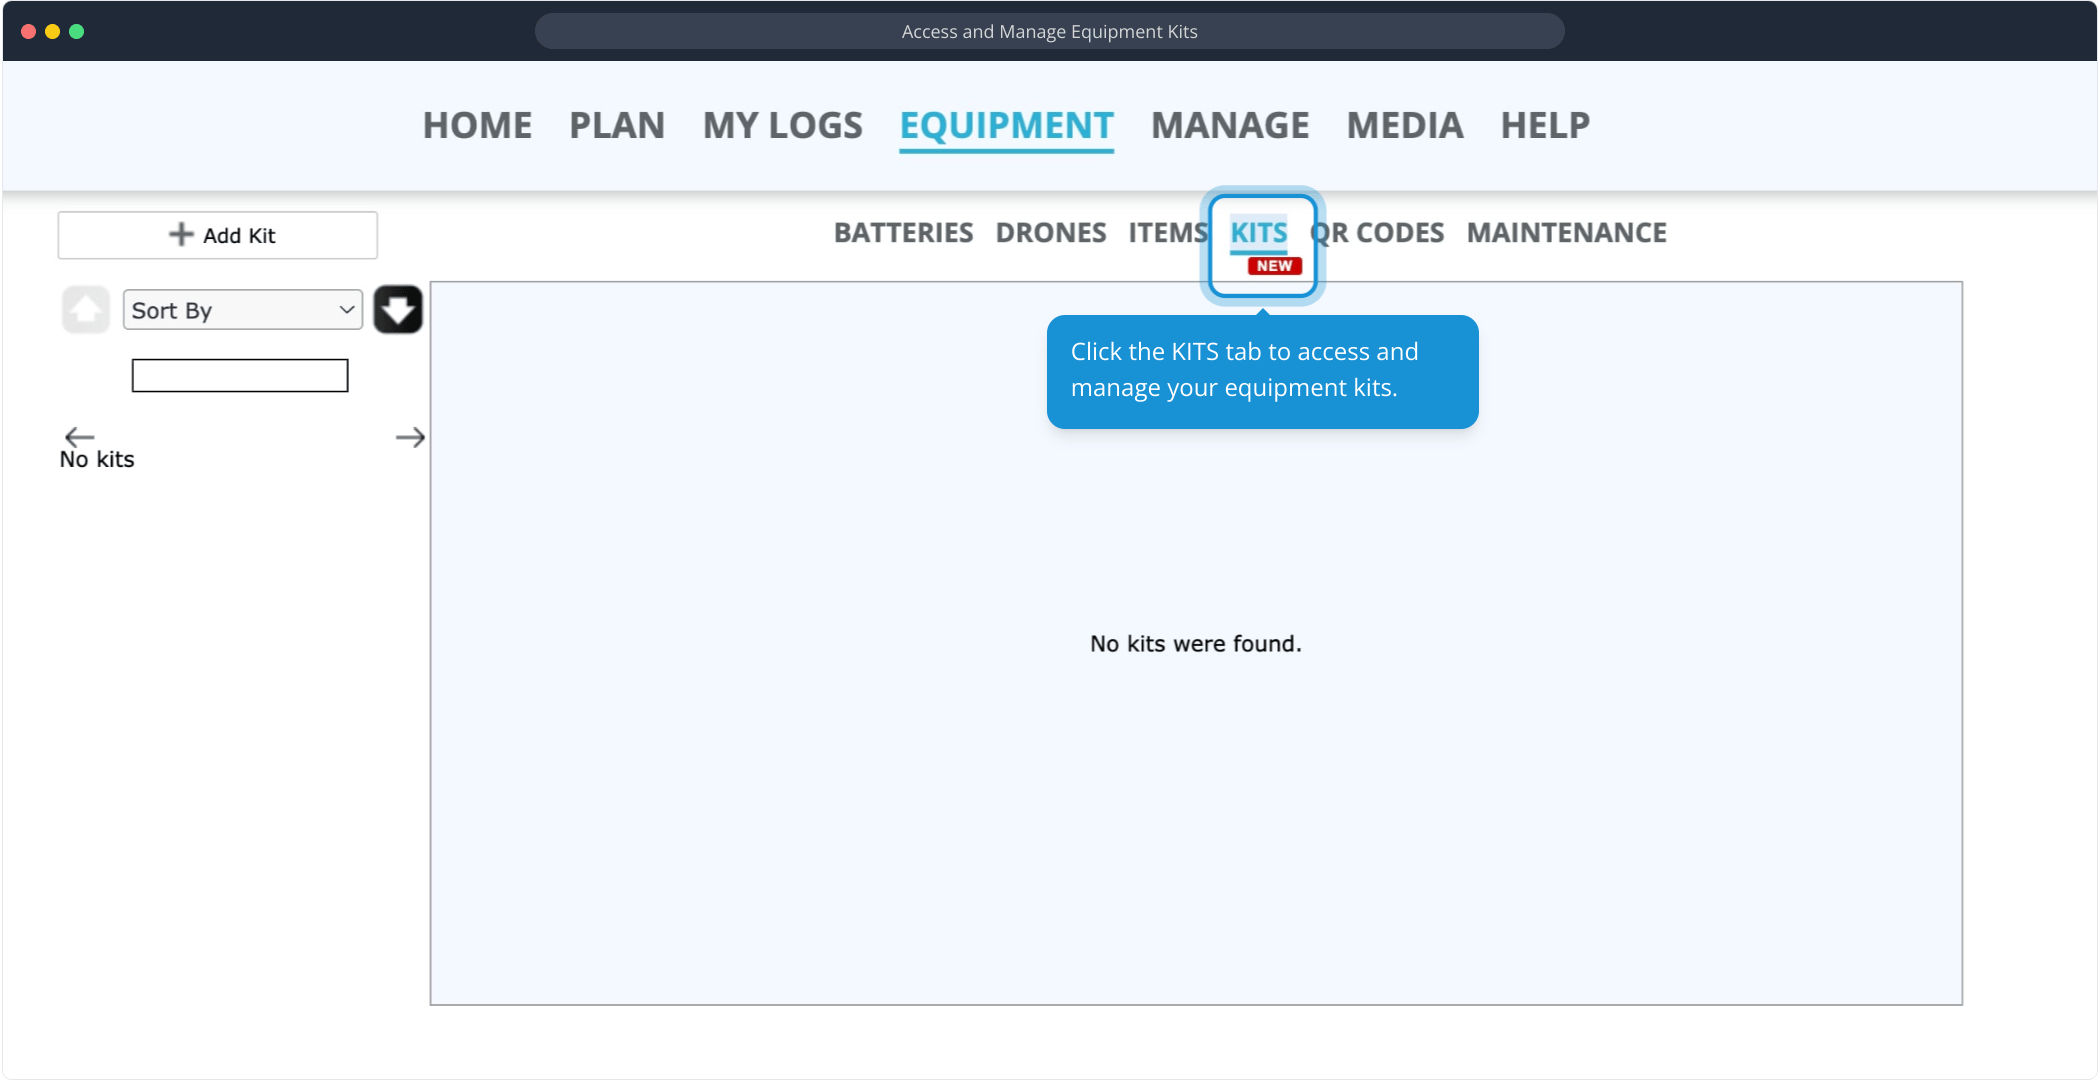
Creating a Kit
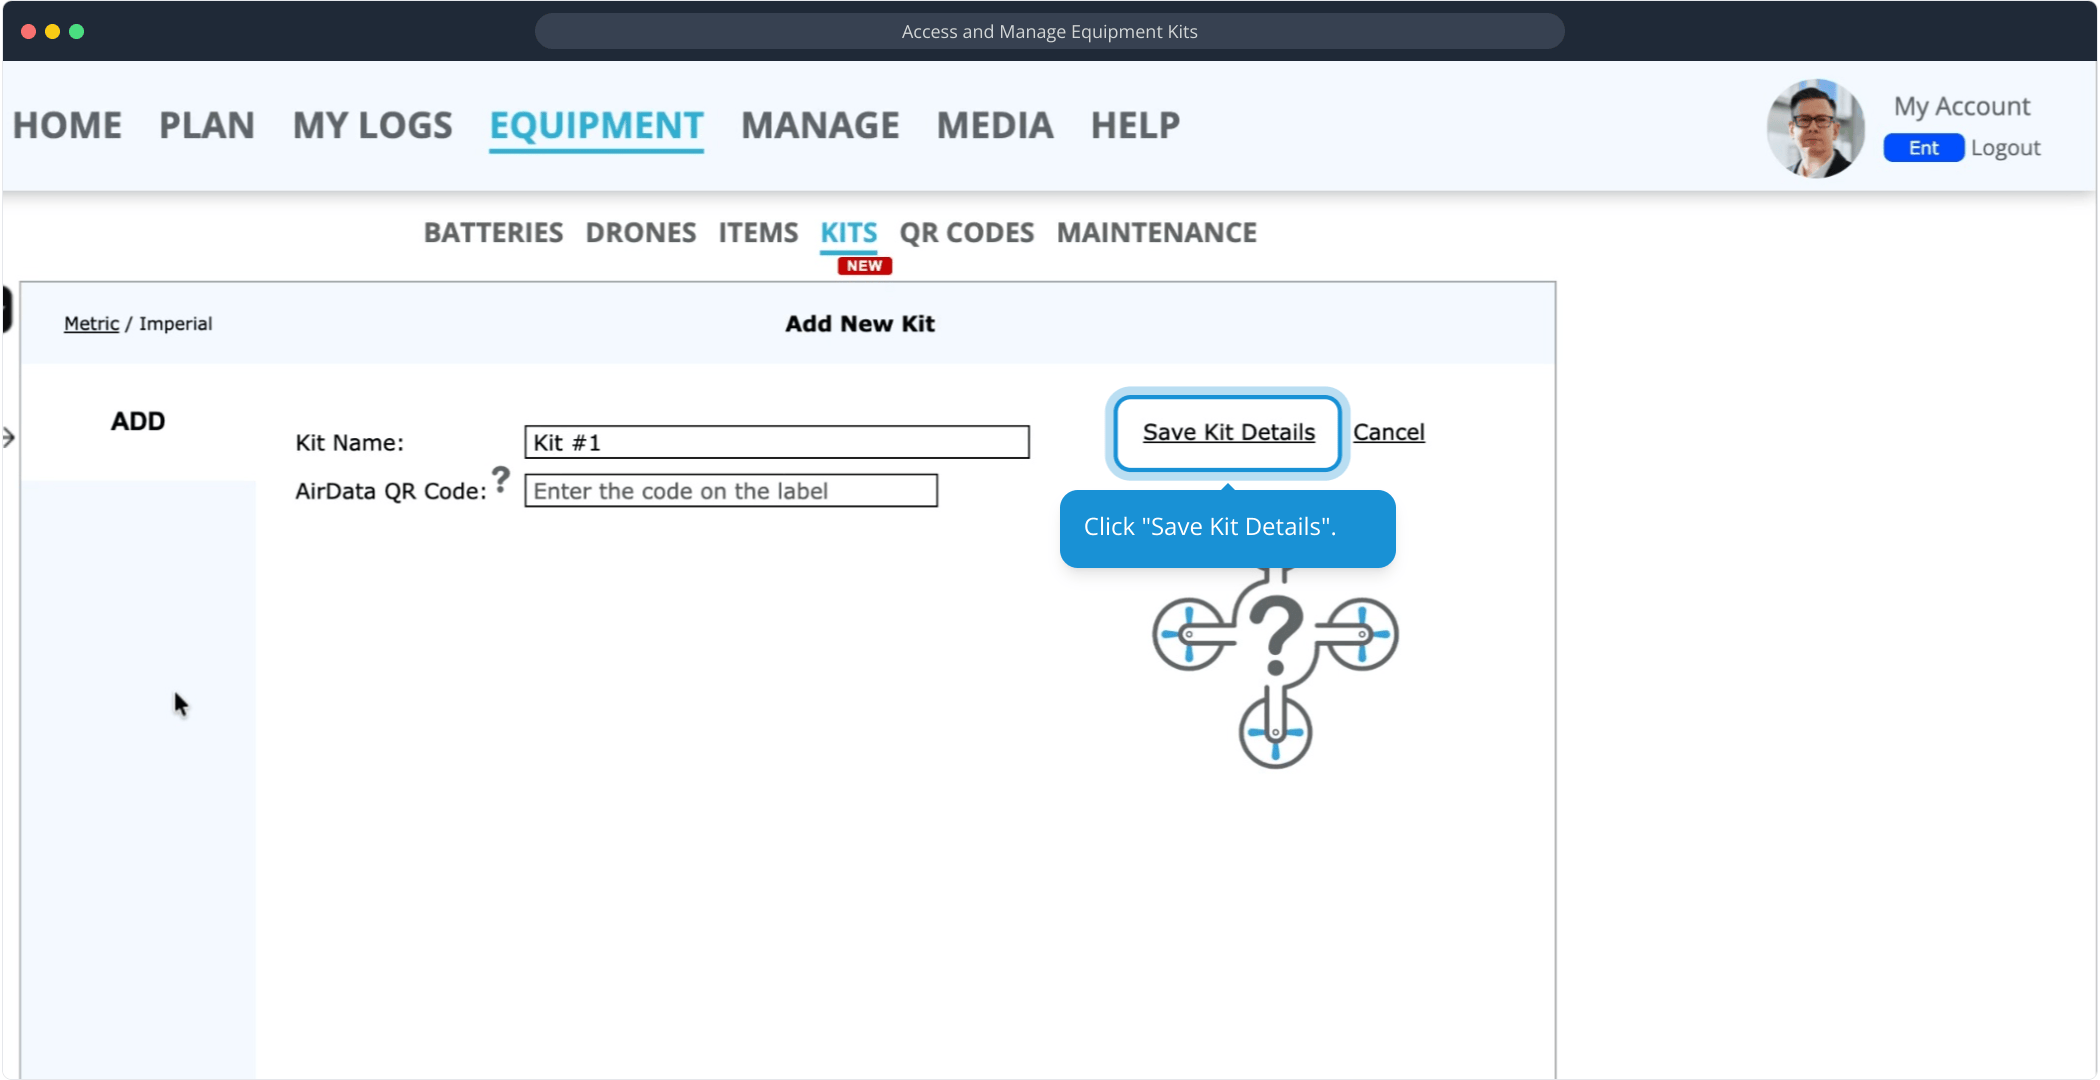
Click the KITS tab to access and manage your equipment kits.
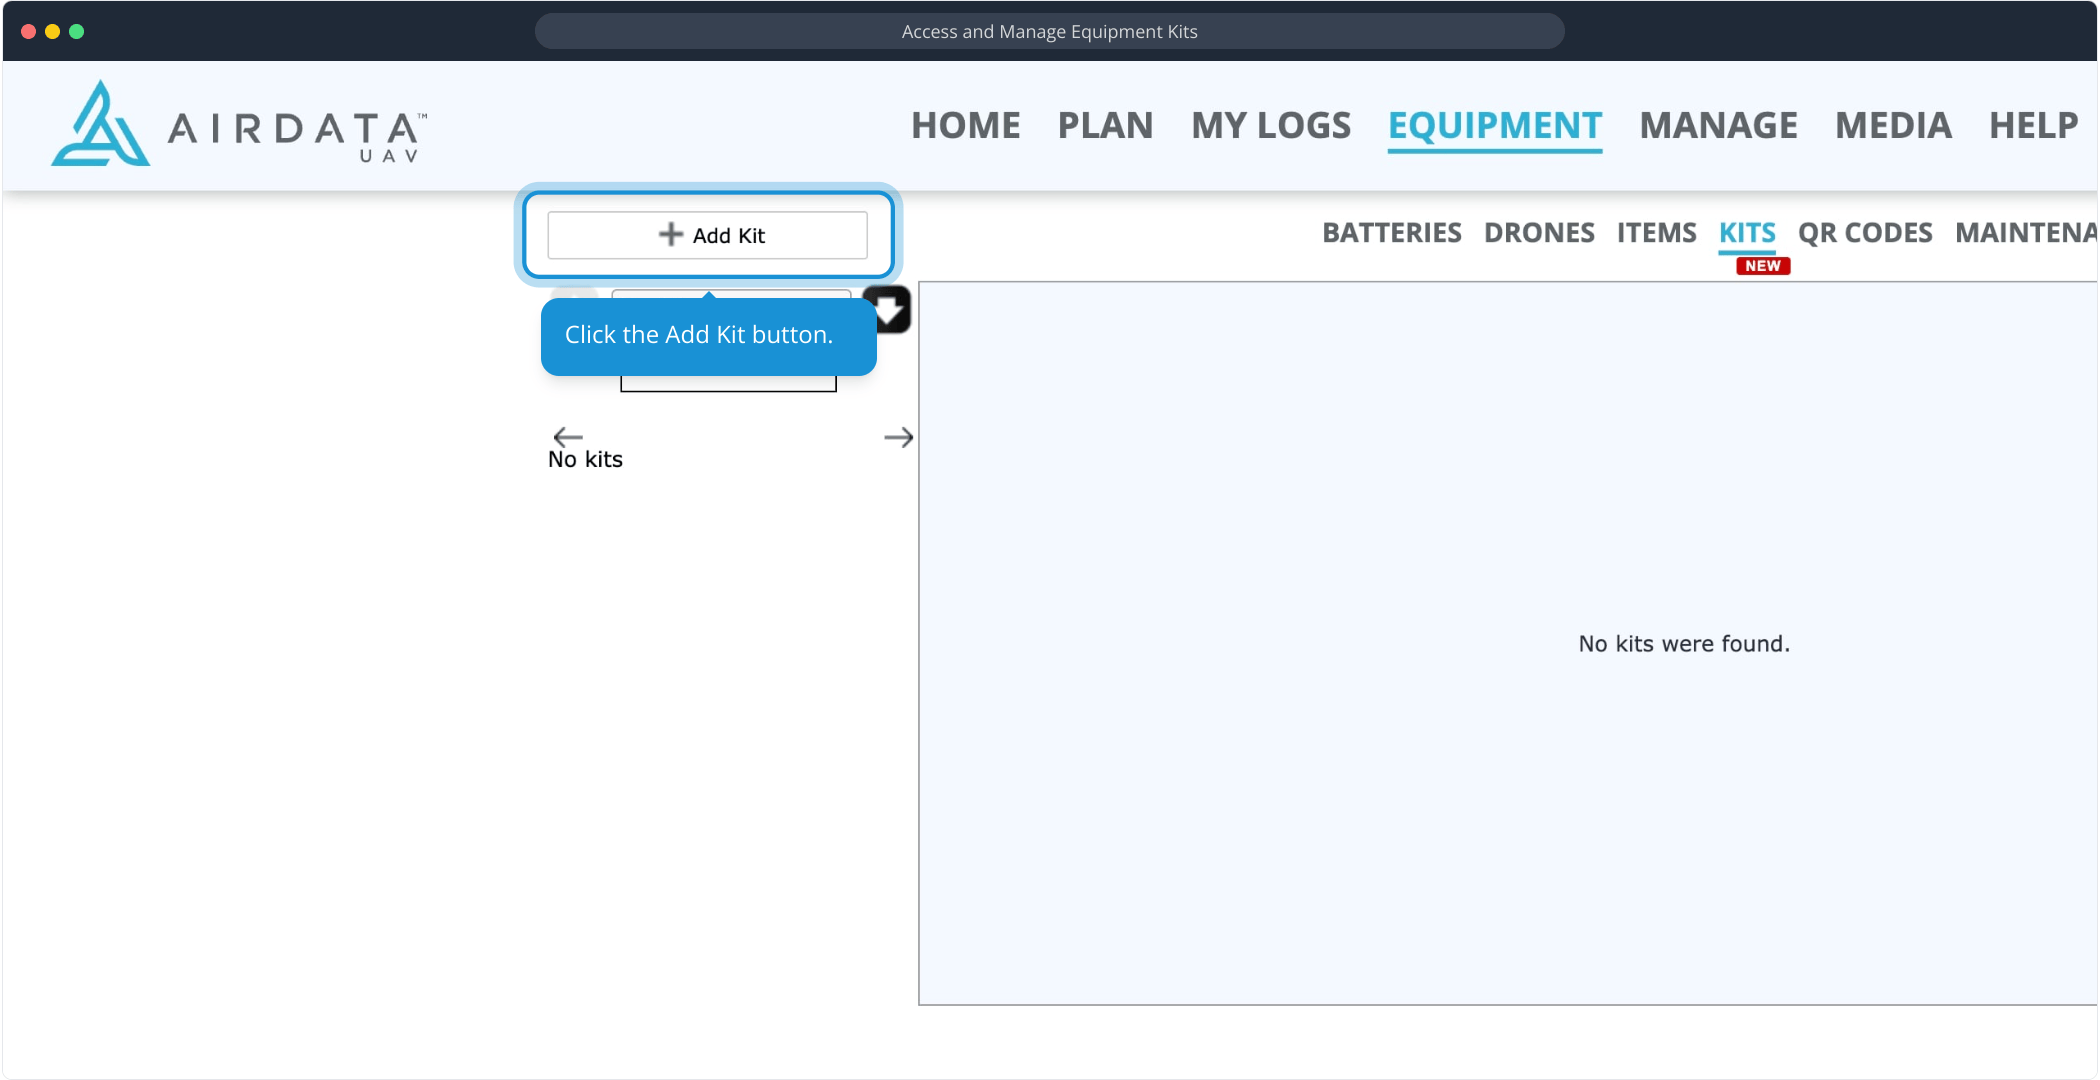
Click the Add Kit button.
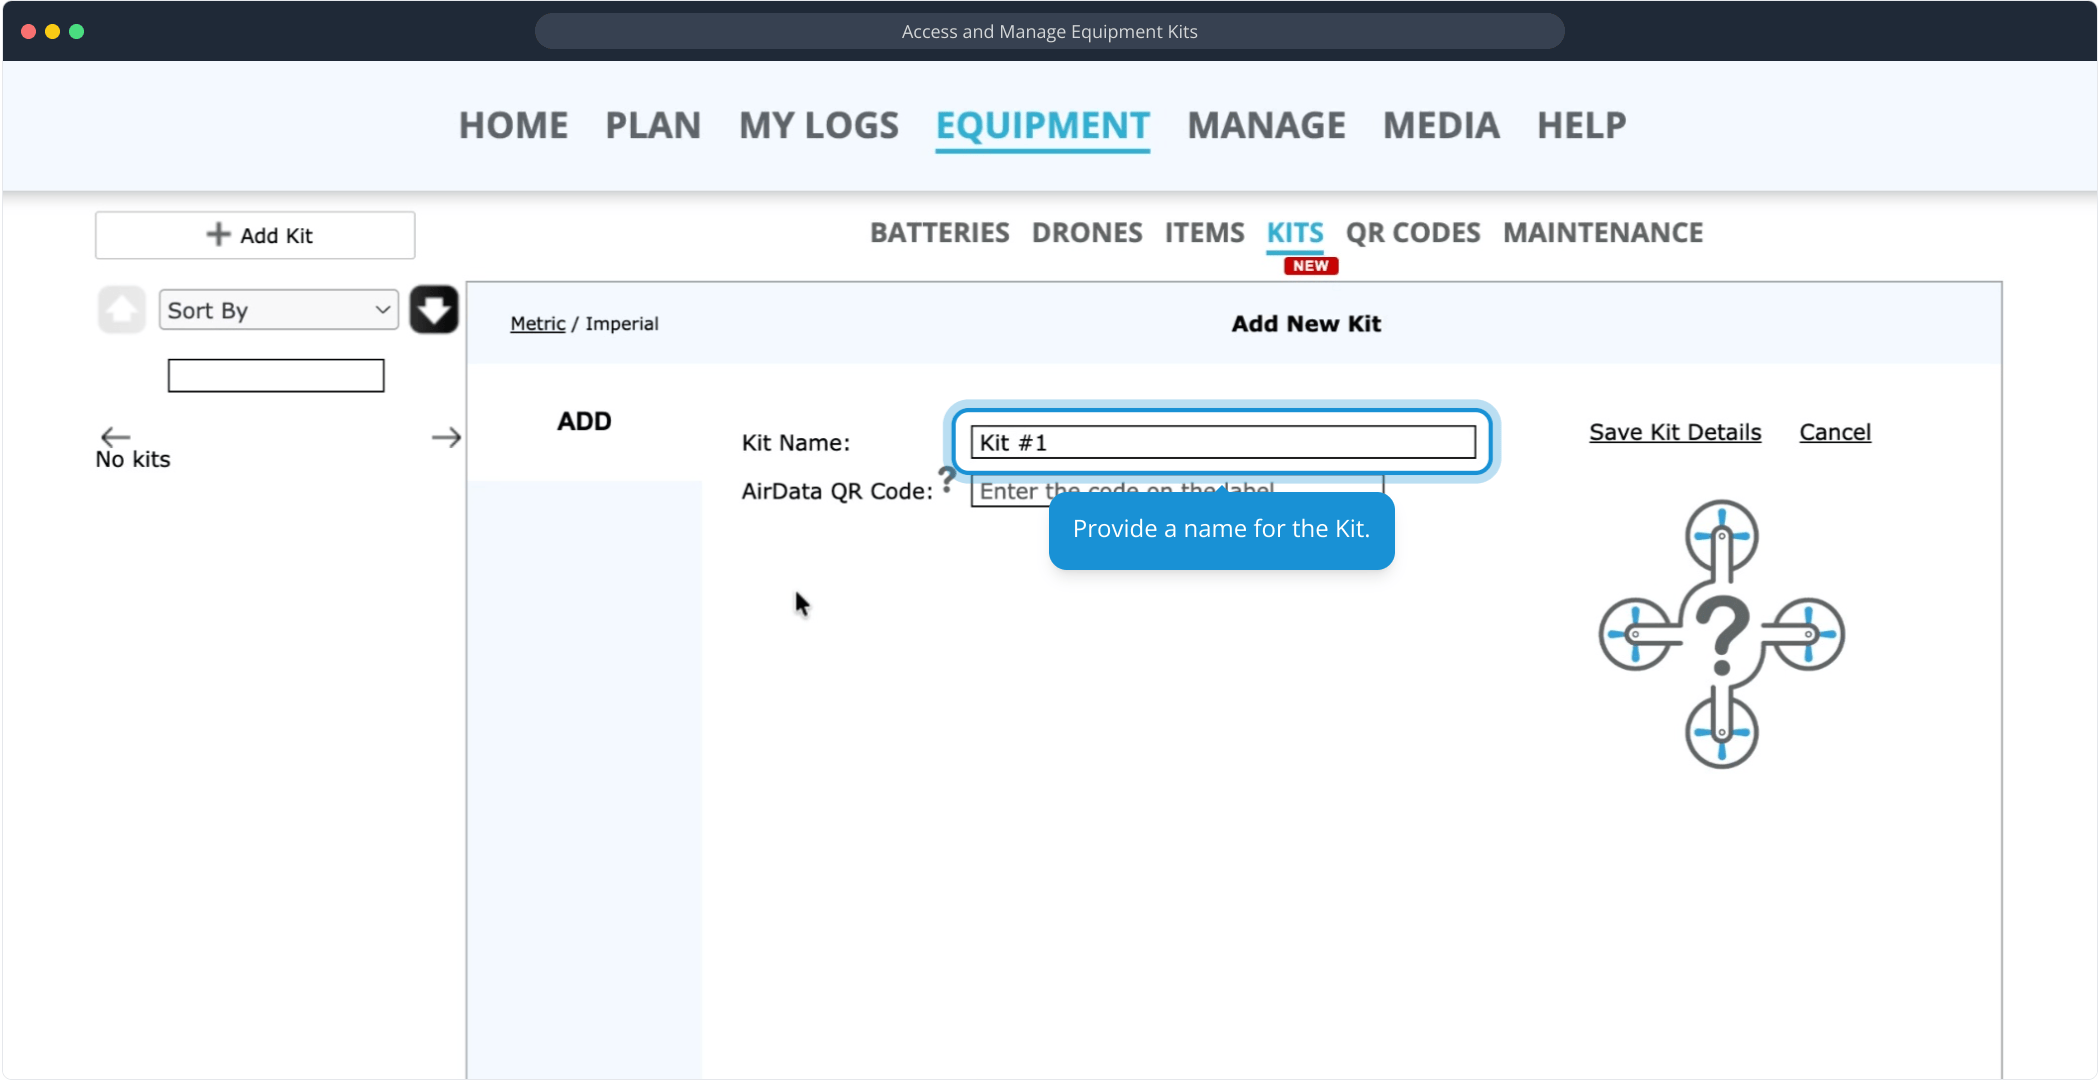
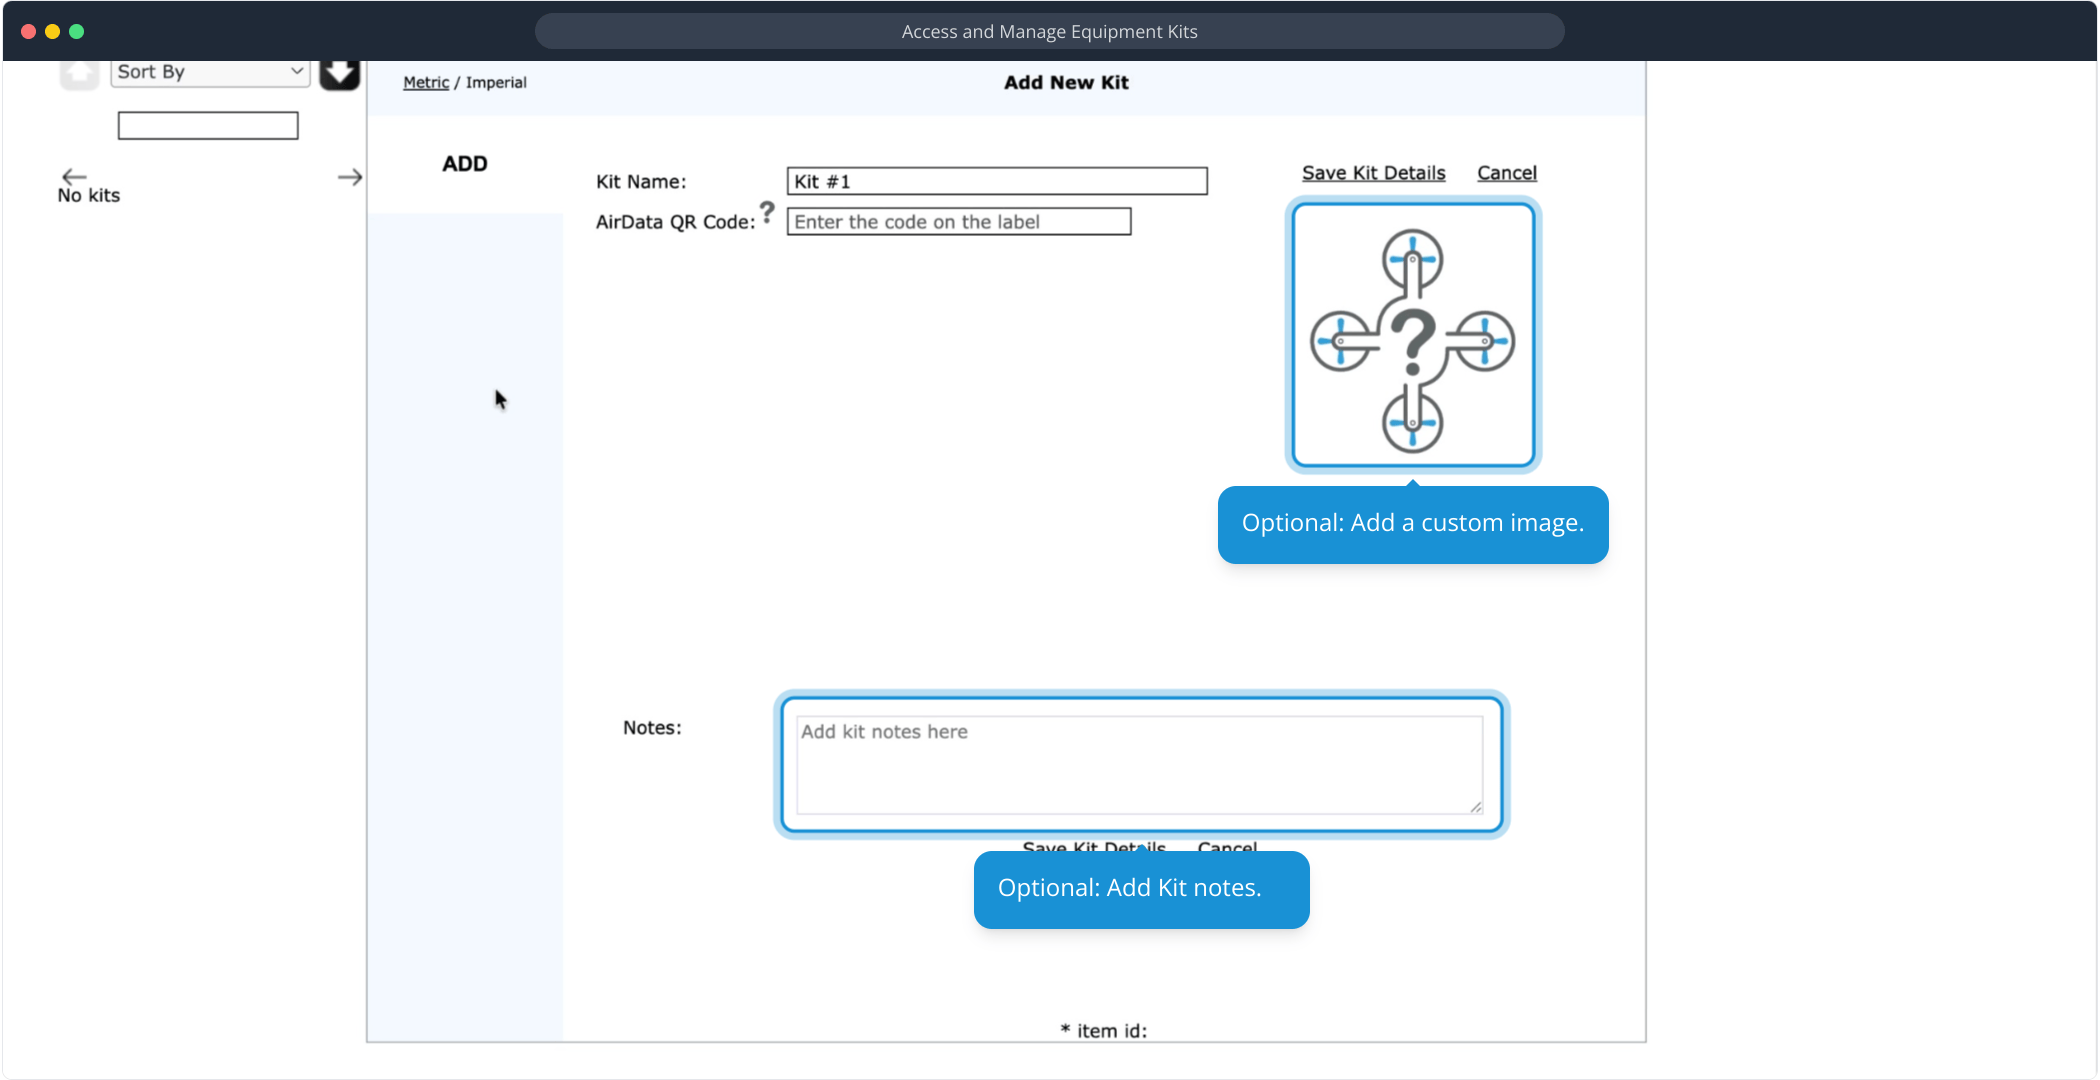
Provide a name for the Kit.
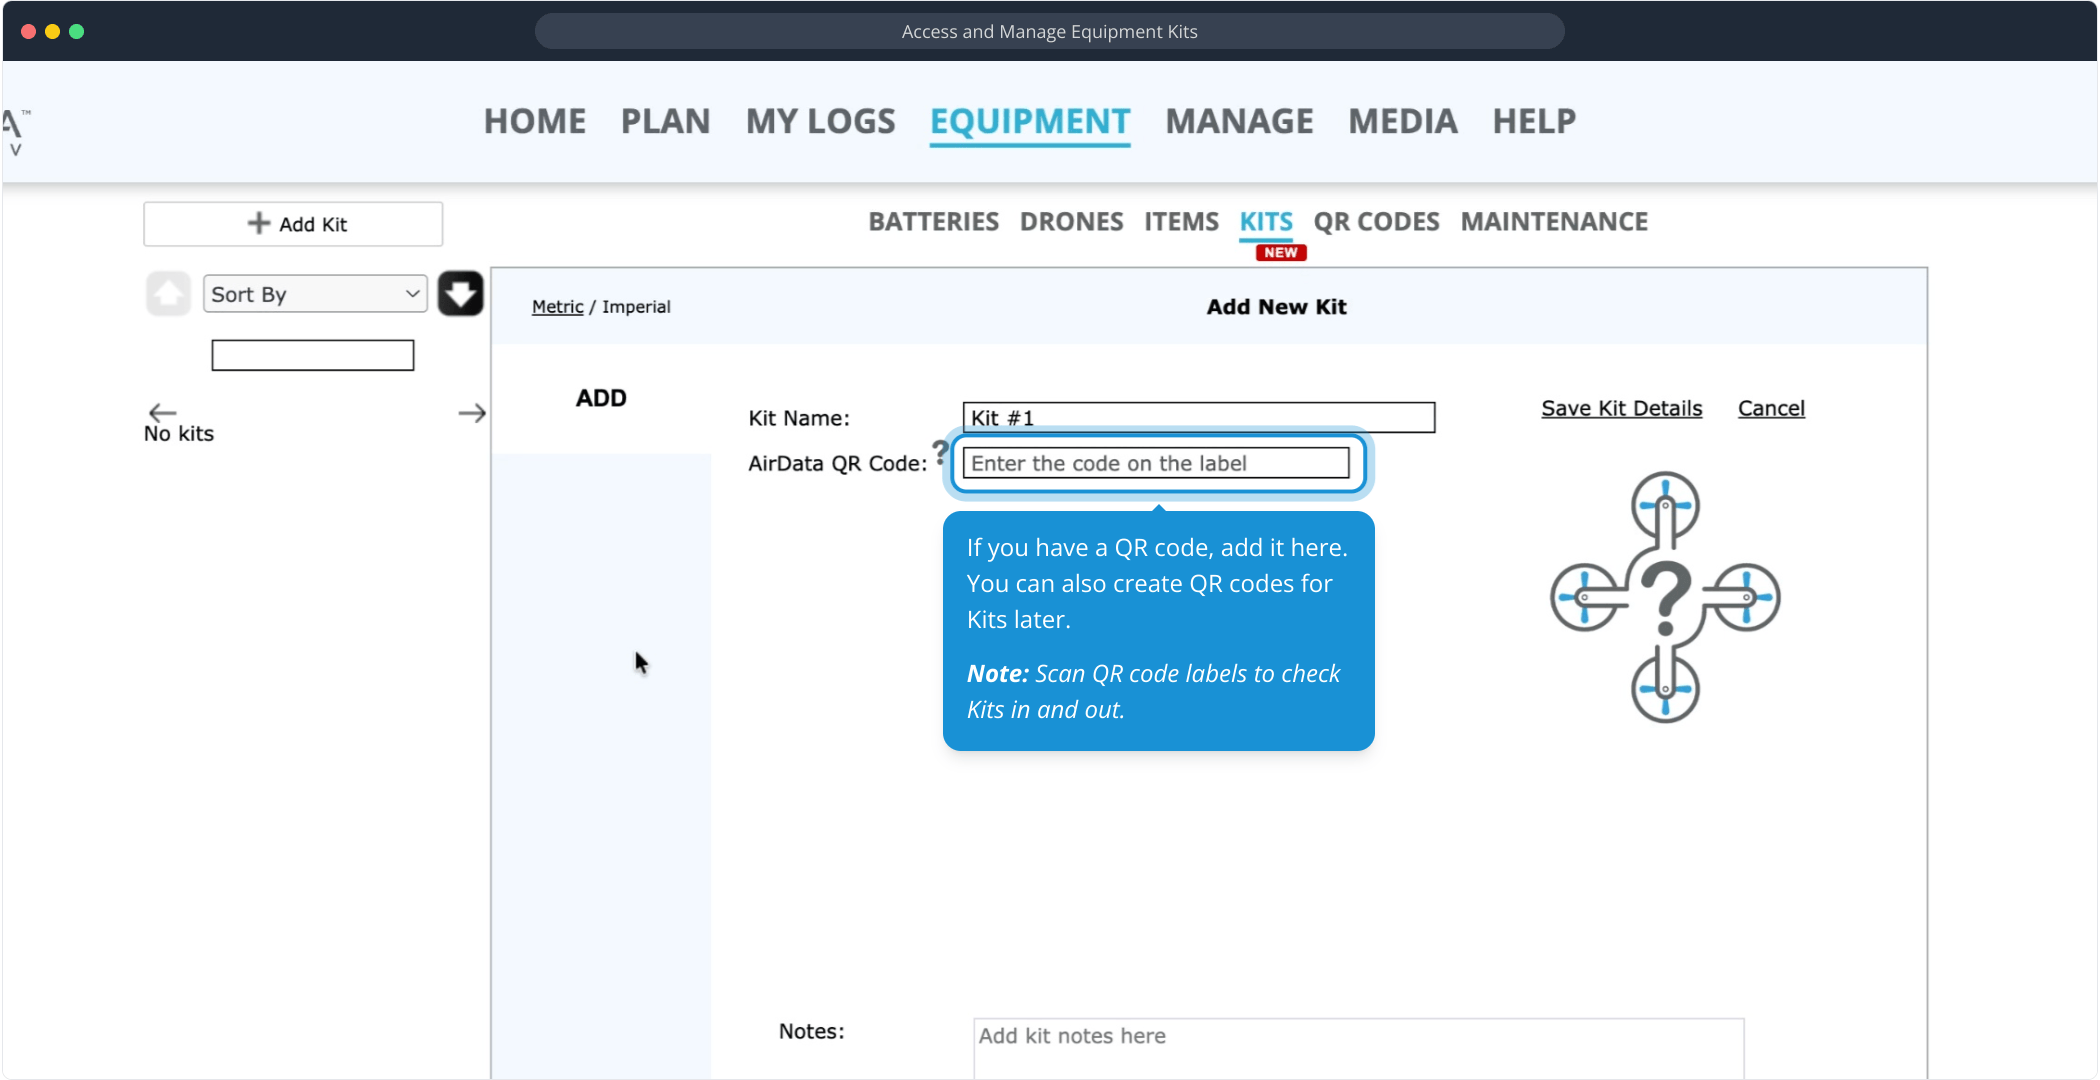
If you have a QR code, add it here. You can also create QR codes for Kits later.
Note: Scan QR code labels to check Kits in and out.
Note: Scan QR code labels to check Kits in and out.
Optional: Add a custom image and Kit notes.
Click "Save Kit Details".
Adding Equipment to a Kit
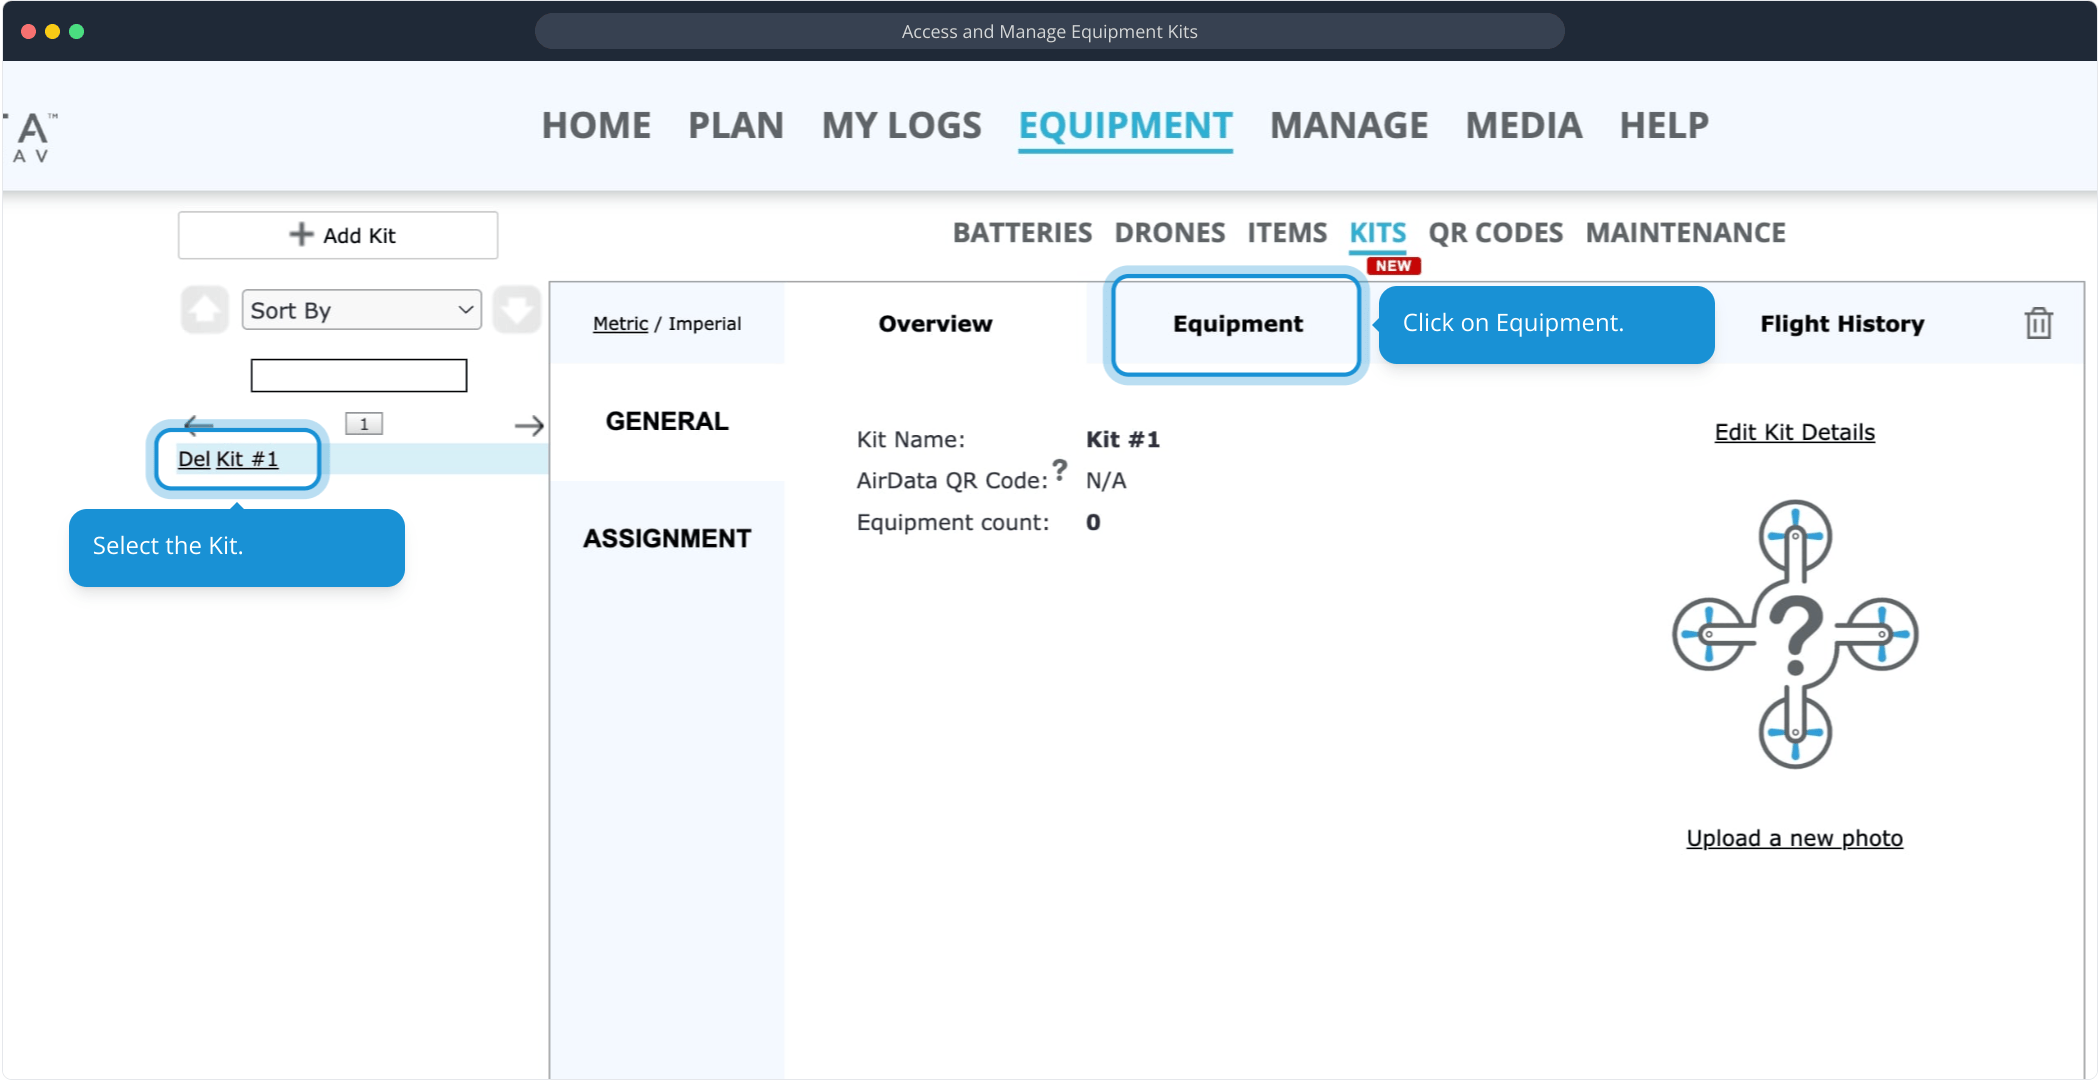
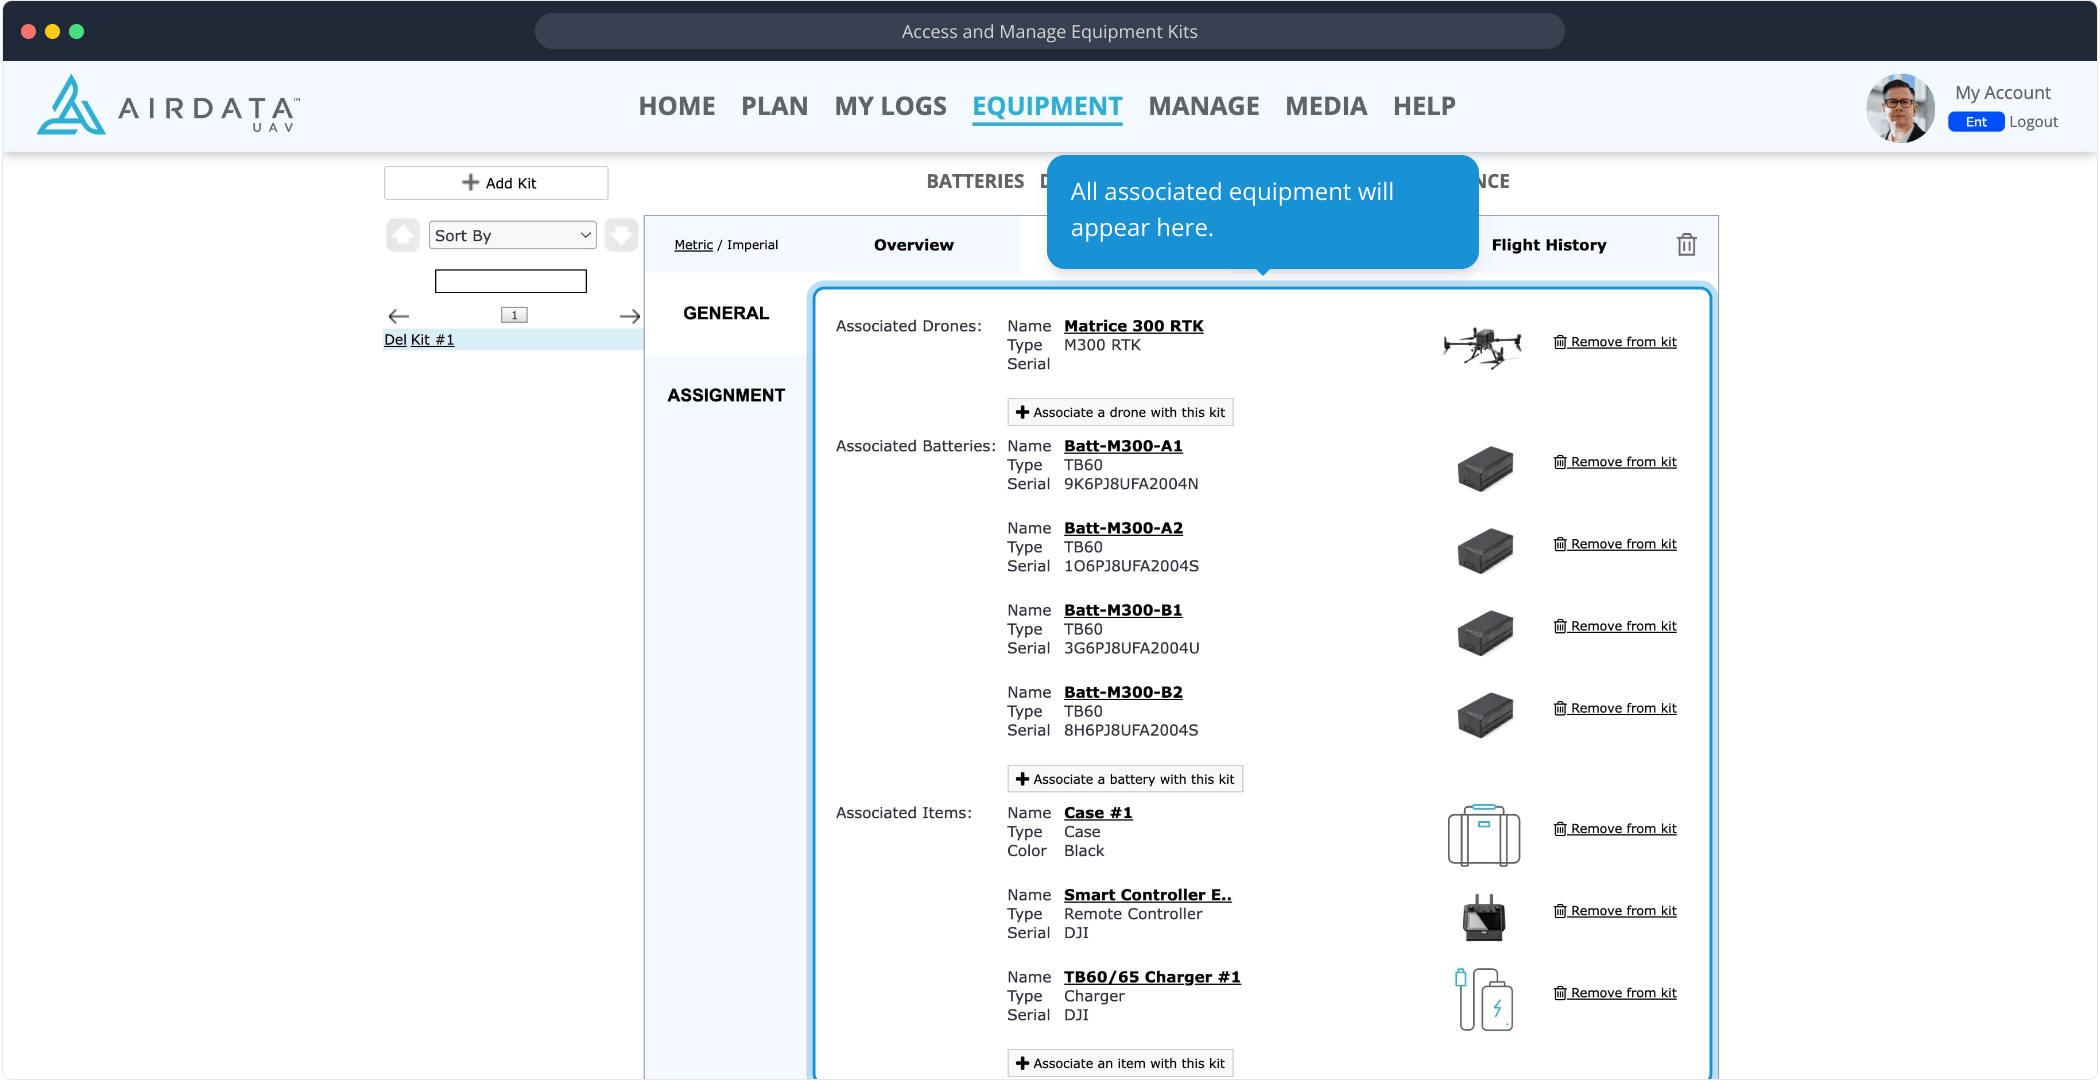
Select the Kit and click on Equipment.
Choose the equipment to include in this Kit.
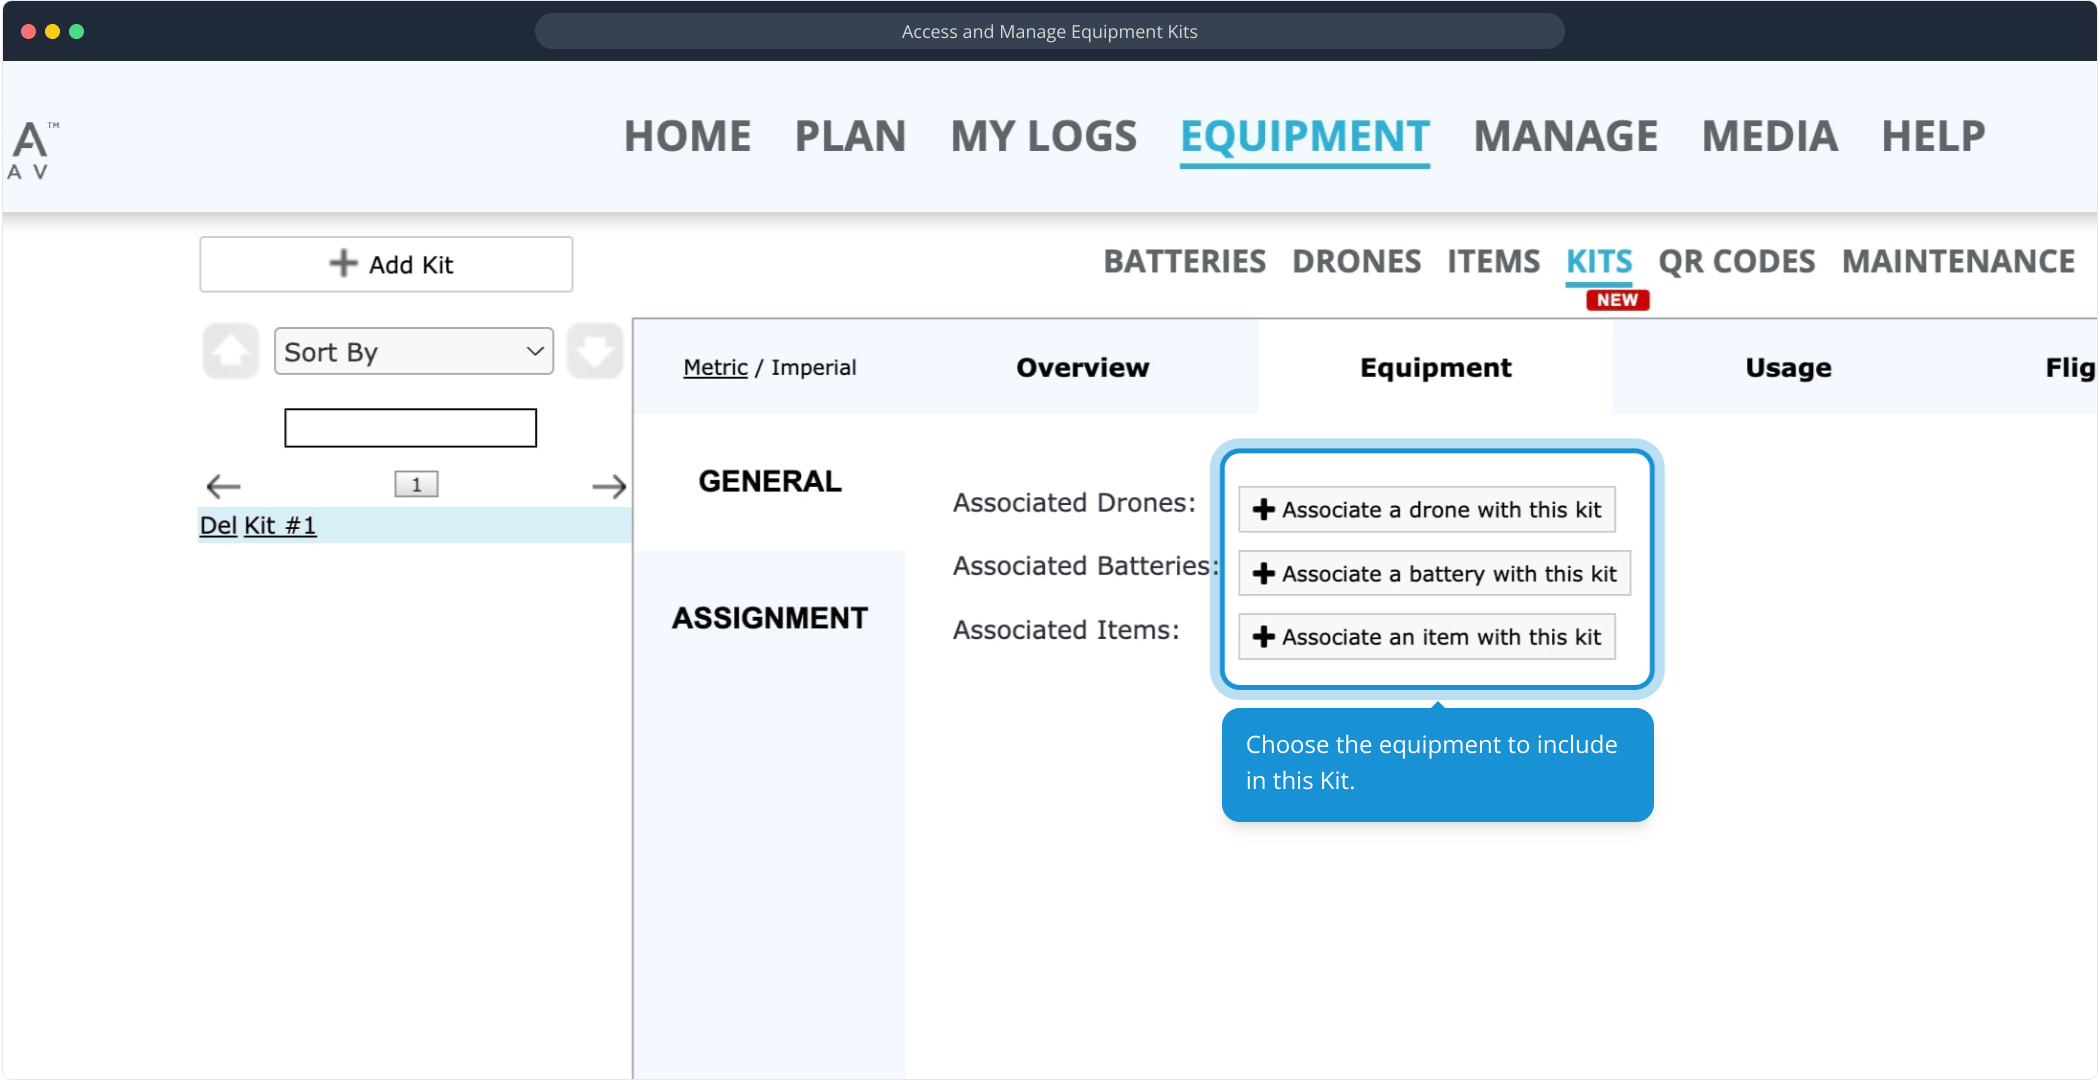
All associated equipment will appear here:
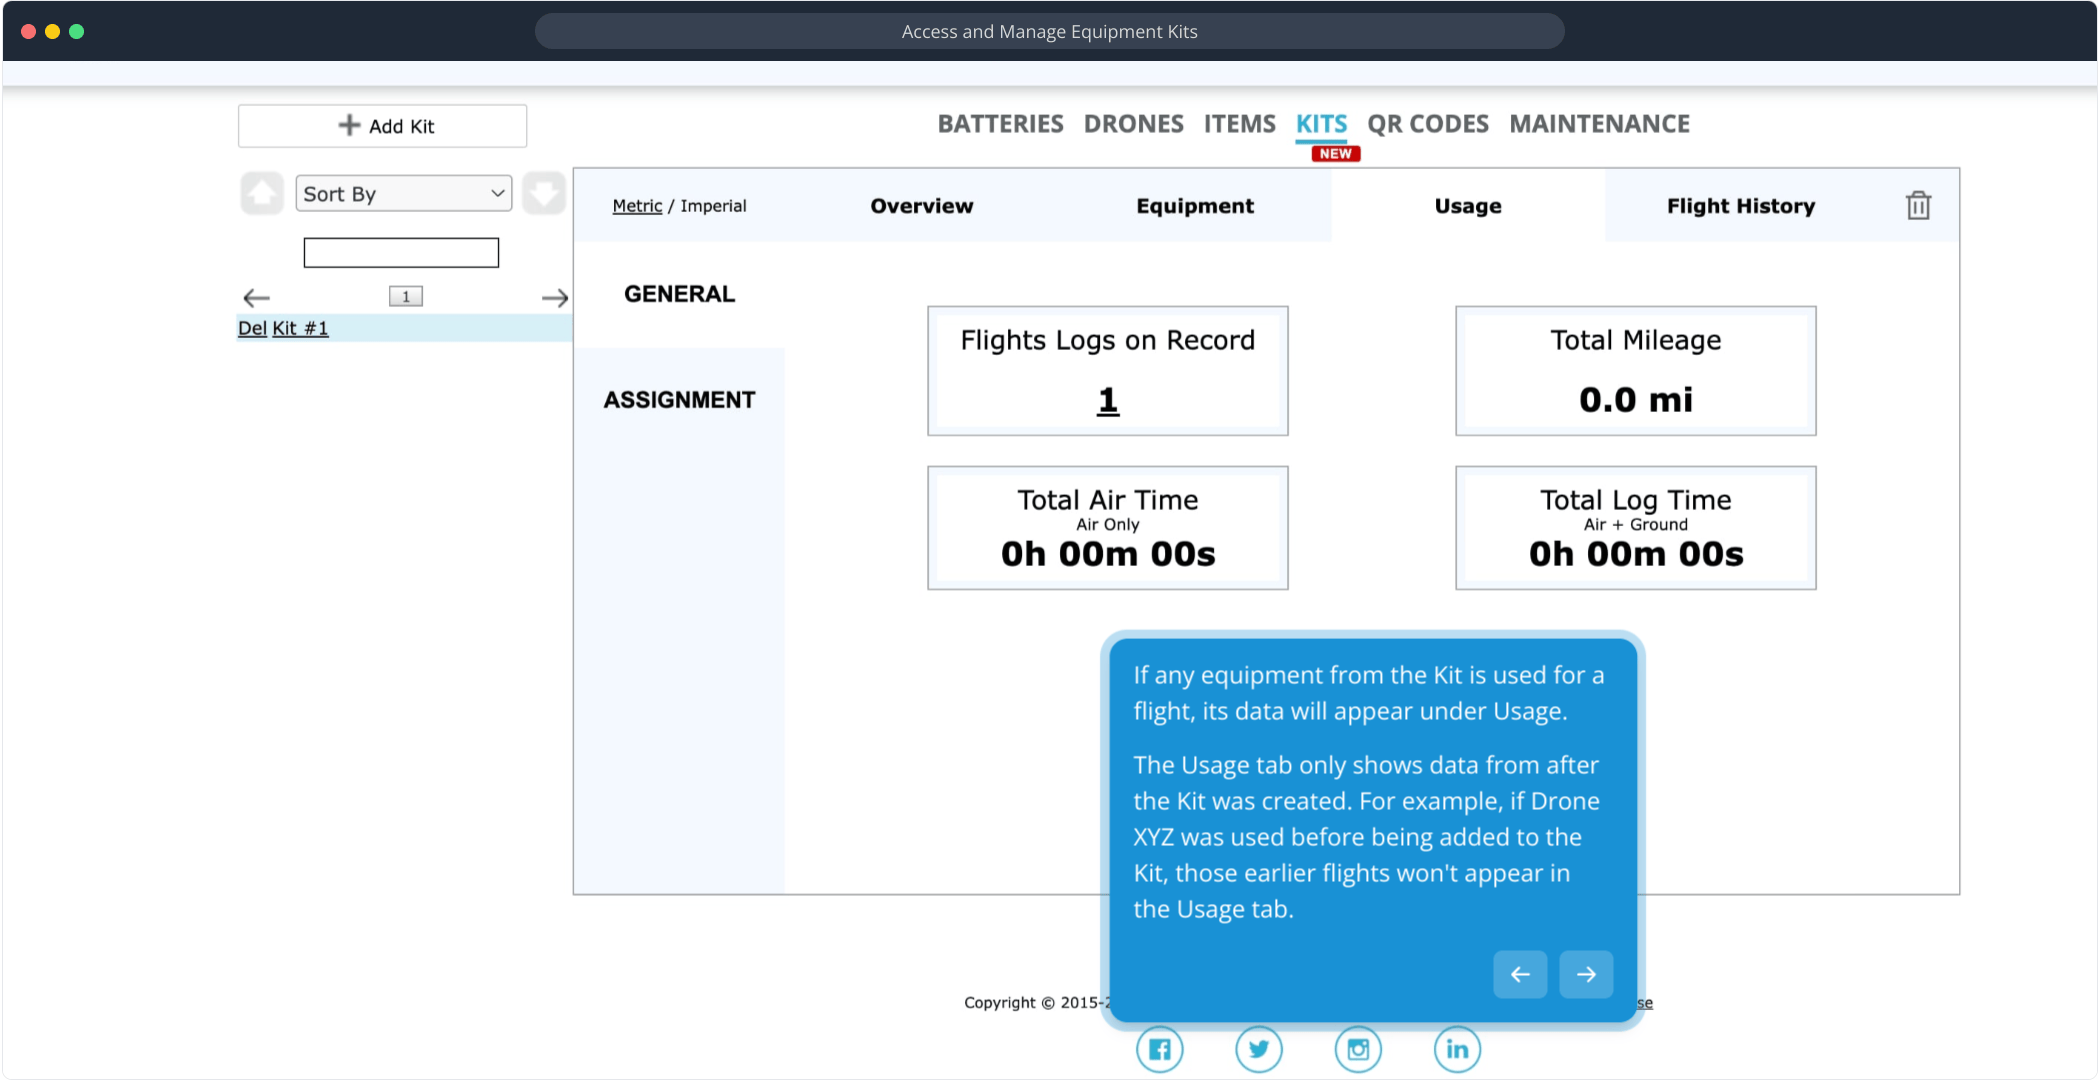
Viewing a Kit's Usage
If any equipment from the Kit is used for a flight, its data will appear under Usage.
The Usage tab only shows data from after the Kit was created. For example, if Drone XYZ was used before being added to the Kit, those earlier flights won't appear in the Usage tab.
The Usage tab only shows data from after the Kit was created. For example, if Drone XYZ was used before being added to the Kit, those earlier flights won't appear in the Usage tab.
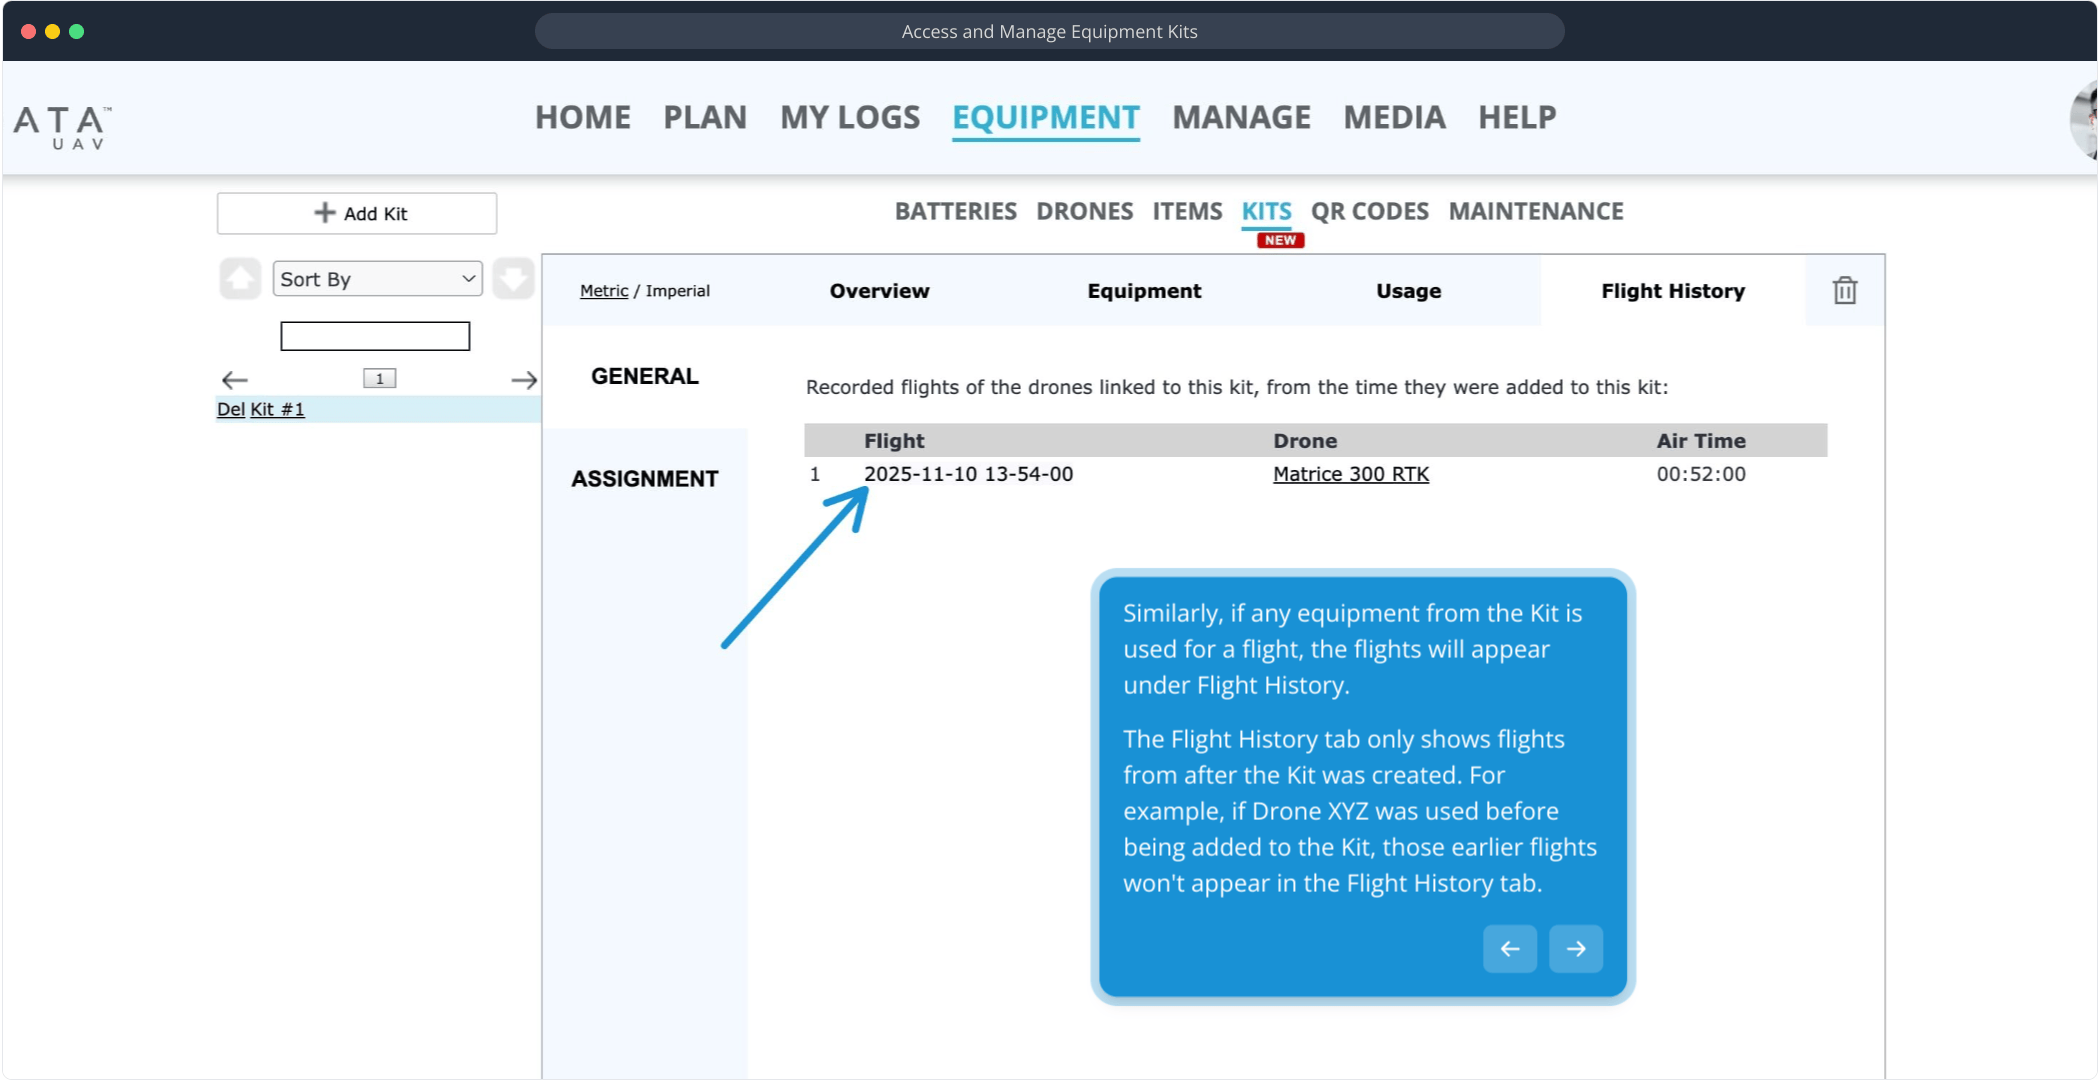
Similarly, if any equipment from the Kit is used for a flight, the flights will appear under Flight History.
The Flight History tab only shows flights from after the Kit was created. For example, if Drone XYZ was used before being added to the Kit, those earlier flights won't appear in the Flight History tab.
The Flight History tab only shows flights from after the Kit was created. For example, if Drone XYZ was used before being added to the Kit, those earlier flights won't appear in the Flight History tab.
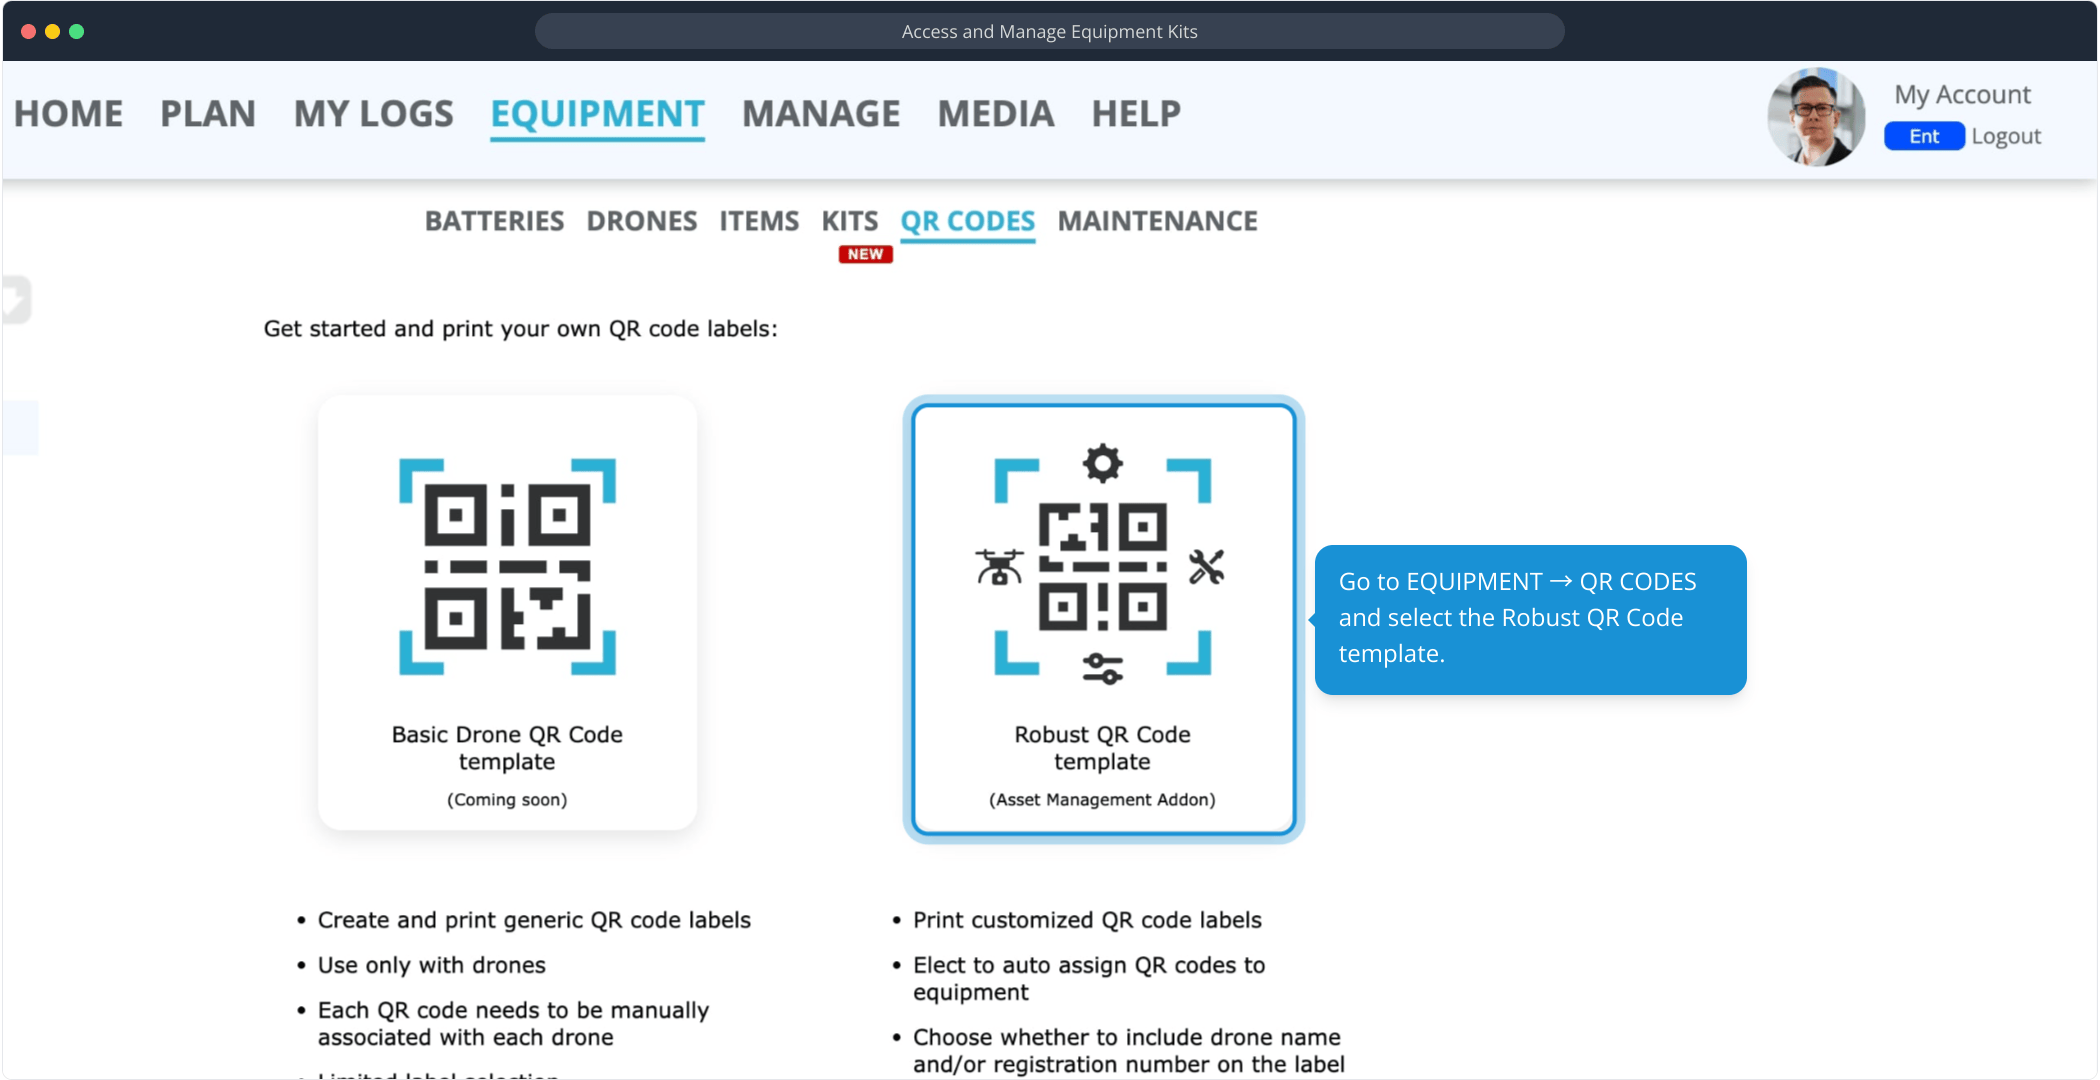
Creating QR Codes
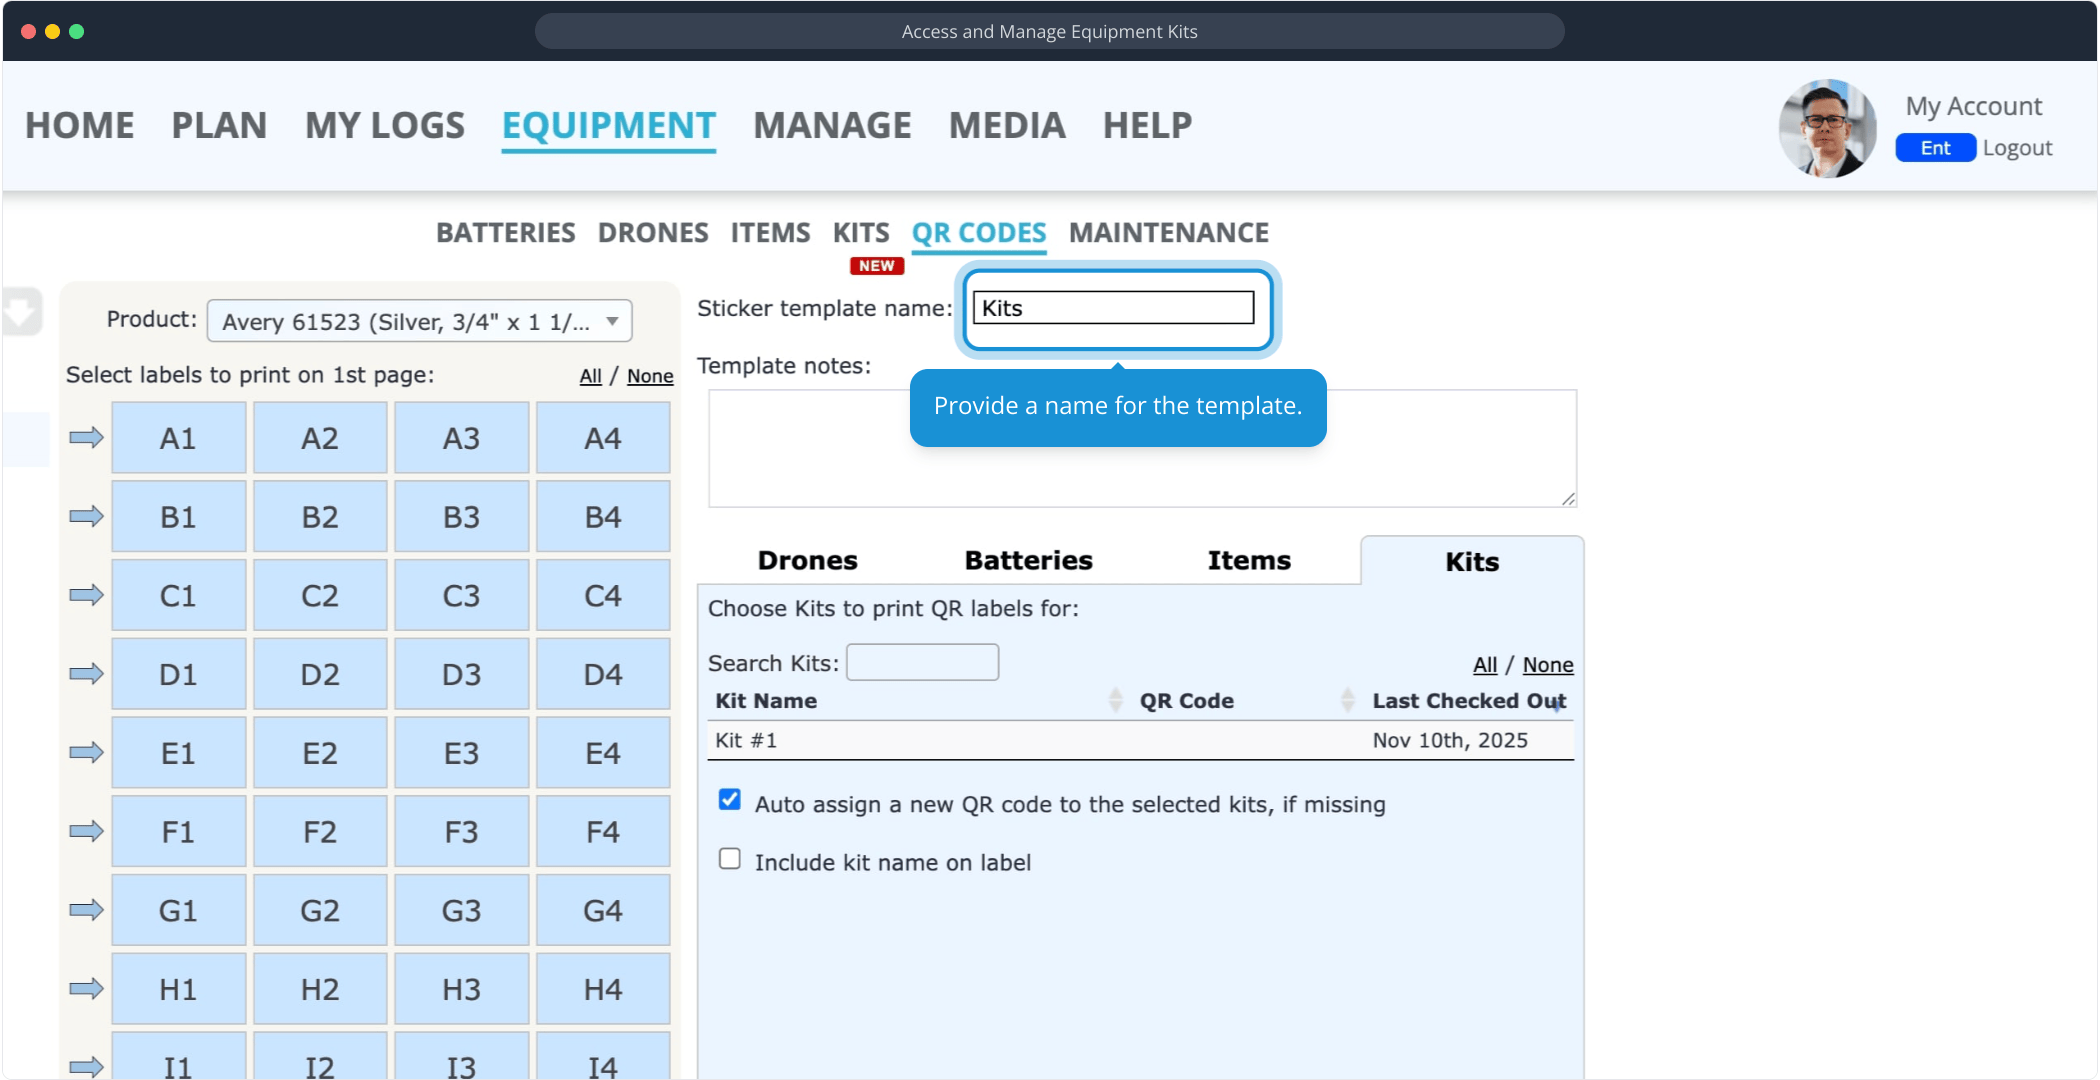
Go to EQUIPMENT → QR CODES and select the Robust QR Code template.
Provide a name for the template.
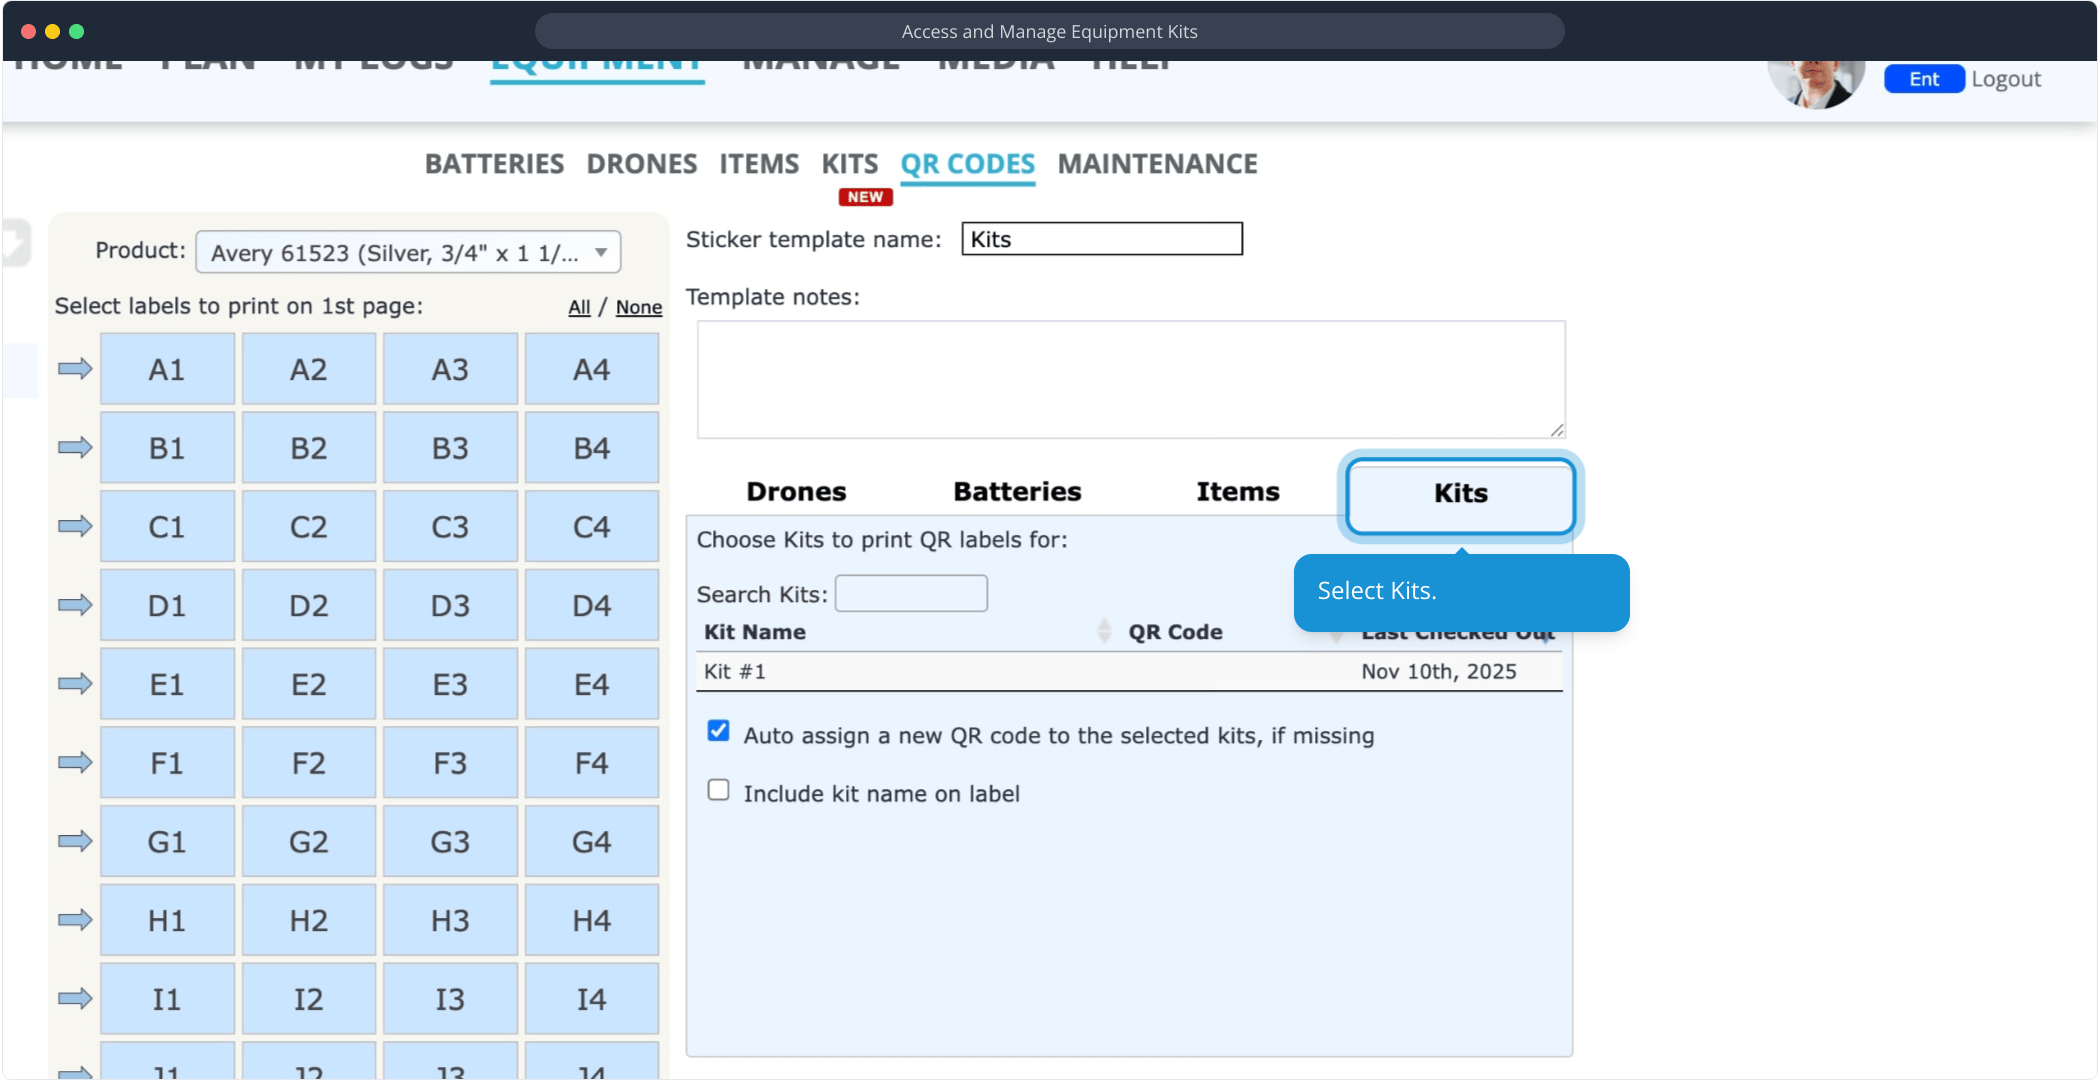
Select Kits.
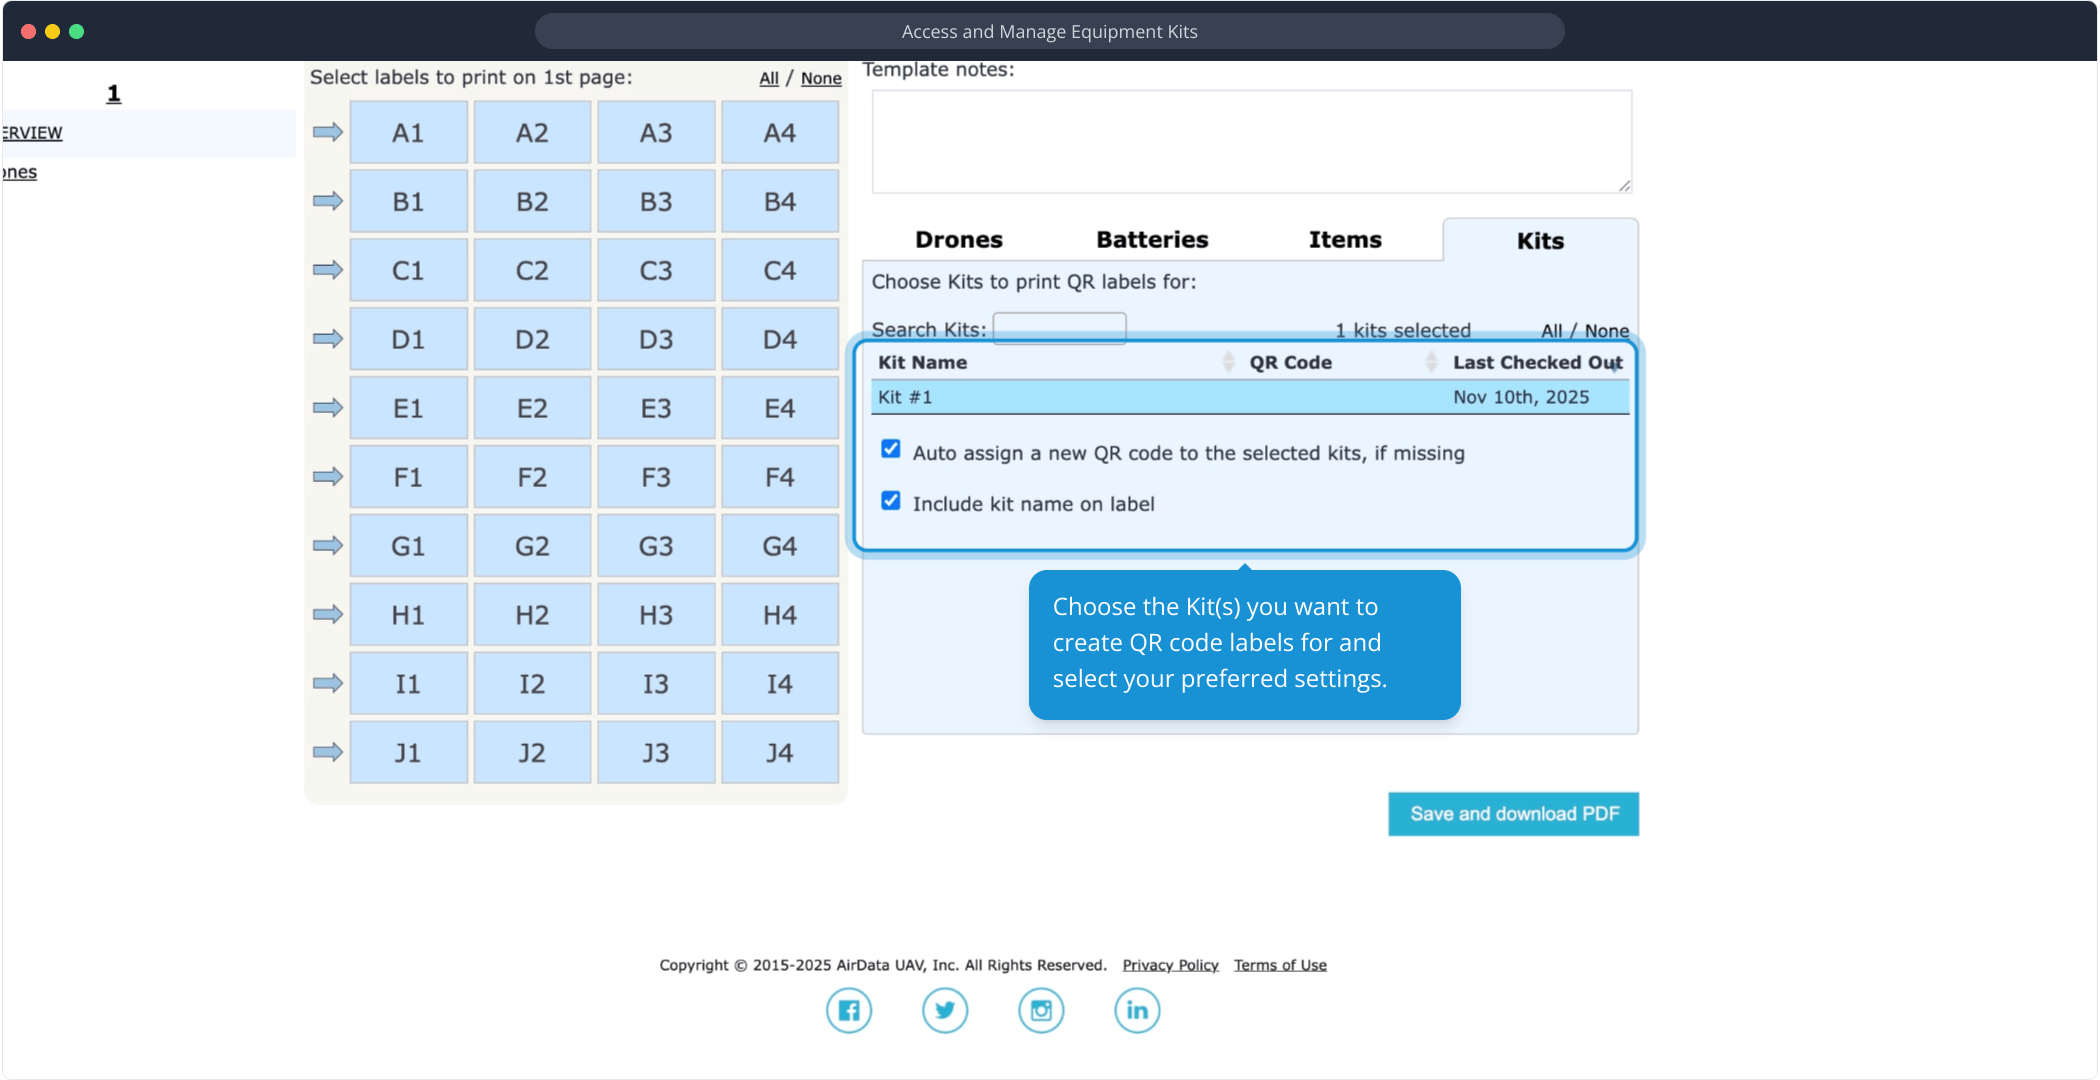
Choose the Kit(s) you want to create QR code labels for and select your preferred settings.
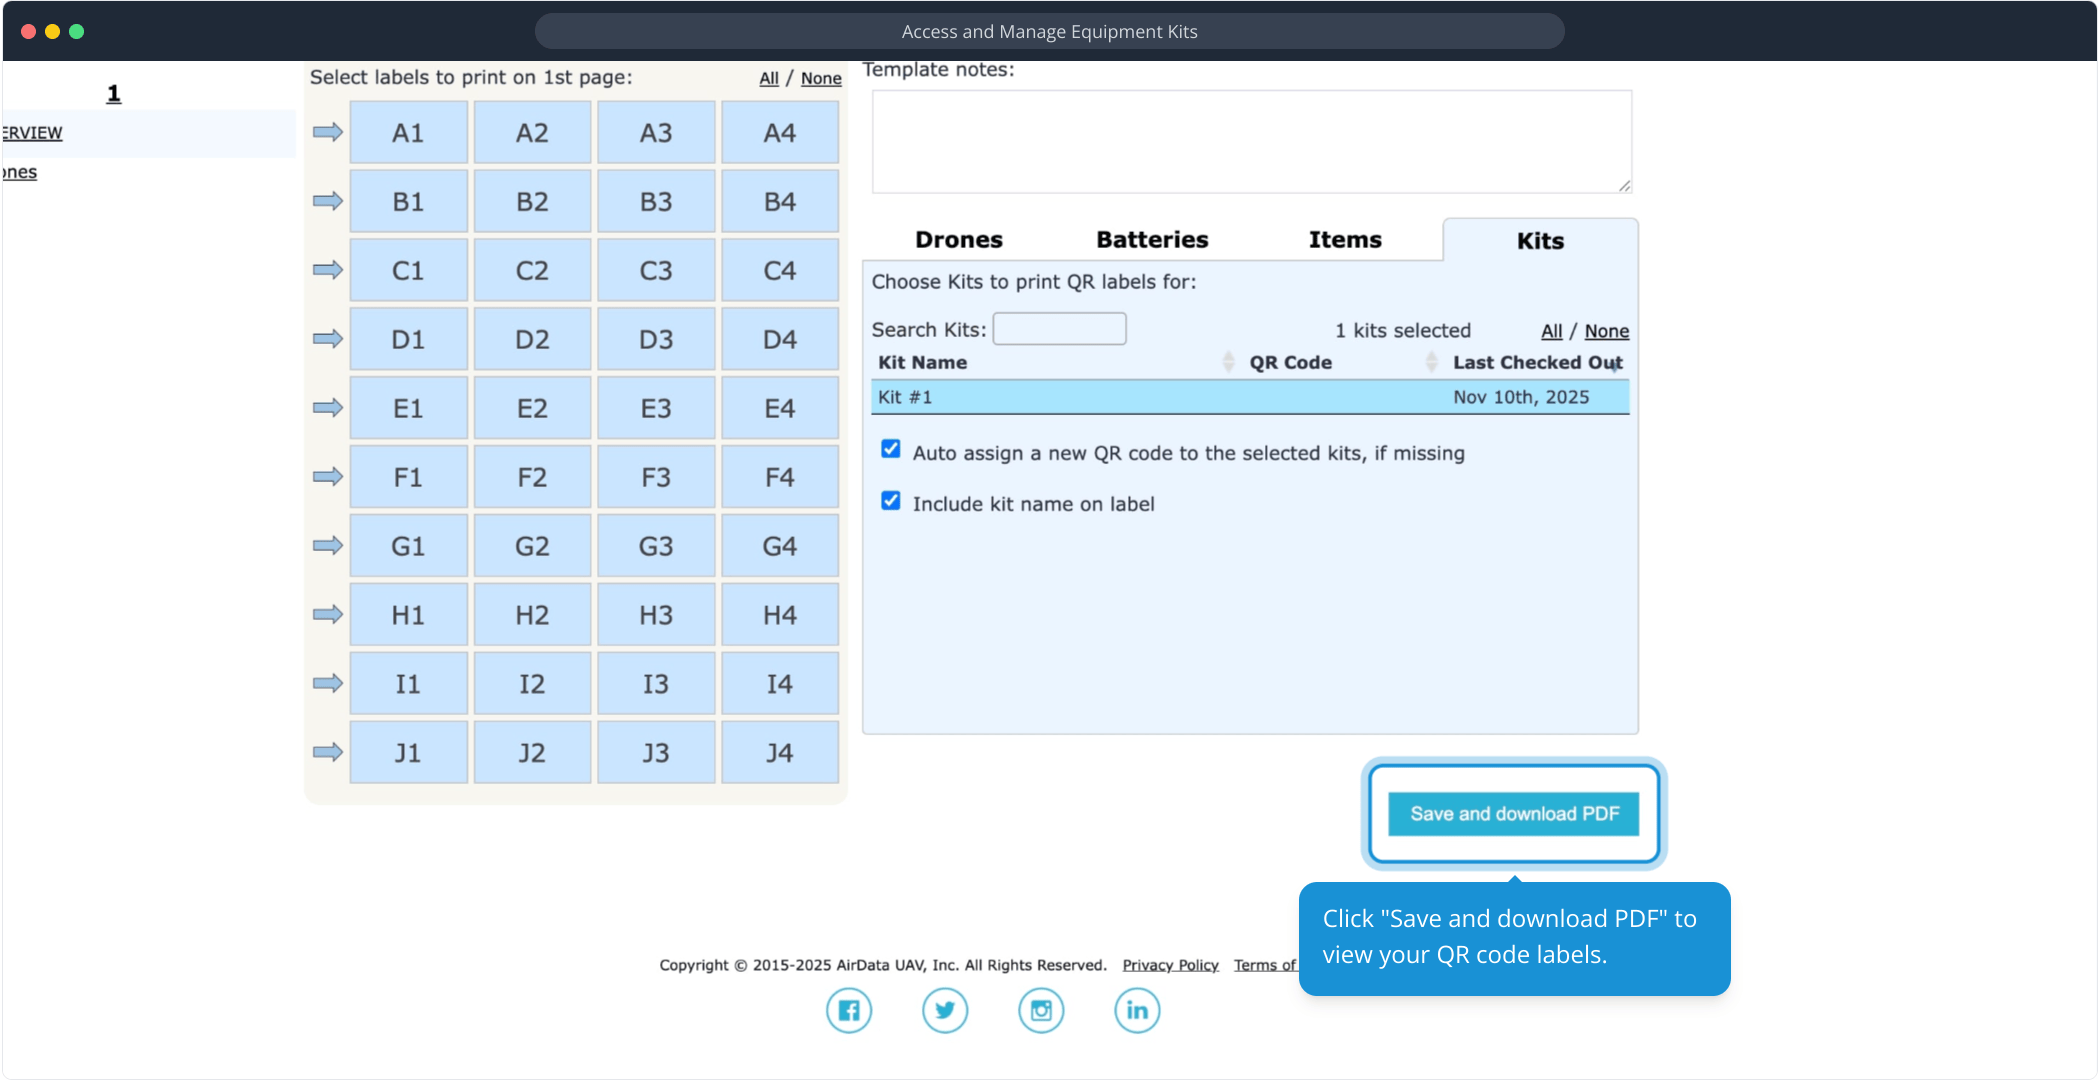
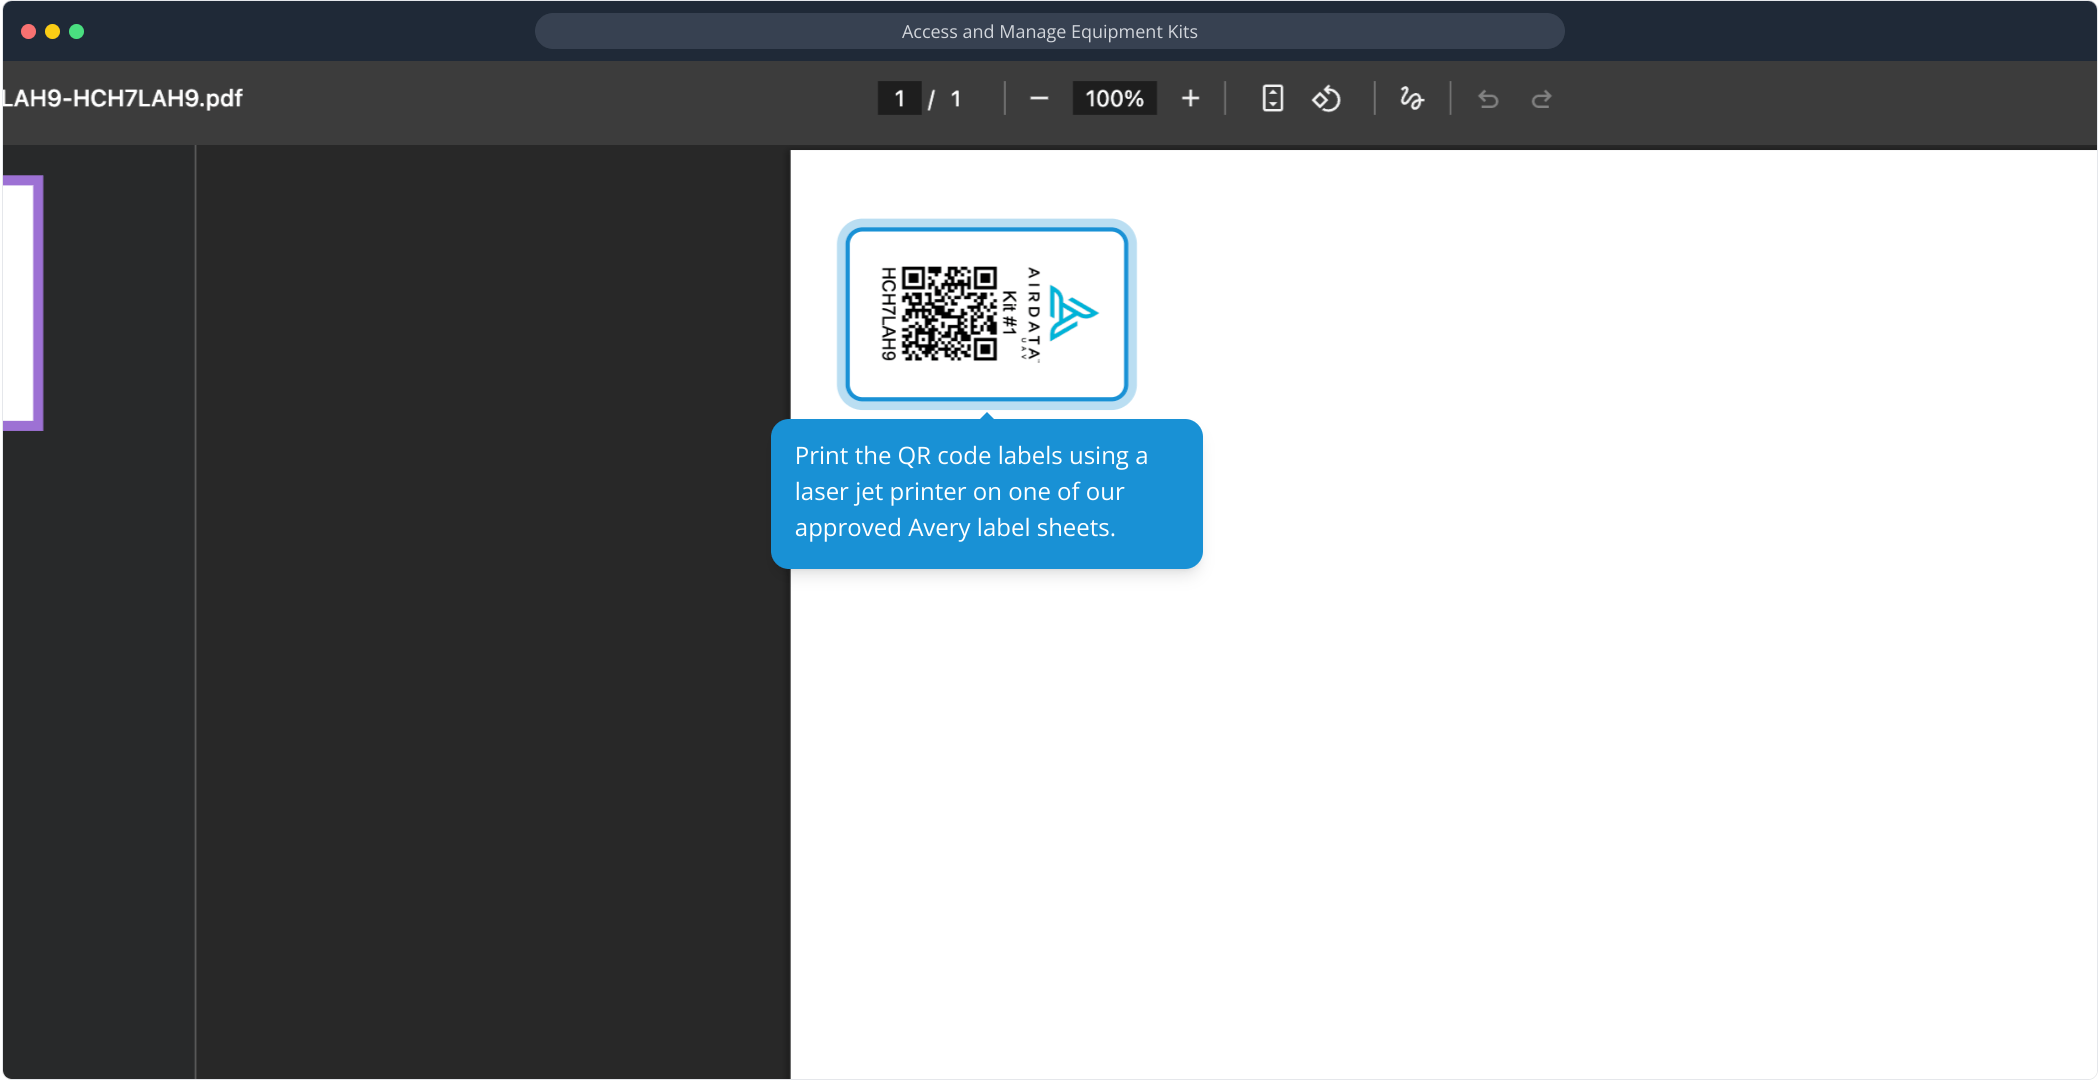
Click "Save and download PDF" to view your QR code labels.
Print the QR code labels using a laser jet printer on one of our approved Avery label sheets.
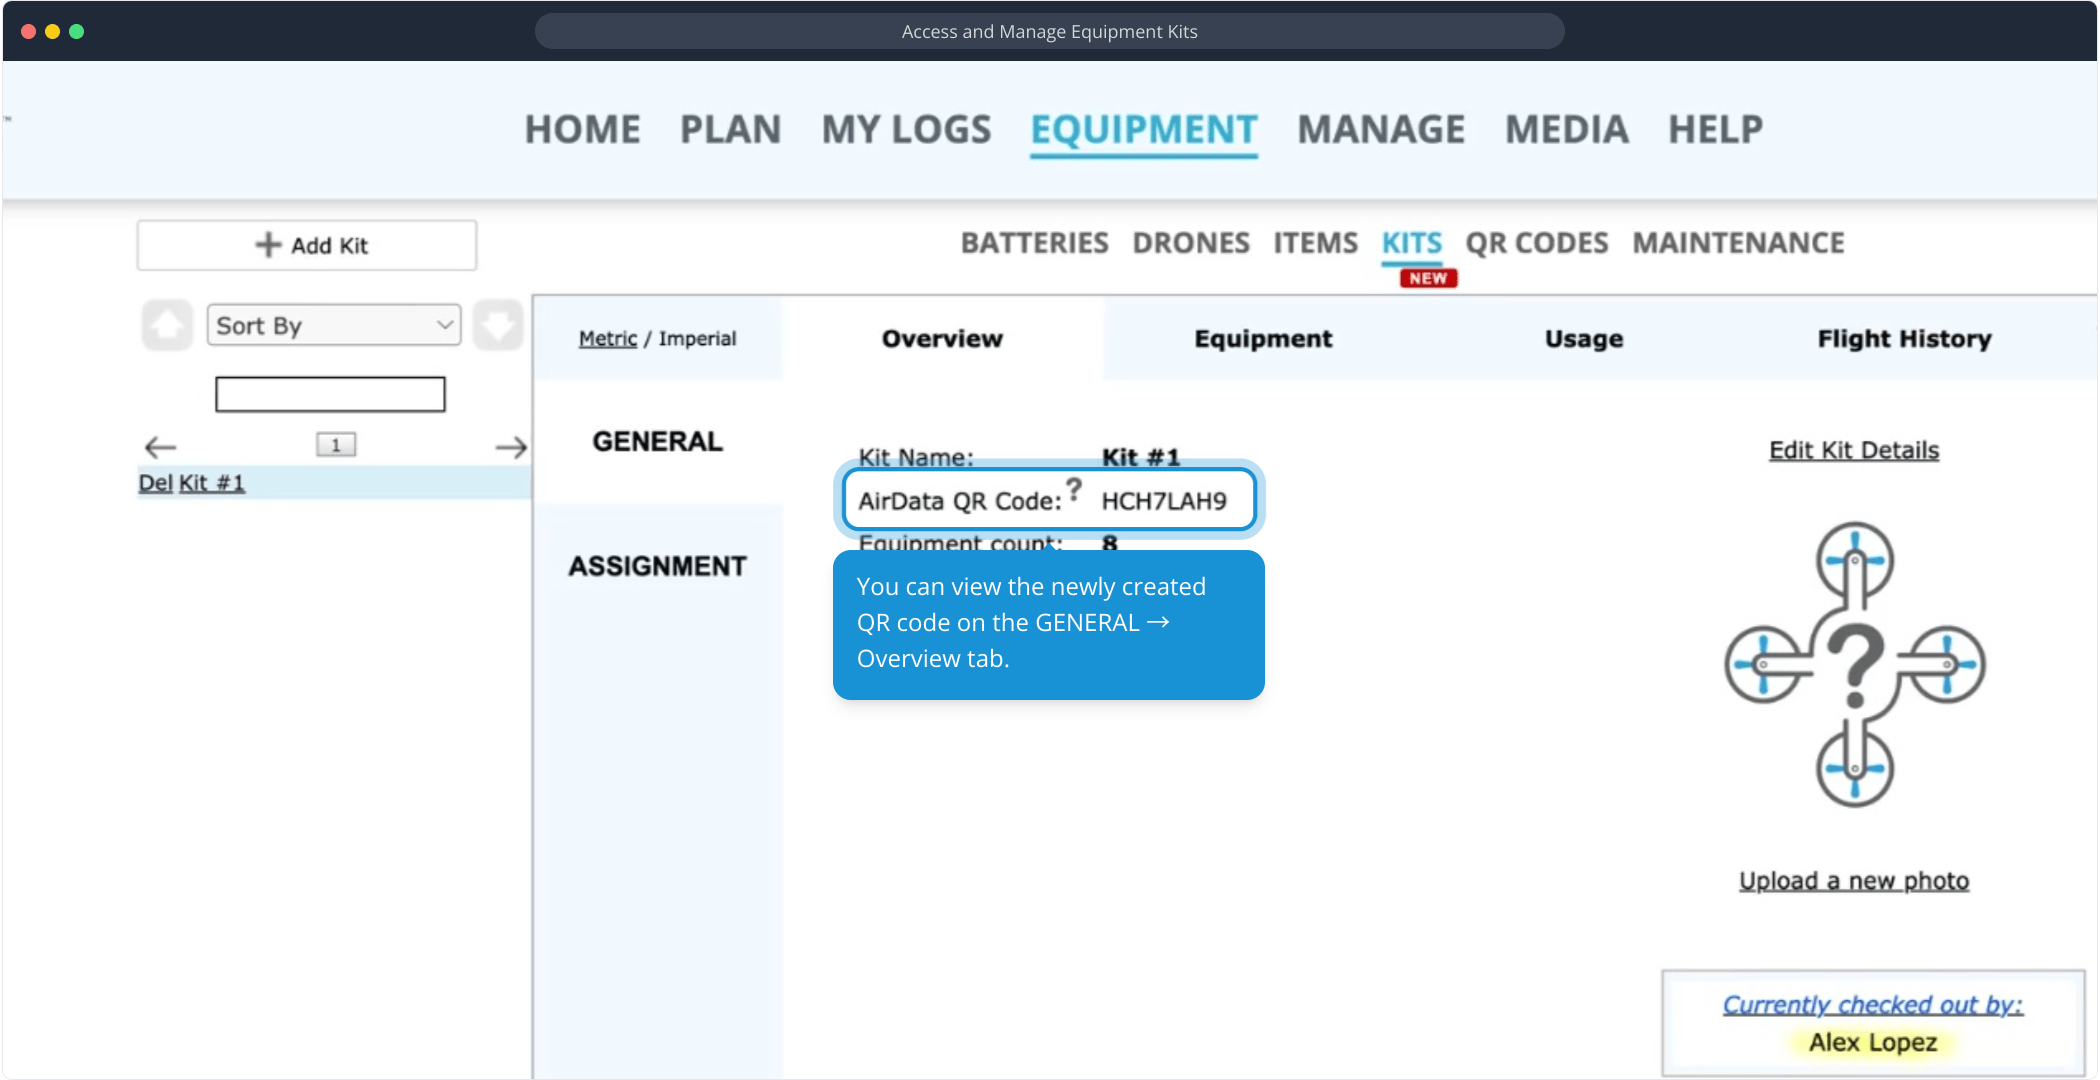
You can view the newly created QR code on the GENERAL → Overview tab.
Checking Out a Kit (Web Portal)
Pilots need the "Edit" permission to check in or check out a Kit. To learn how to check in or check out Kits for your pilots, continue reading.
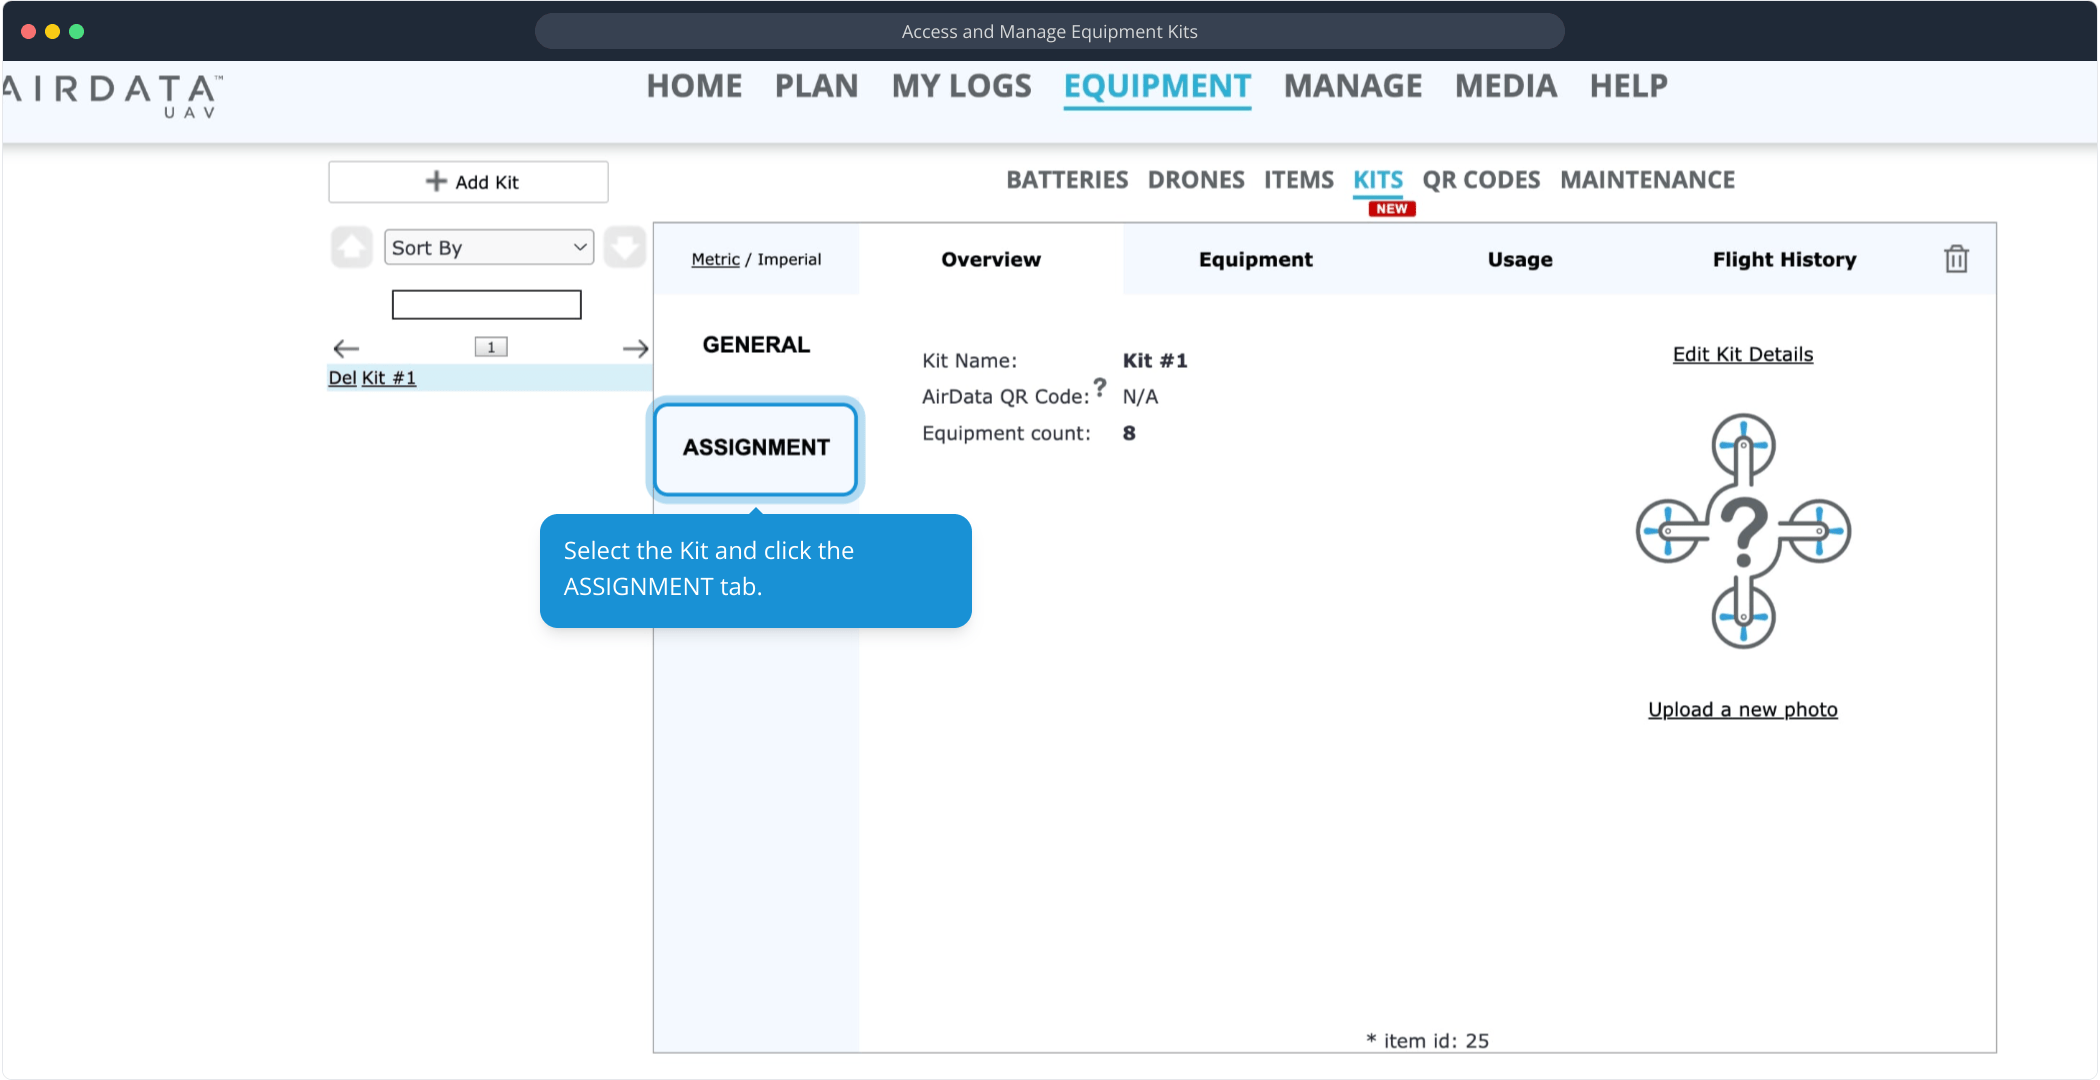
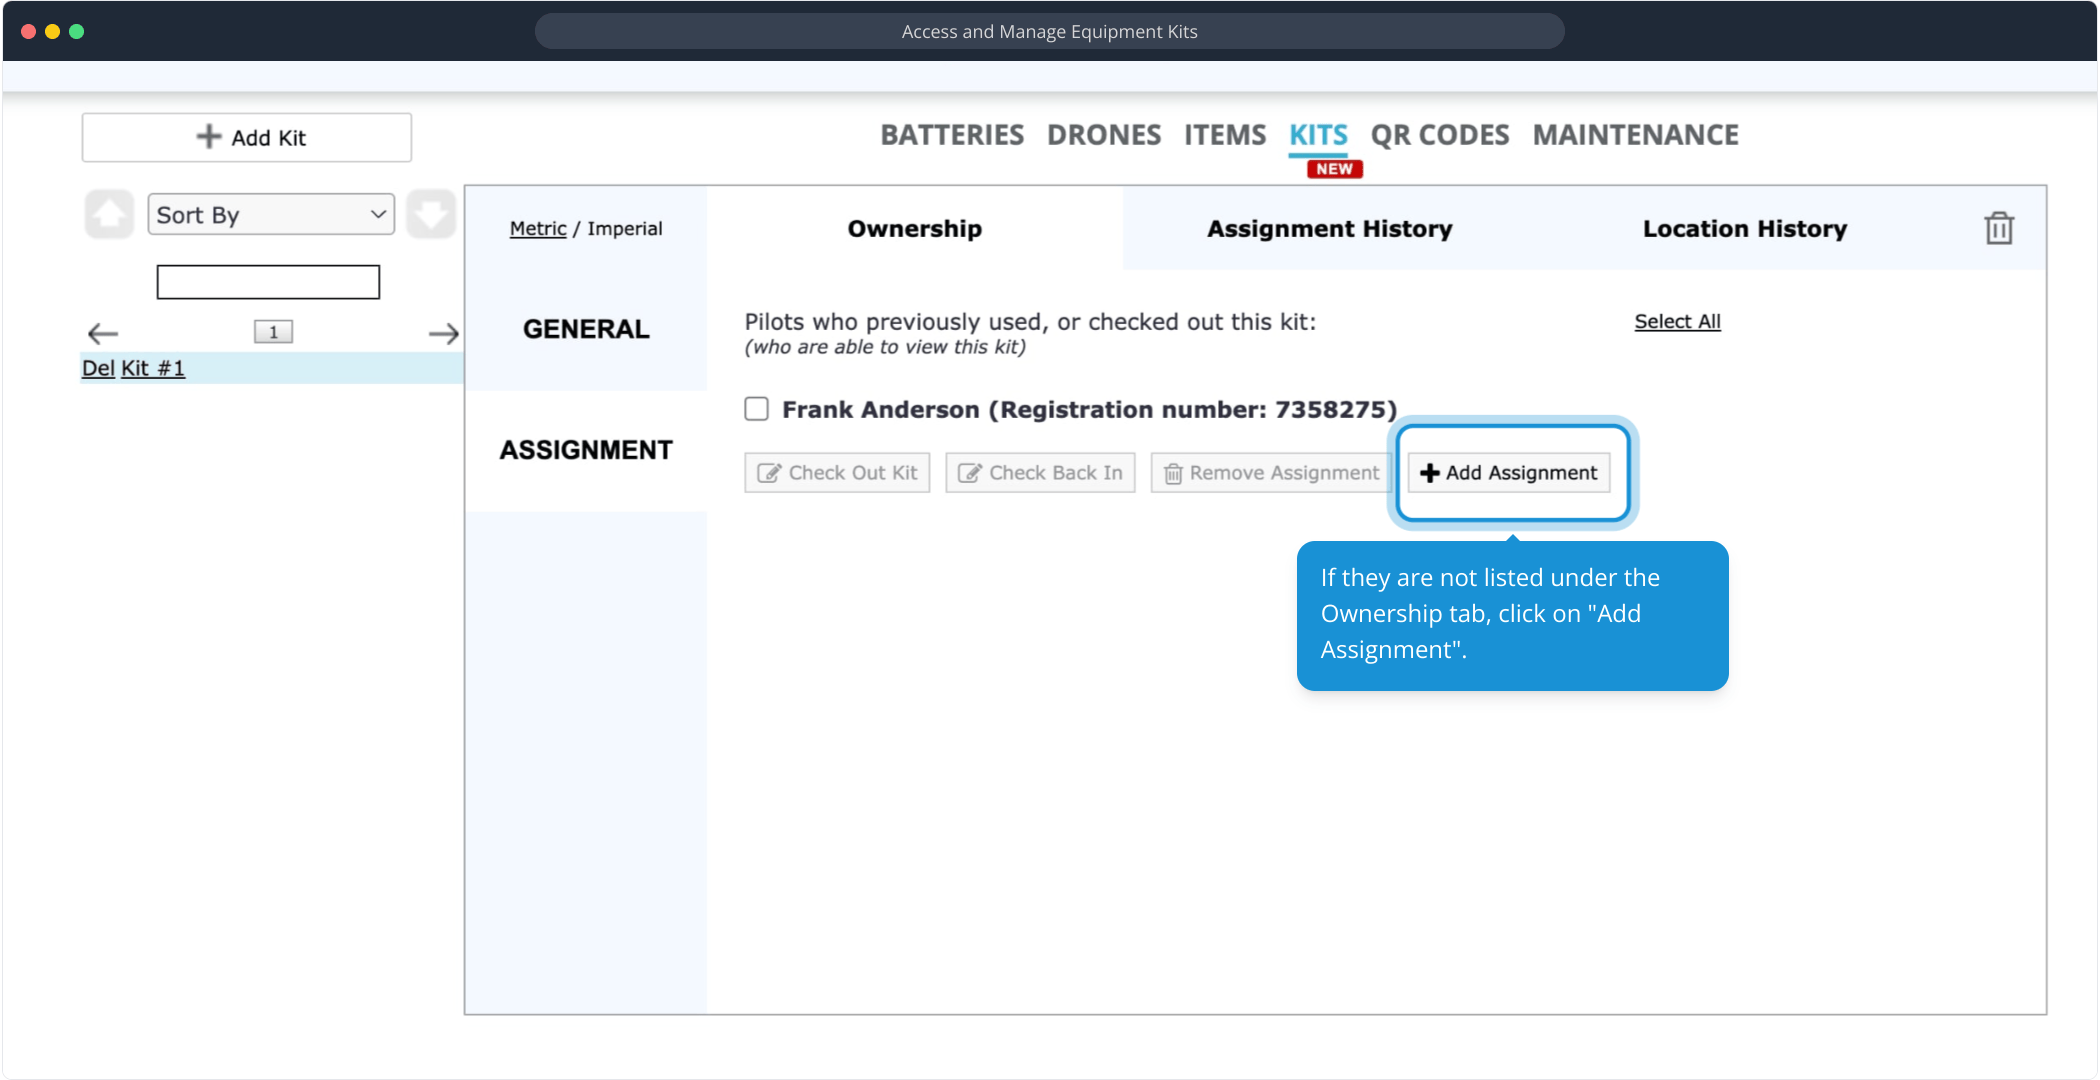
Select the Kit and click the ASSIGNMENT tab.
On the Ownership tab, select the pilot you want to check the Kit out to.
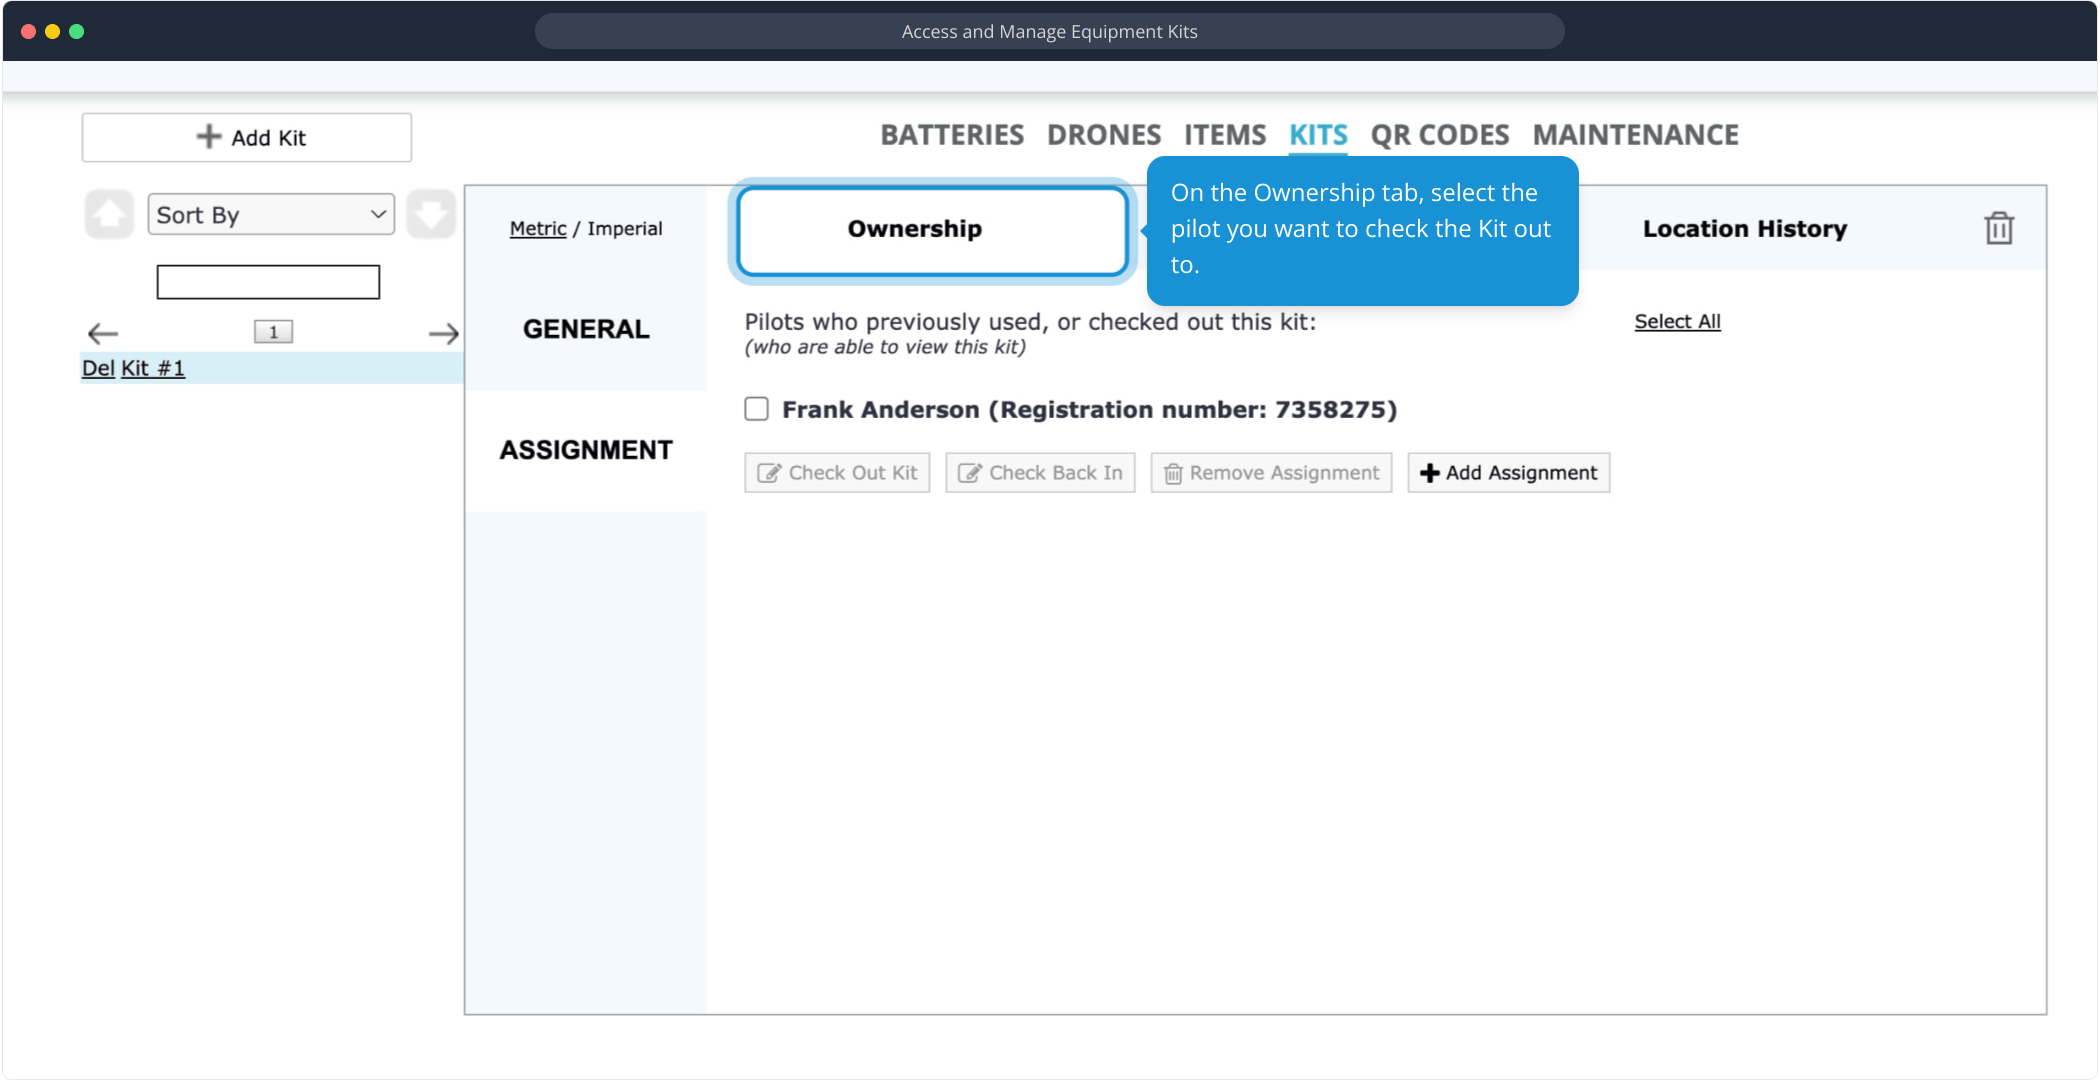
If they are not listed under the Ownership tab, click on "Add Assignment".
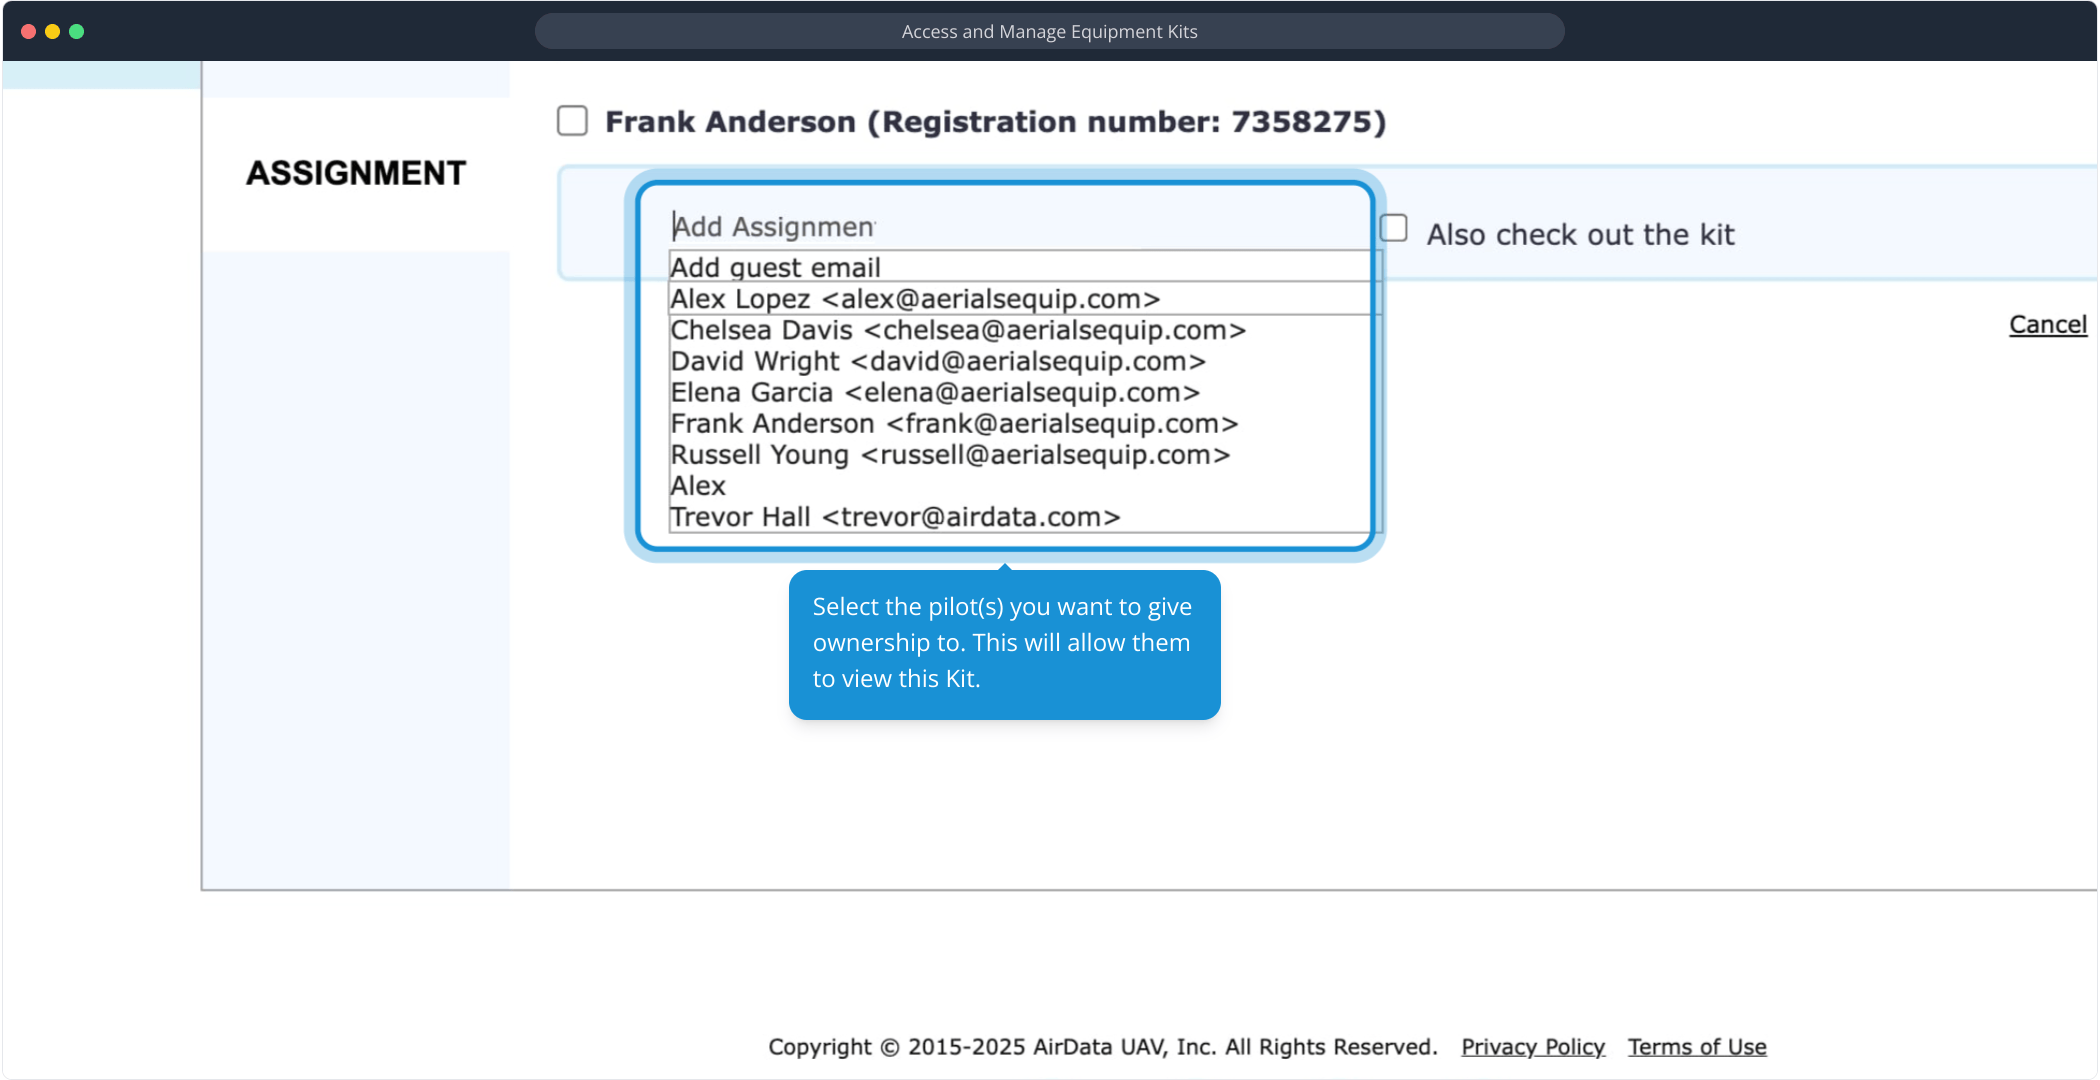
Select the pilot(s) you want to give ownership to. This will allow them to view this Kit.
Select this option to check out the selected Kit to the chosen pilot(s):
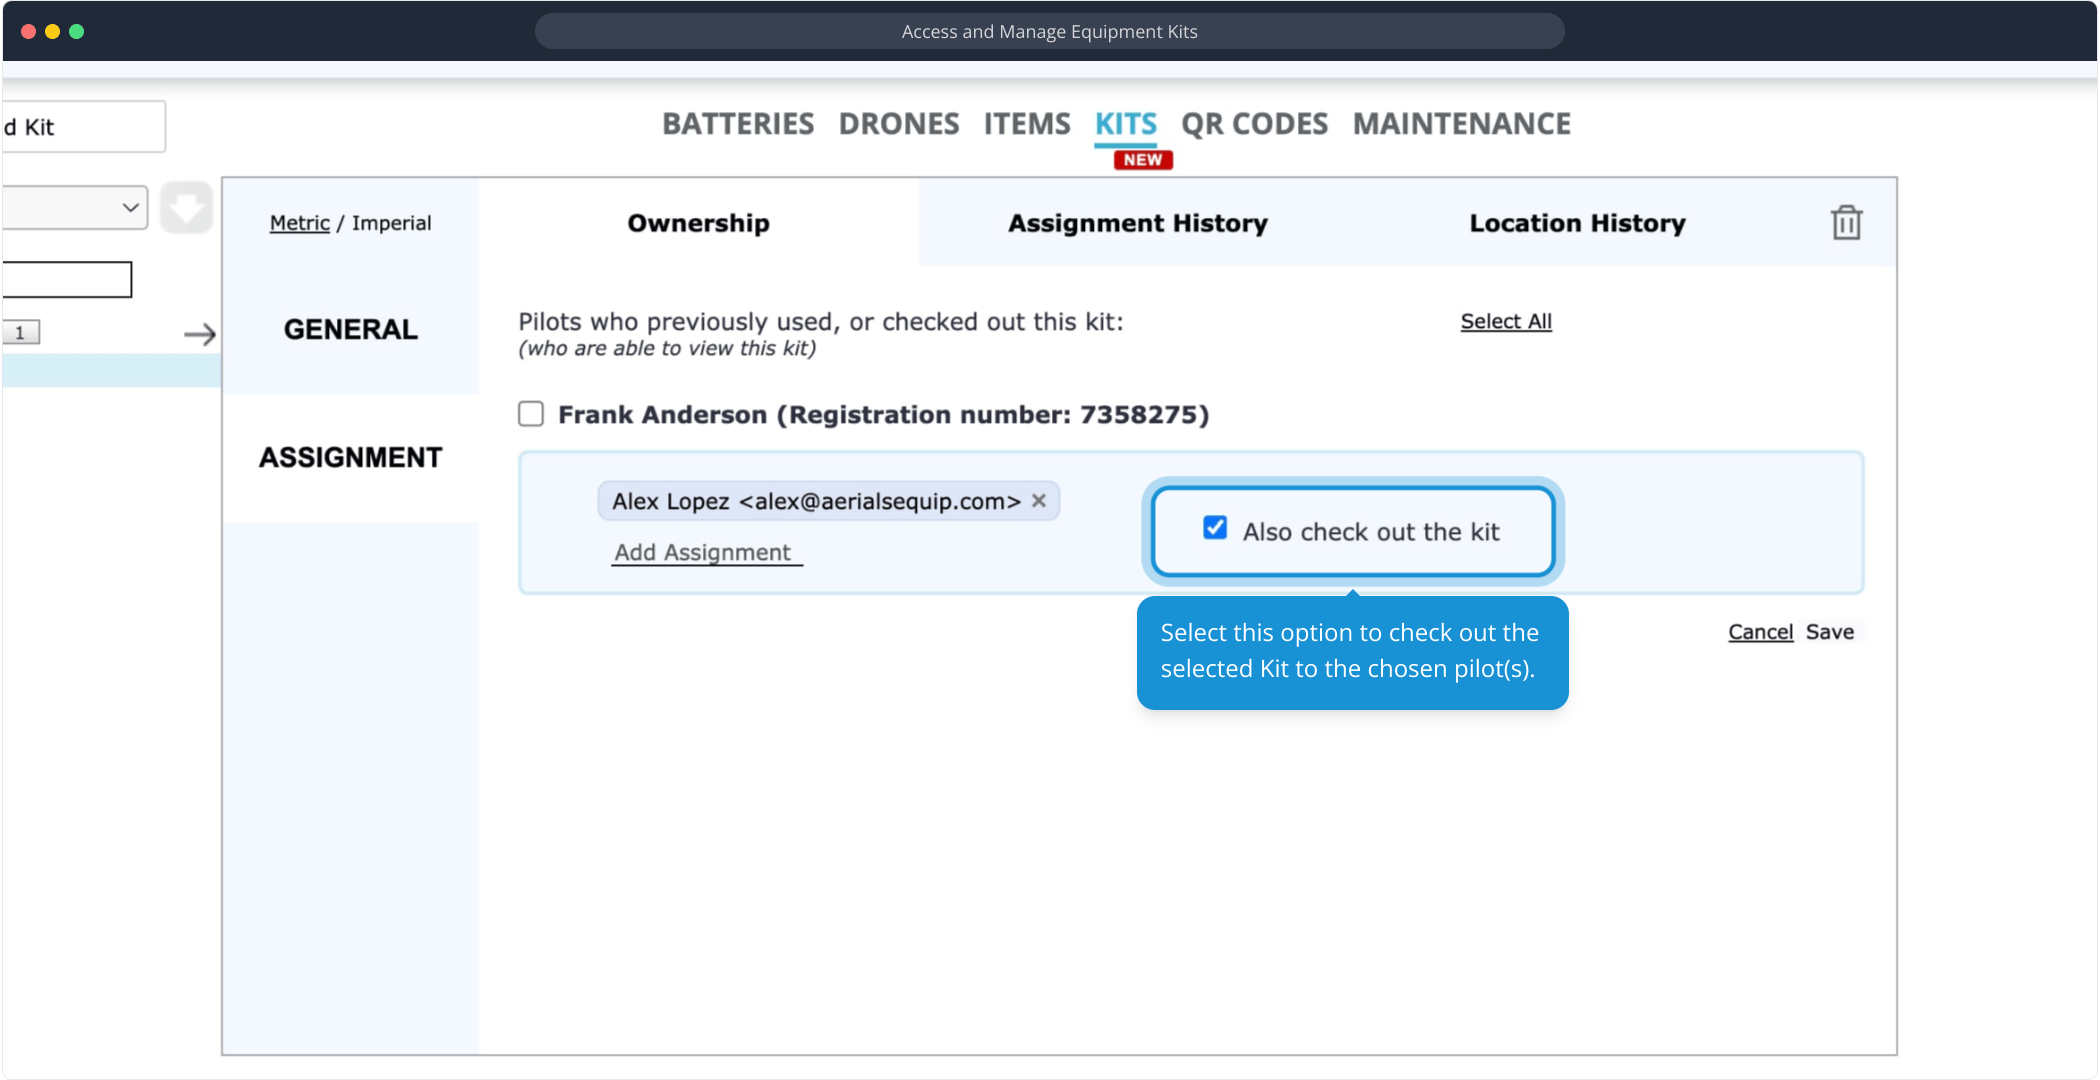
Save your selections.

Your actions will be reflected here:
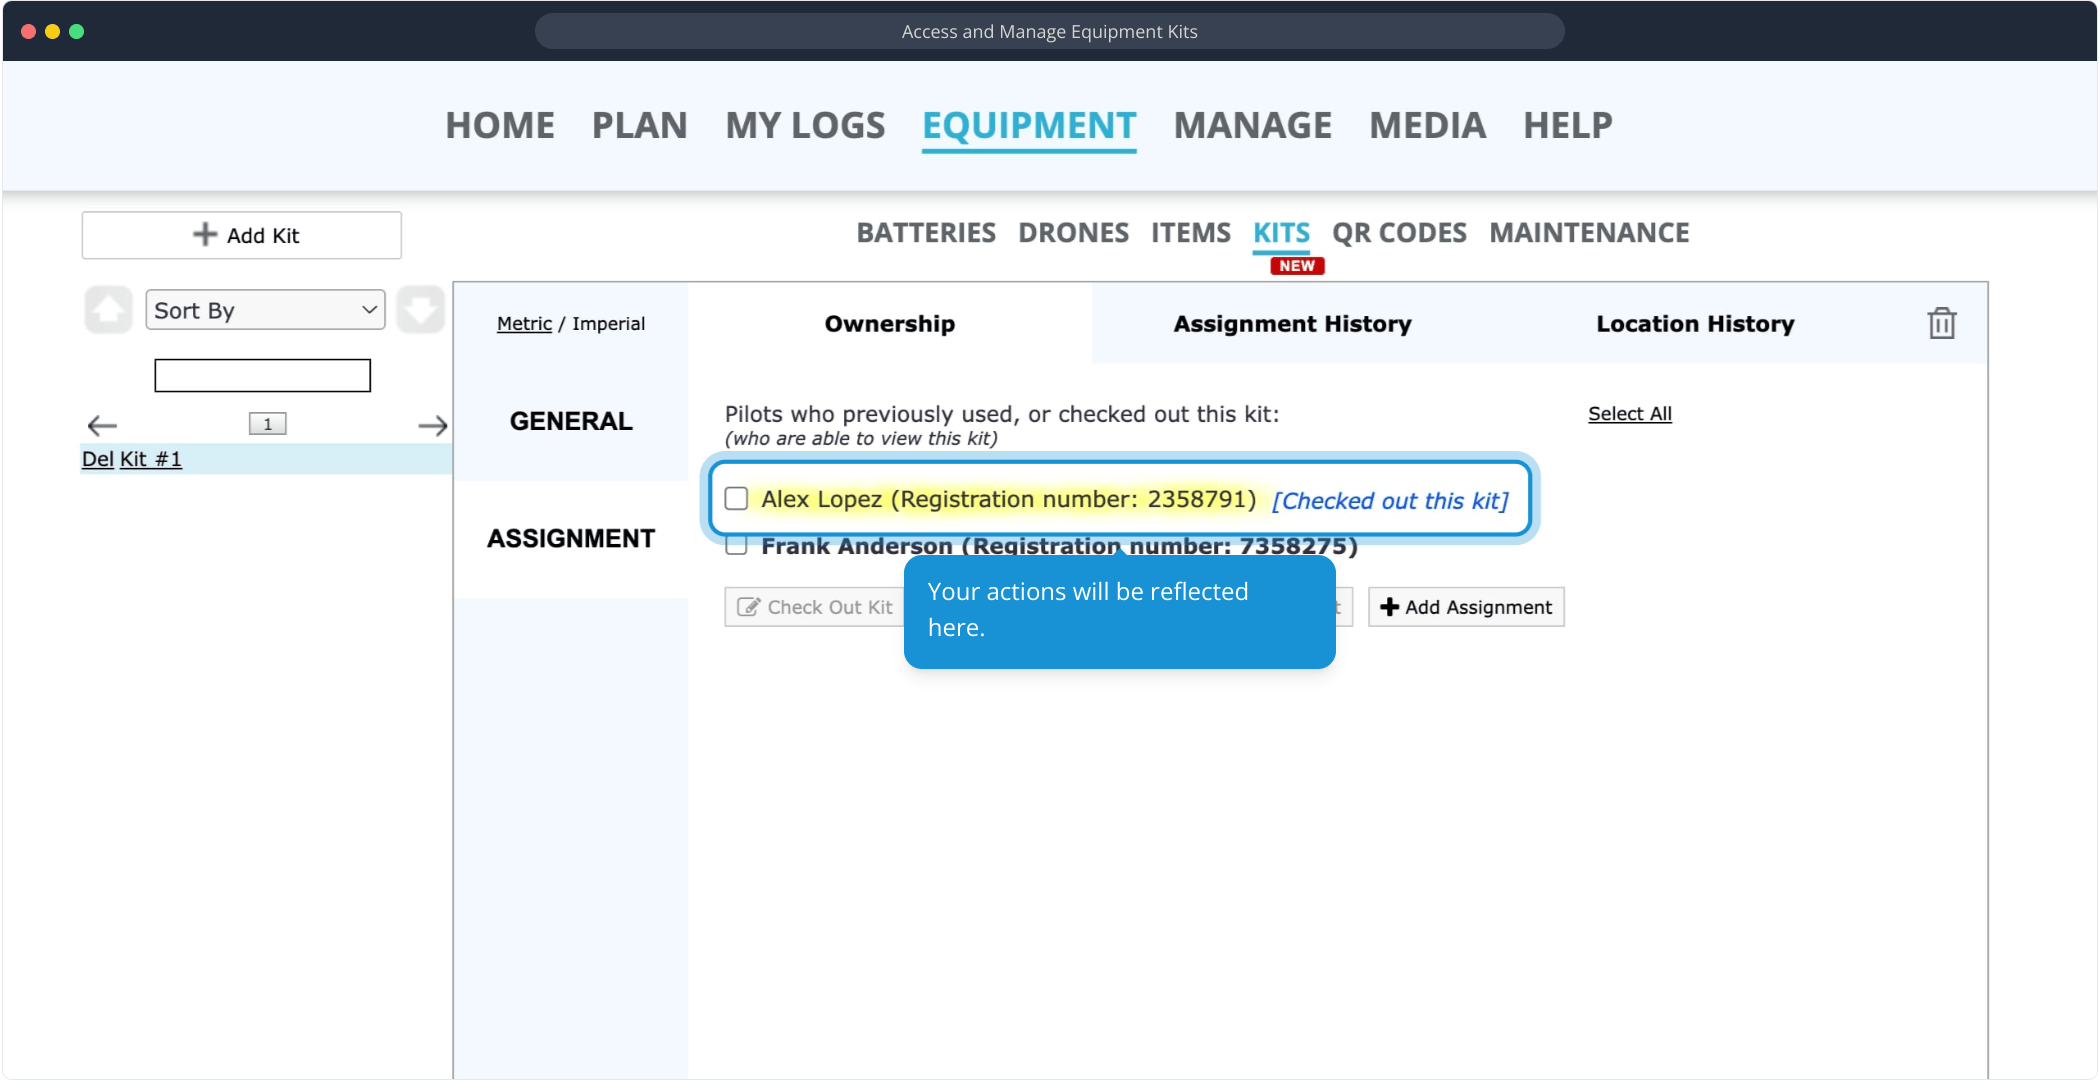
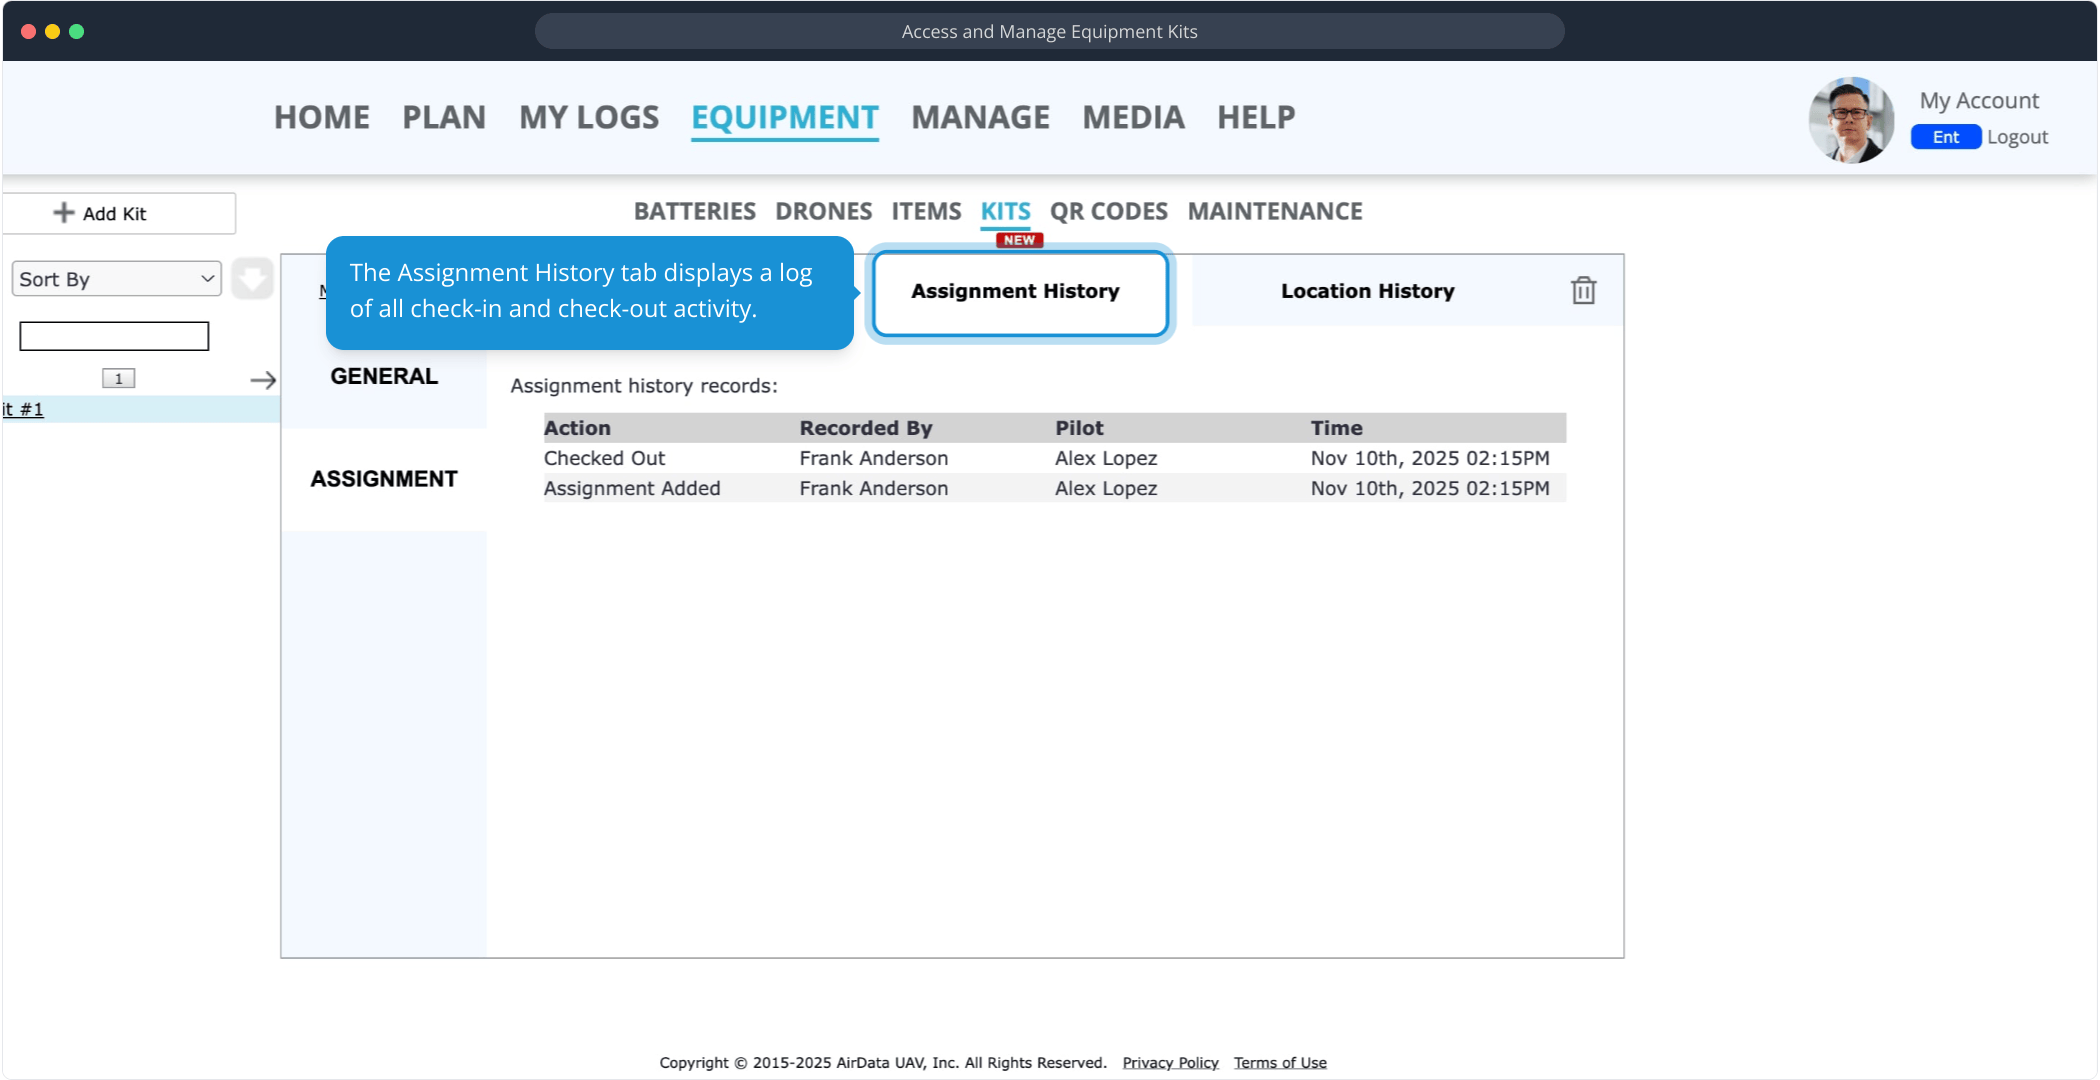
The Assignment History tab displays a log of all check-in and check-out activity.
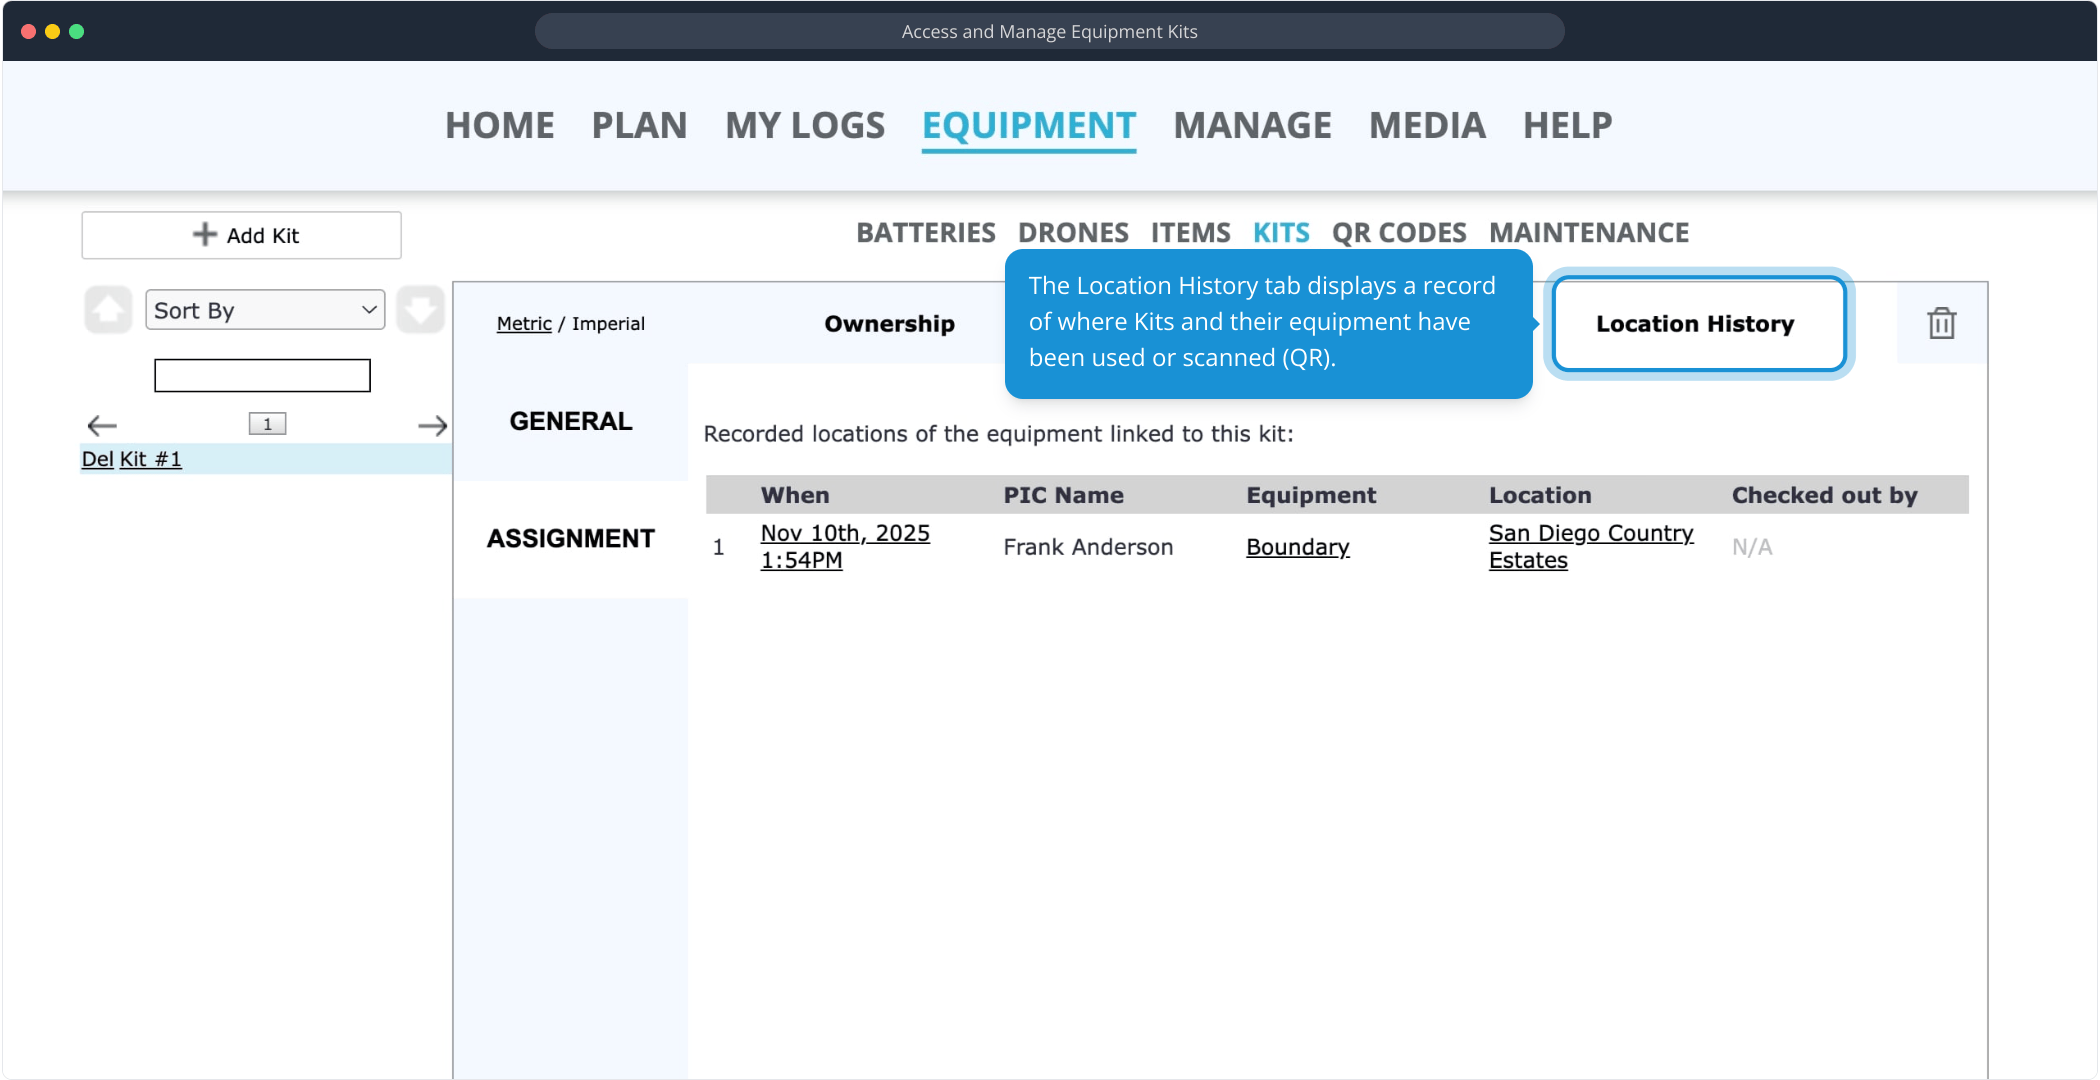
The Location History tab displays a record of where Kits and their equipment have been used or scanned (QR).
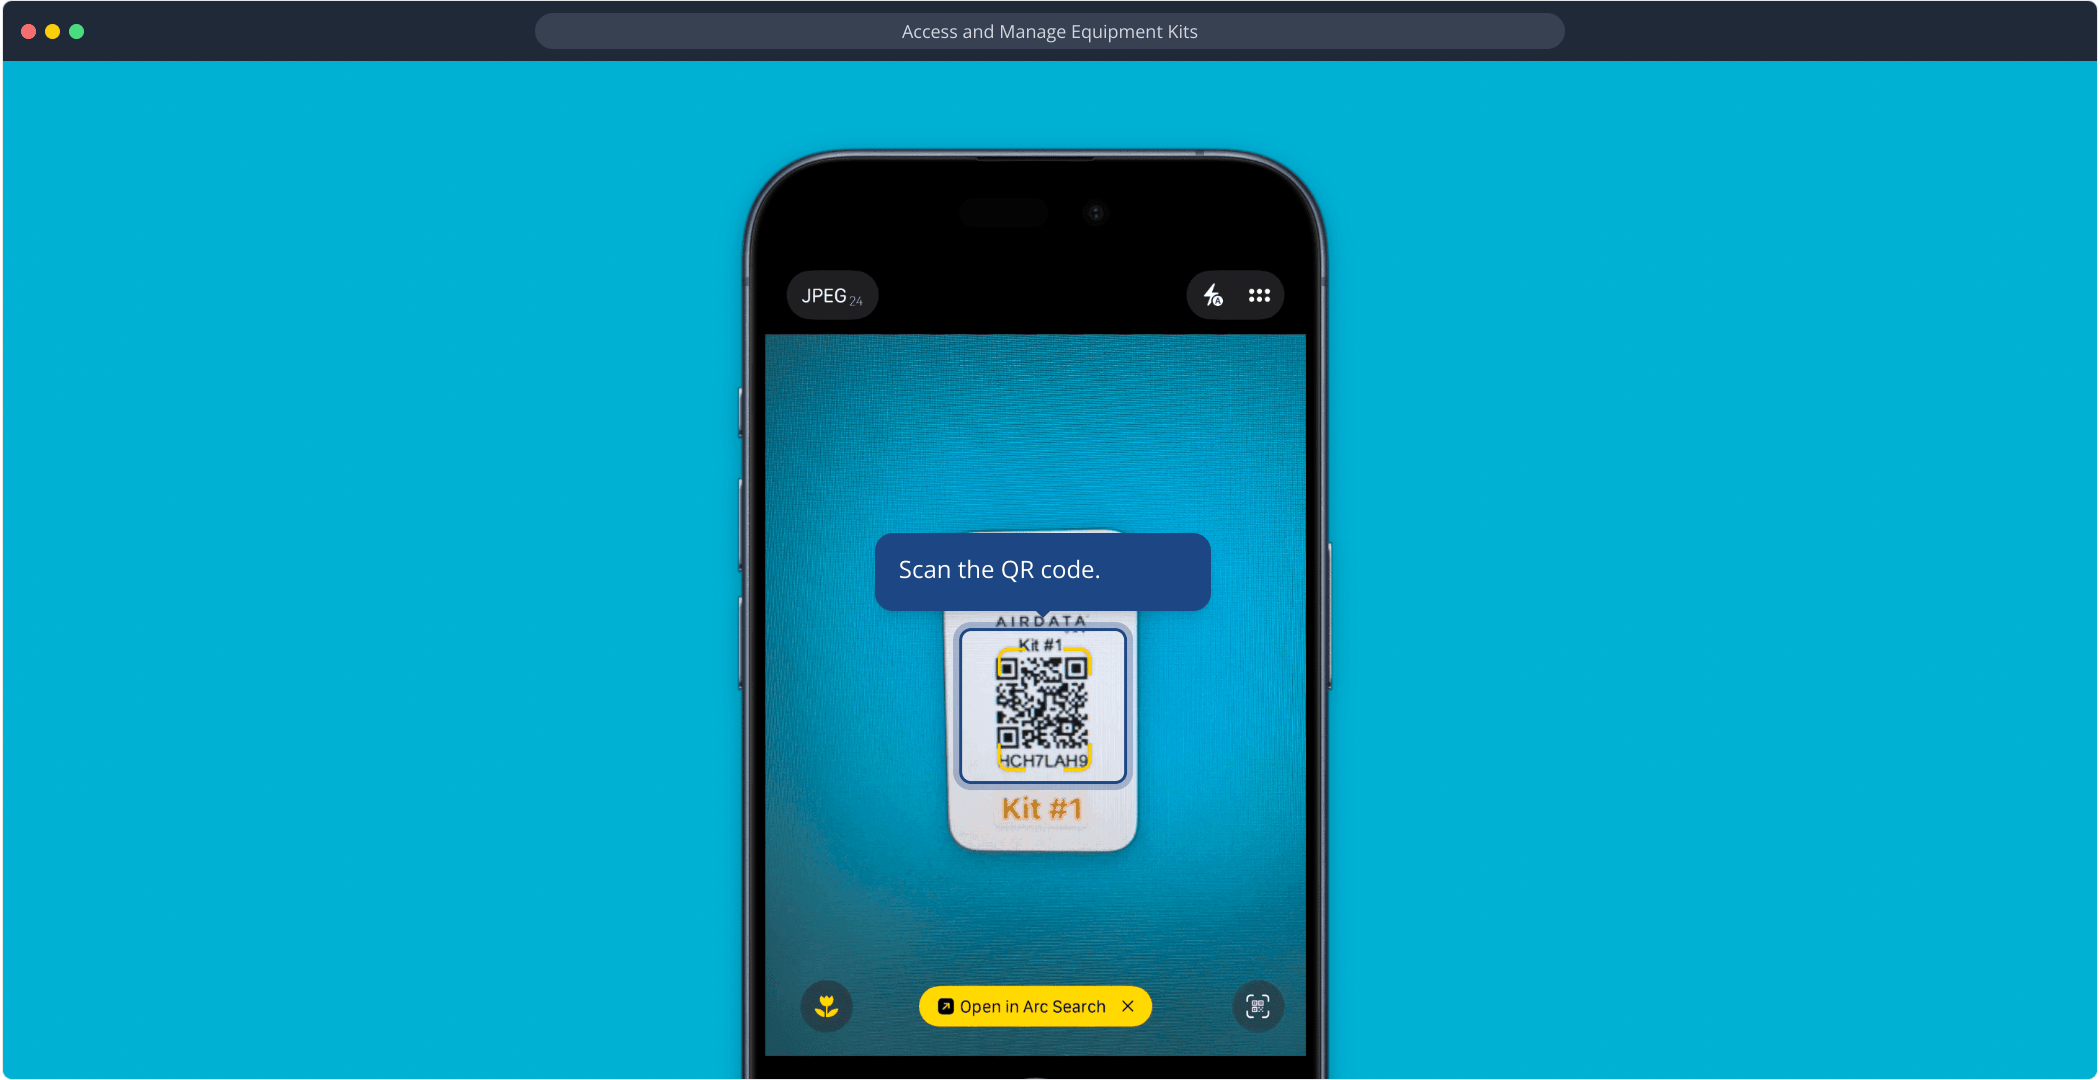
Checking Out a Kit (QR)
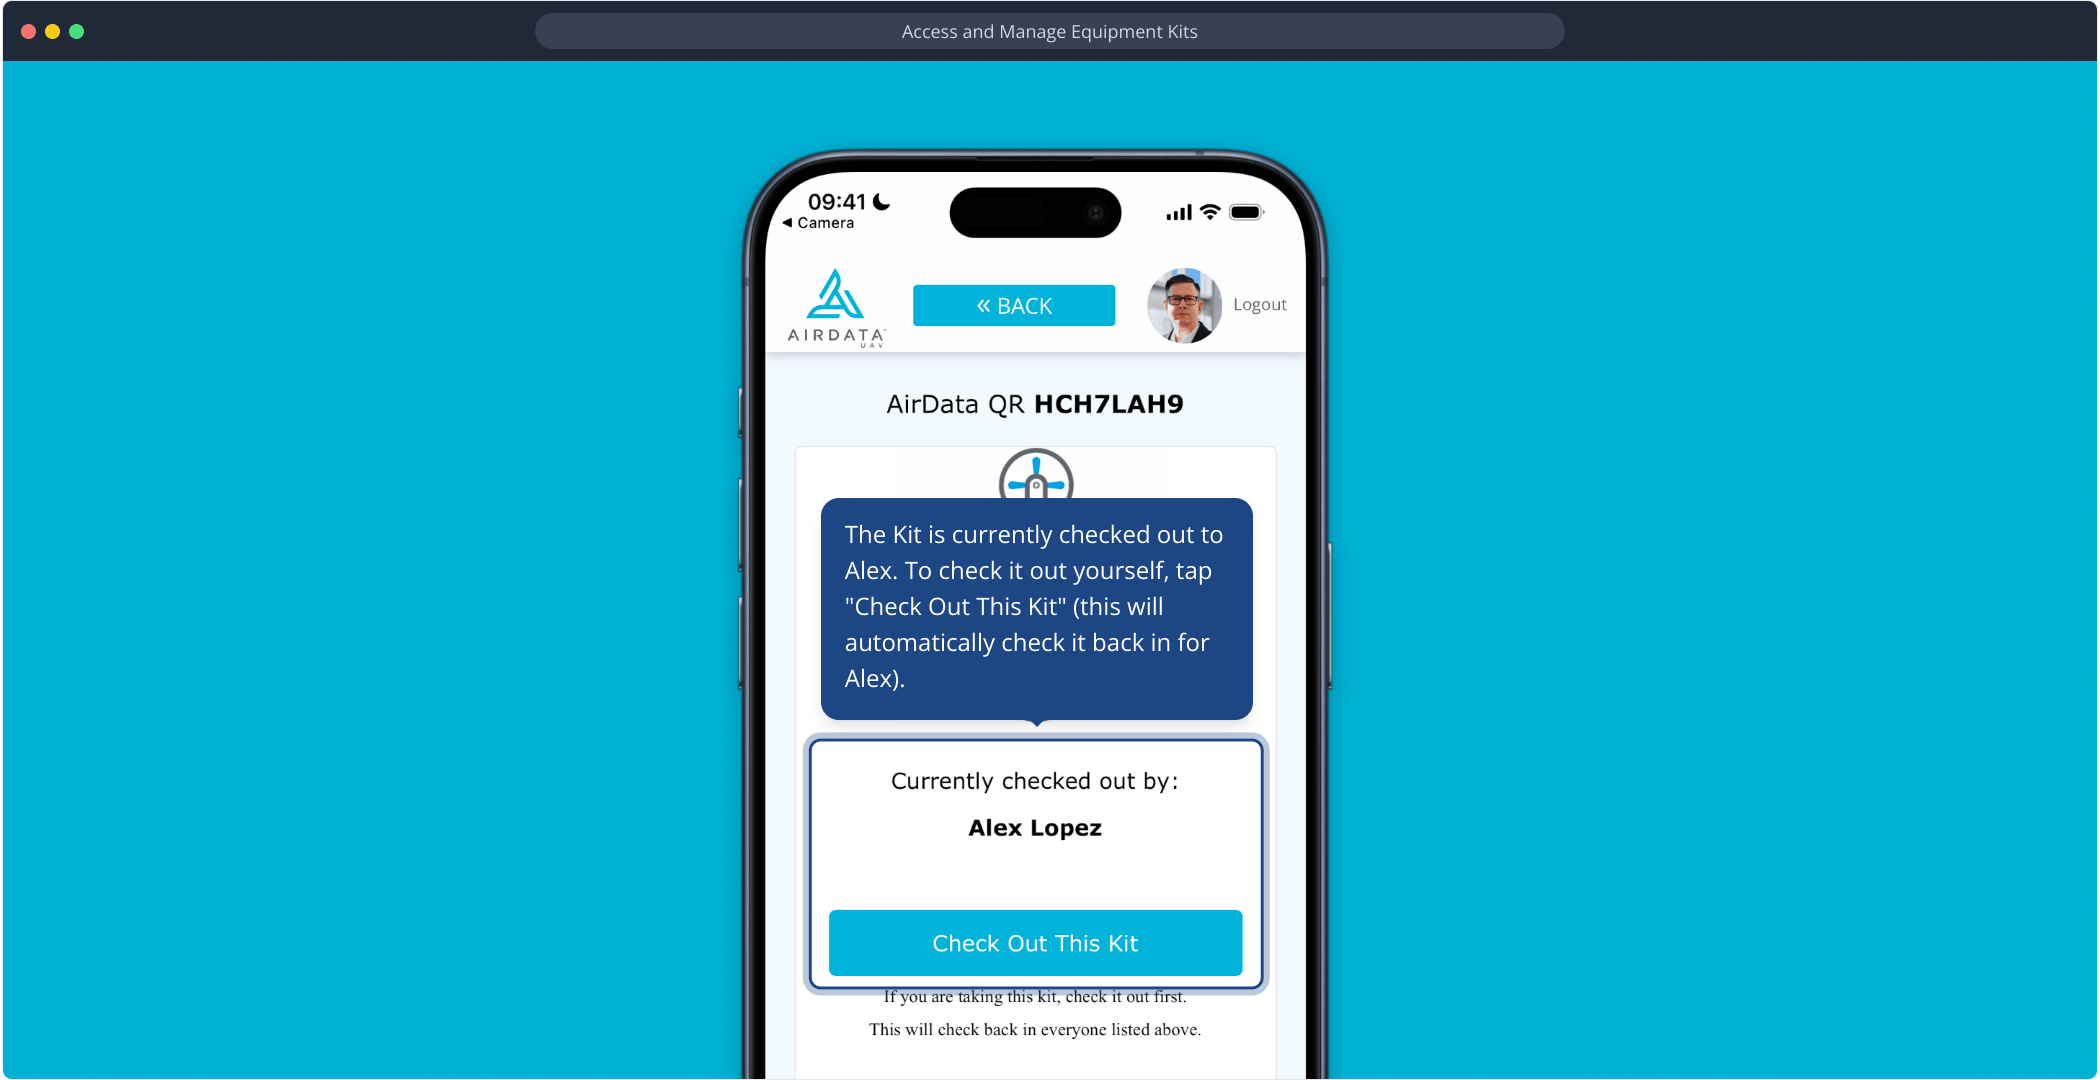
Scan the QR code.
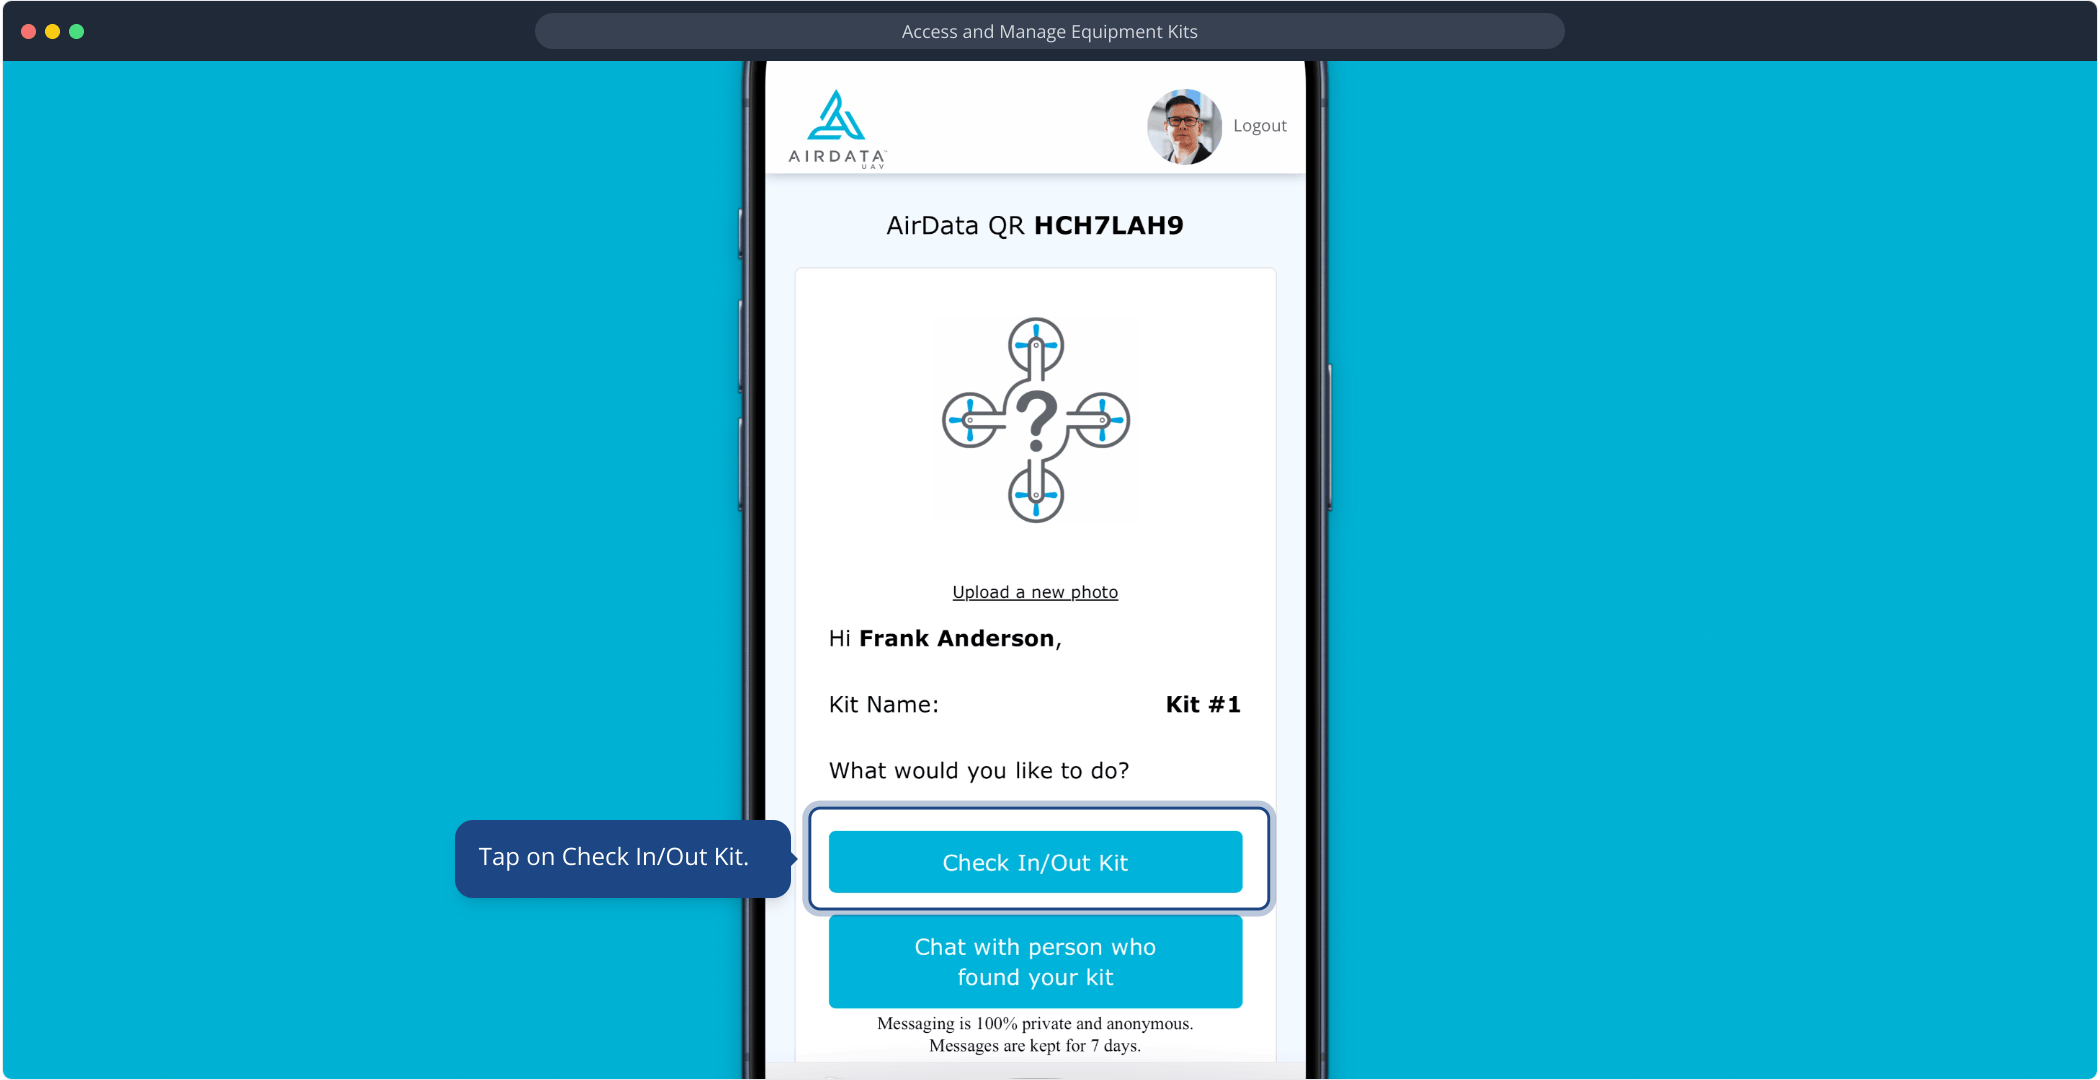
Tap on Check In/Out Kit.
The Kit is currently checked out to Alex. To check it out yourself, tap "Check Out This Kit" (this will automatically check it back in for Alex).
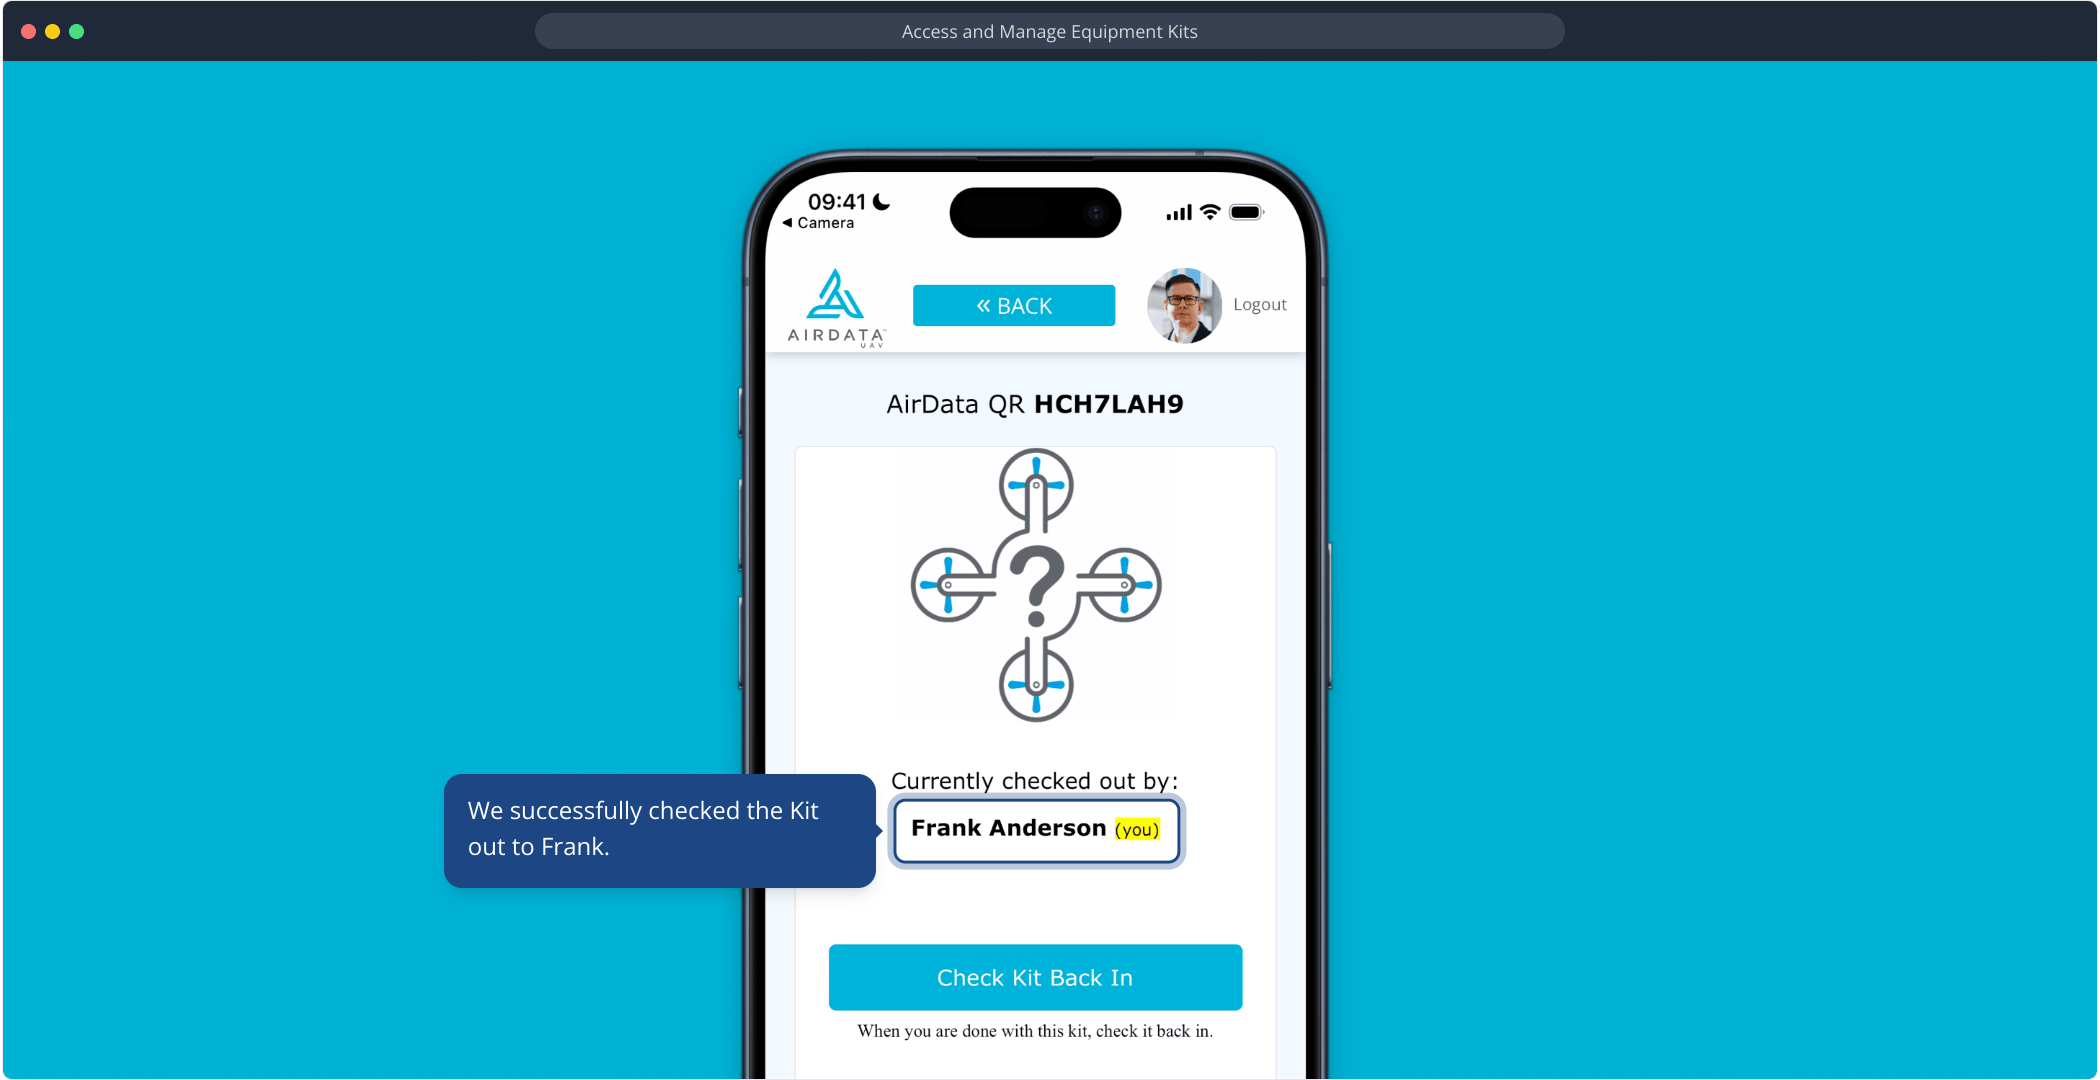
We successfully checked the Kit out to Frank.
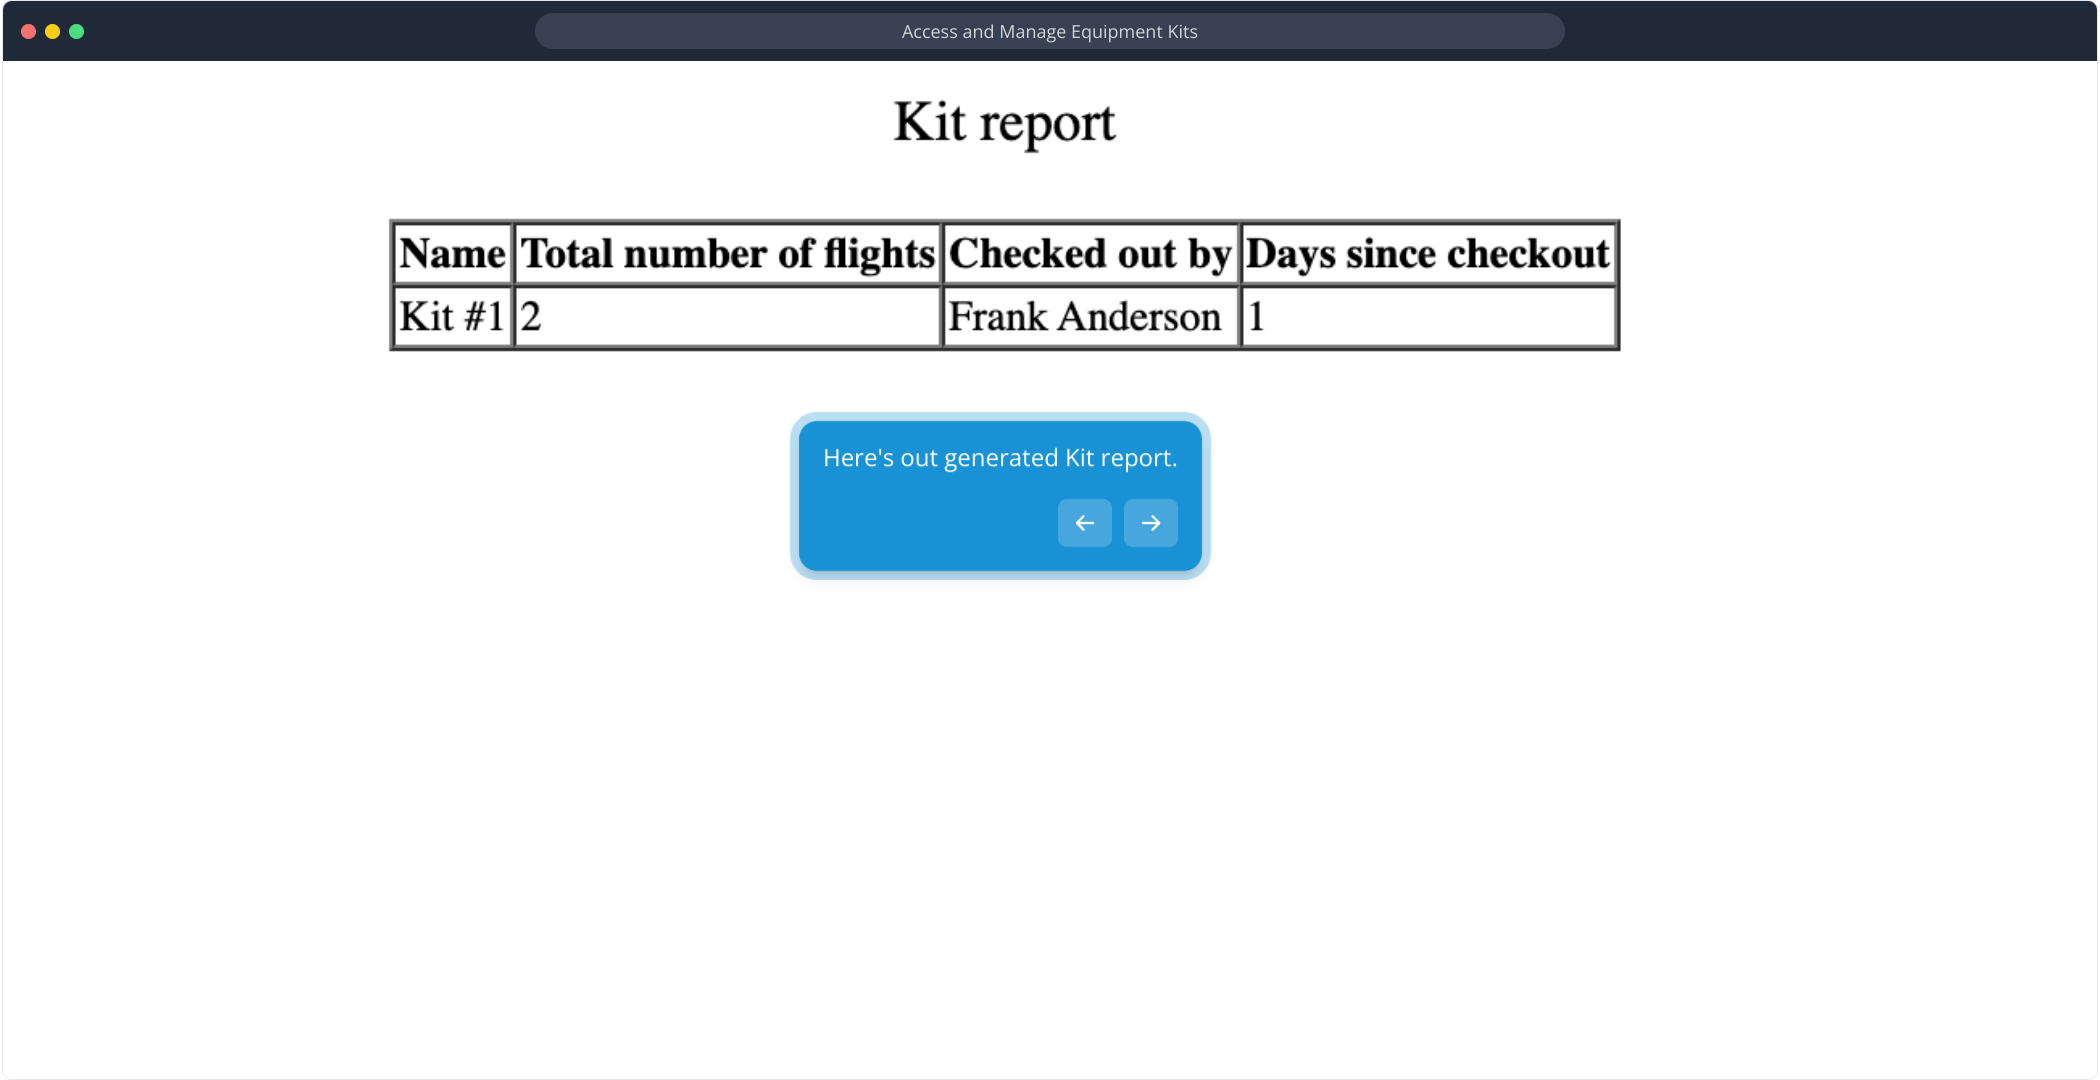
Kit Reporting
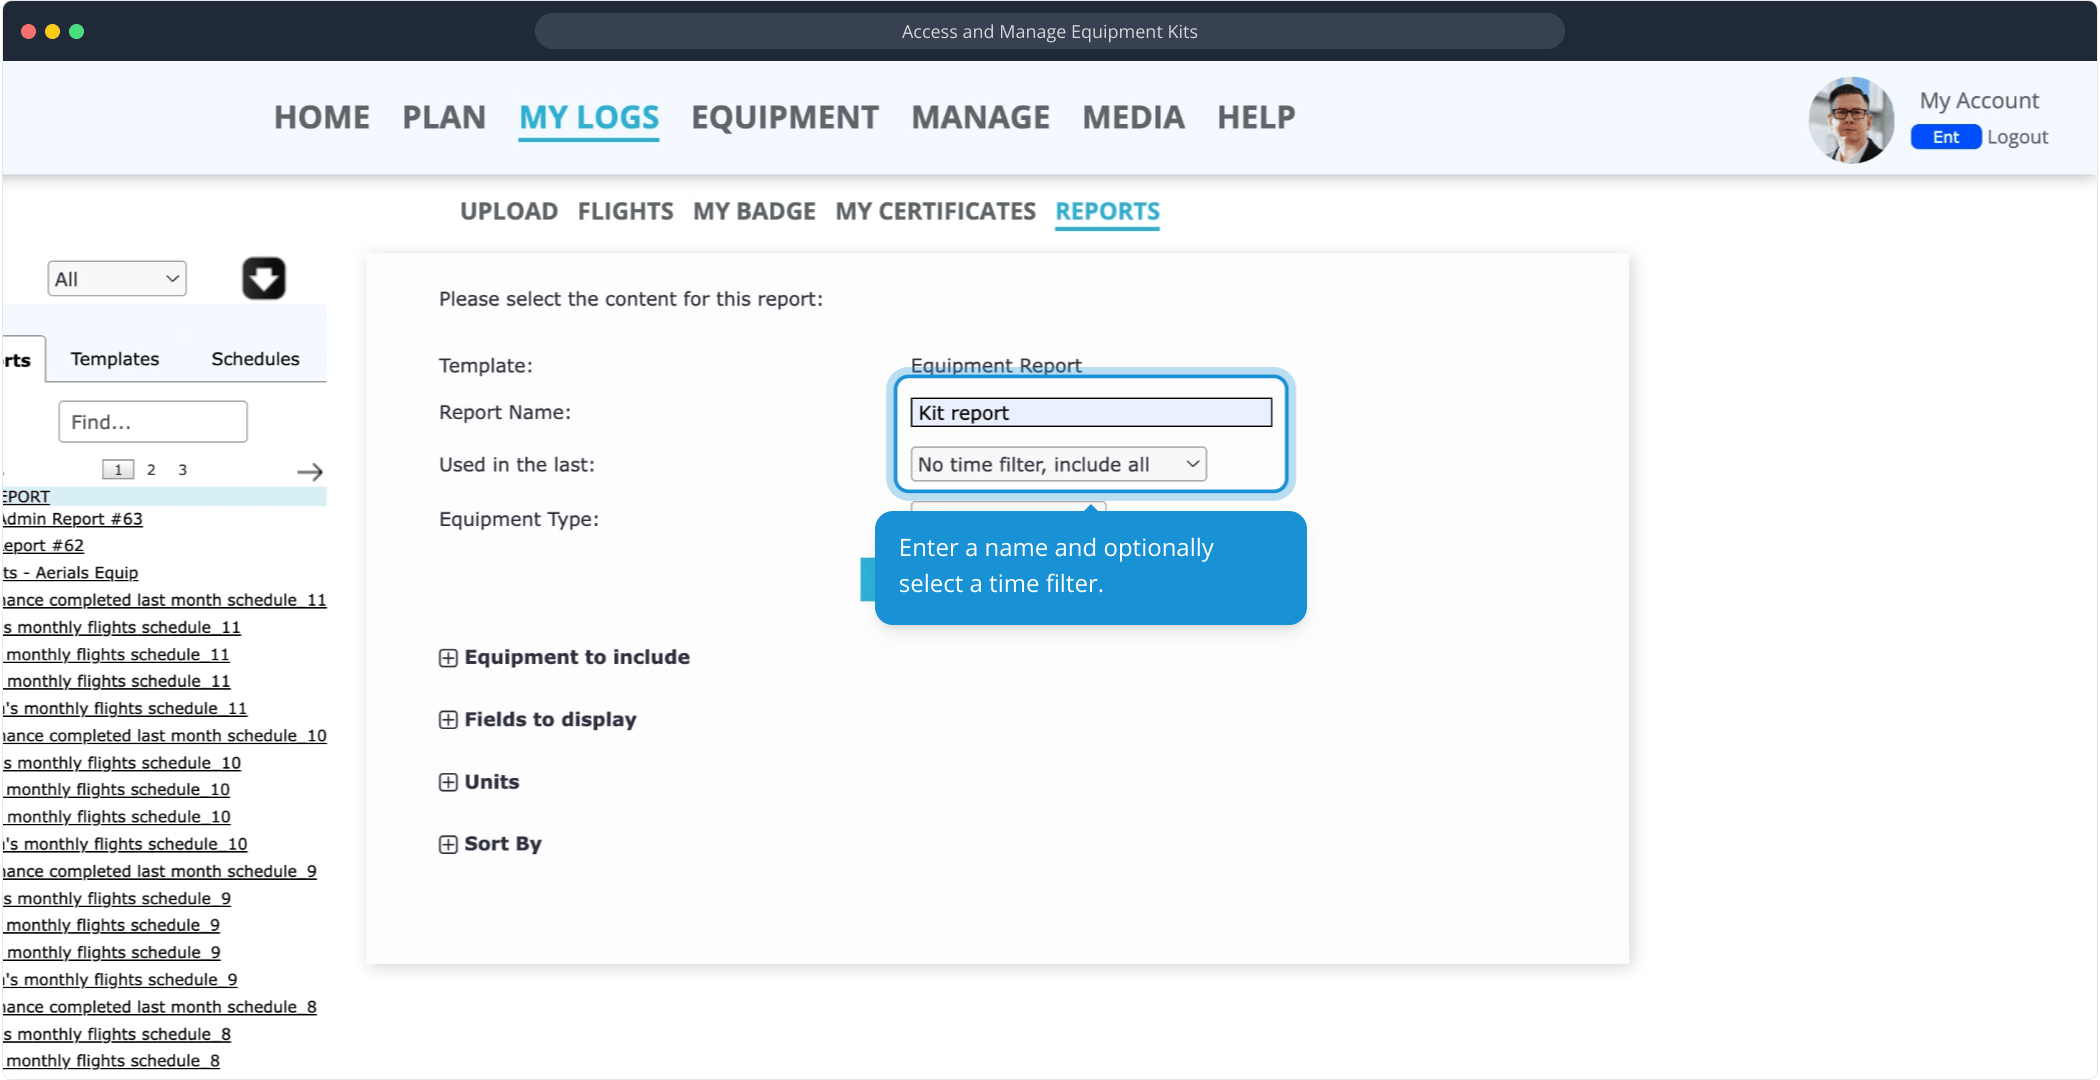
Under MY LOGS → REPORTS, select Equipment Report.

Enter a name and optionally select a time filter.
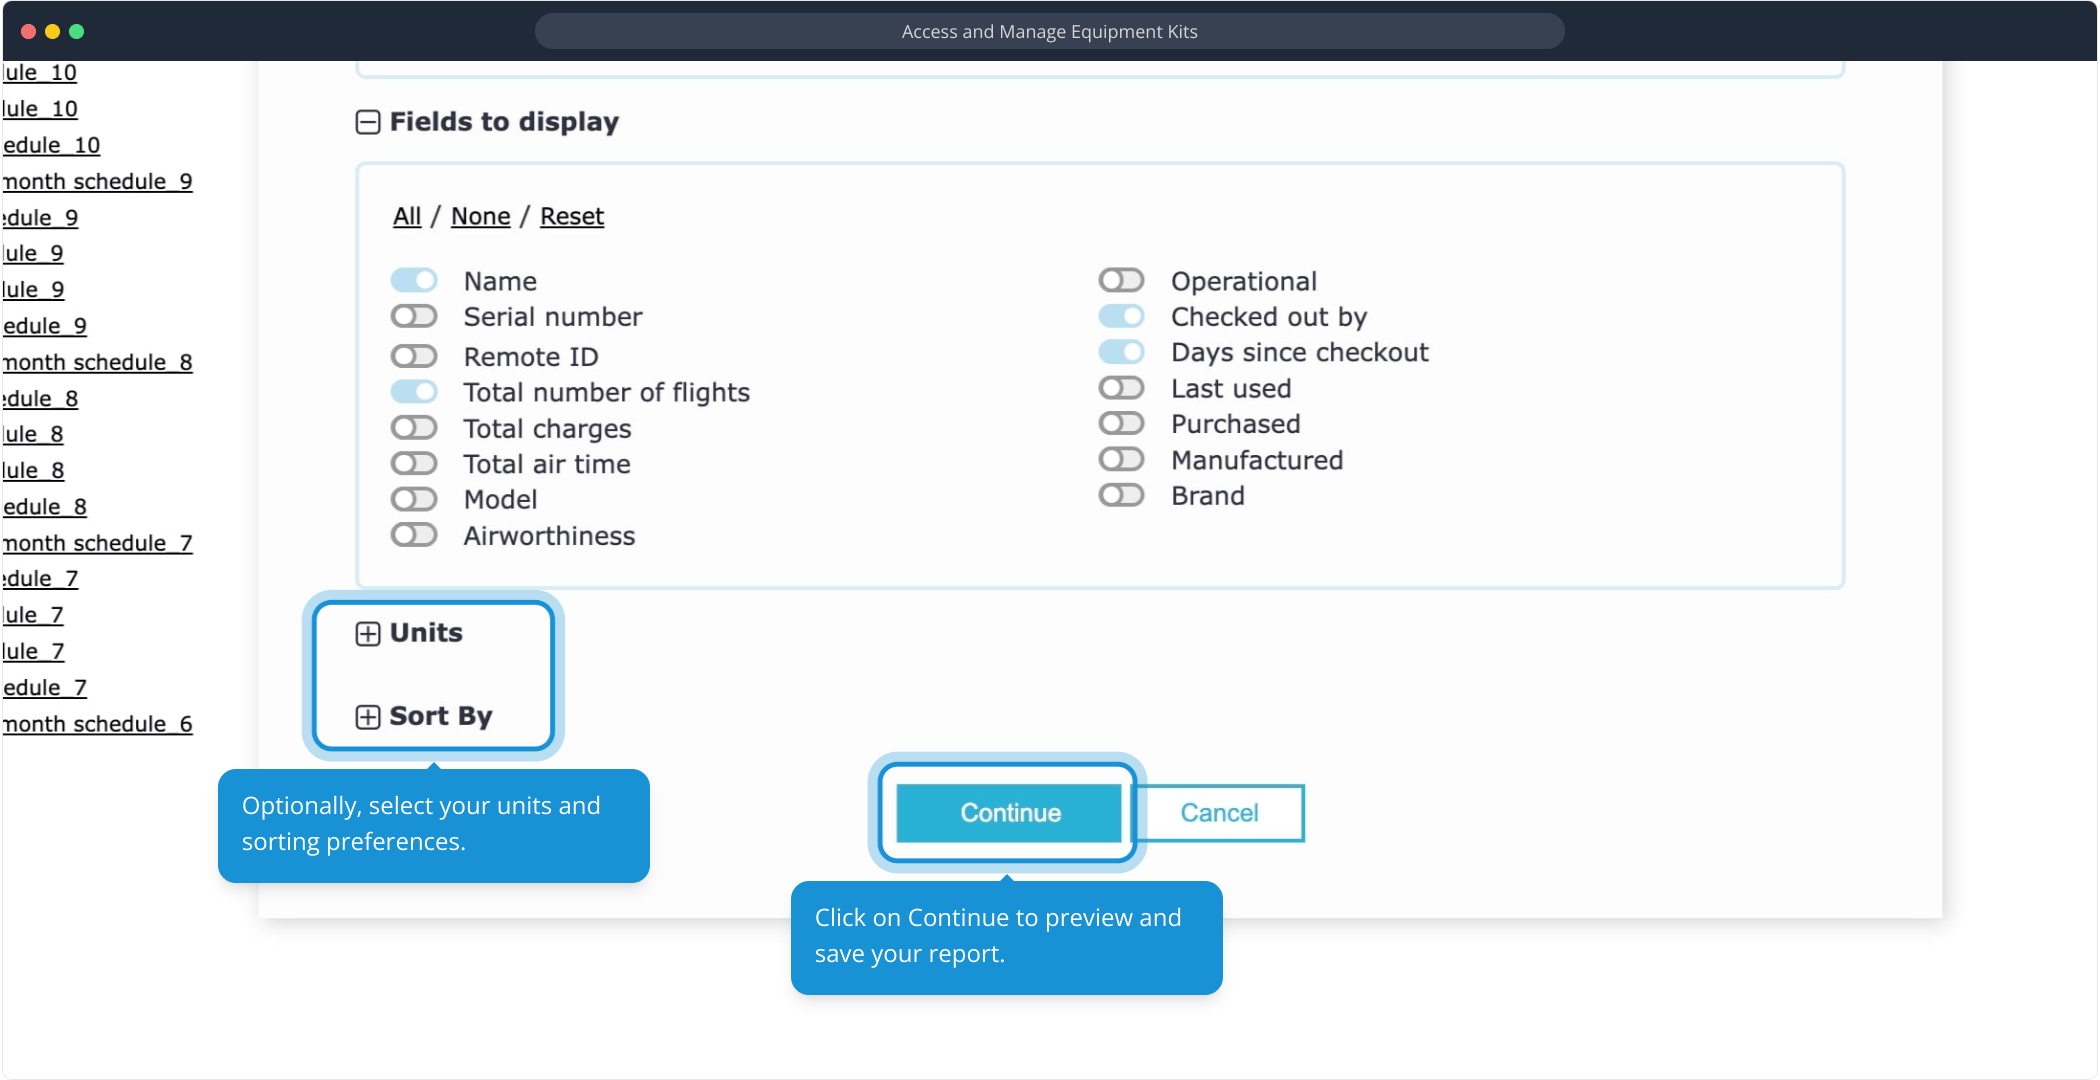
Optionally, select your units and sorting preferences. Click on Continue to preview and save your report.
Here's out generated Kit report.
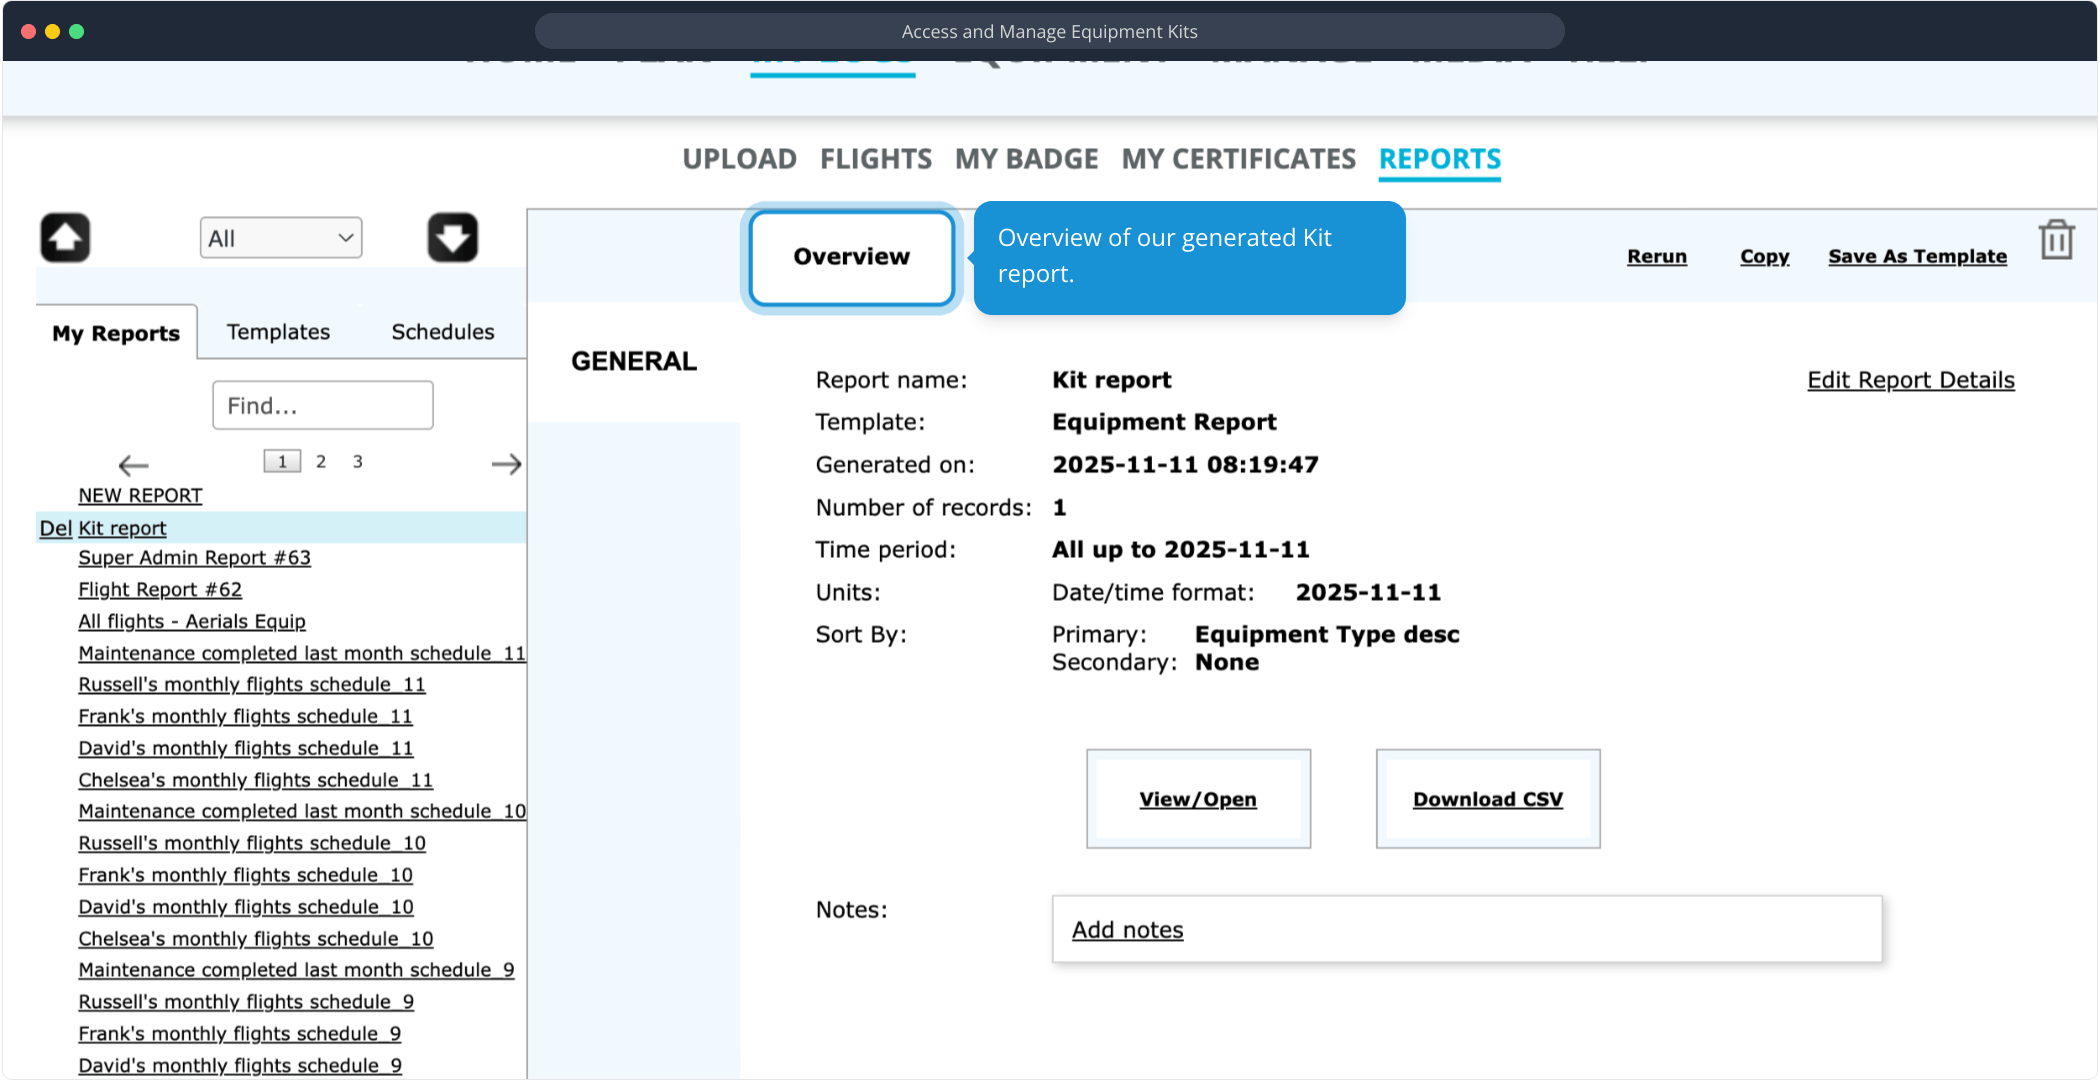
Overview of our generated Kit report:
Learn more
Contact us to learn more about the Asset Management add-on, which includes the Kits feature.


Please login to add a comment